Tips and Tricks from Season Six 2024
It’s that time of year again when we look back over the previous travel season and review the lessons we learned along the way. Hopefully you will find at least one of them helpful for you. You can use the links below to go directly to the item you are interested in.
Tip One: Use fans to clear condensation
Tip Two: Dance inside rig for exercise
Tip Three: Use booster seat as back rest
Tip Four: Keep griddle away from side of RV
Tip Five: Mark positions of wheels
Tip Six: Put rug between GoTreads and 2x6’s
Tip Seven: Have funnel for pouring hand-carried water
Tip Eight: Clean up RV antifreeze spills right away
Tip Nine: Mark filler tube for measured amount of sanitization
Tip Ten: Use pot holders to level induction cook top
Tip Eleven: Wear sun gloves when hiking
Tip Twelve: Use foot stool when steps stop working
Tip Thirteen: Use ratchet straps to retract steps when motor breaks
Tip Fourteen: Attache phone to life jacket when paddling
Tip Fifteen: Put 10 essentials in packing cube
Tip Sixteen: Turn on RV AC before reaching campground
Tip Seventeen: Use silicone to reattach loose trim inside rig
Tip Eighteen: Use superglue to repair broken bathroom handle
Tip Nineteen: Use 50A doggone when 30A outlet doesn’t work
Tip Twenty: Remove vent cover to see water tank
Tip Twenty one: Remove cold water filter before winterization
Tip Twenty two: Attach dead cat with thread to mic mount
Tip Twenty three: Preview Google Maps route
Tip Twenty four: Use Gaffer’s tape to repair trail runners
Tip Twenty five: Use rubbing alcohol to remove pine sap from clothing
Tip One: Use fans to clear condensation
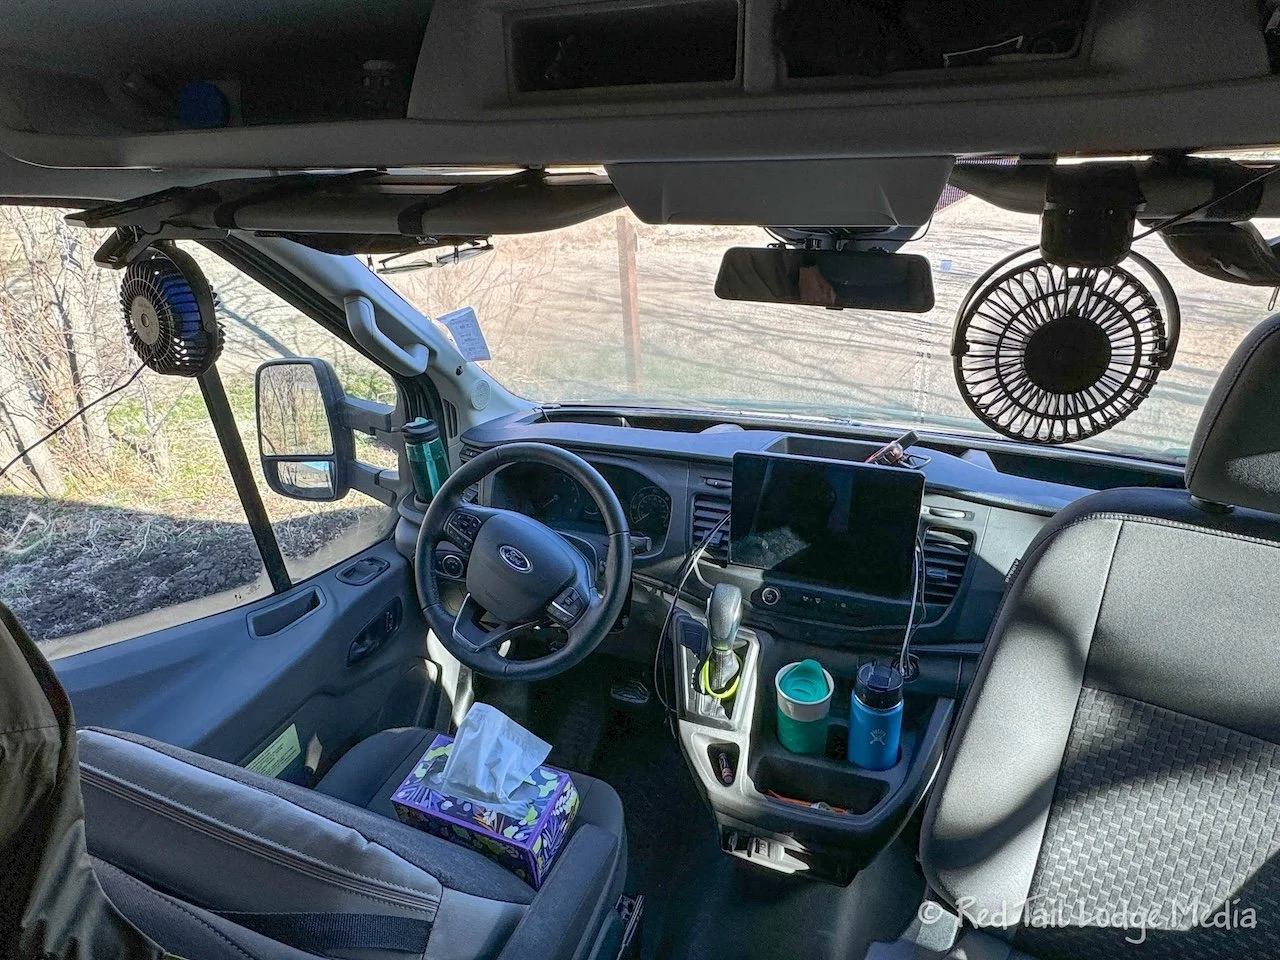
There are times when condensation (or frost) builds up on the windows overnight, especially on the windshield. This can slow you down in the morning if you are trying to hit the road early. To speed up the process, we aimed our small DC fans (paid link) onto the windshield while we were packing up the rest of the rig. Sometimes we still have to wipe down the windshield or run the defroster before leaving, but it makes for a faster getaway. We keep a couple of clean microfiber towels in the driver and passenger doors so they are handy for wiping the windows, if needed.
Tip Two: Dance inside rig for exercise
Ann tries to close her exercise ring every day, which is an hour of cardio. It is a challenge on travel days and during bad weather, like pouring down rain. She discovered that with the dinette table folded down and the Lagun table put away, there is enough space inside the rig to dance. Ann puts her ear buds in, turns on some music, and dances away while Keith hangs out in the back, sitting on his bed. She has also found that she can get a workout in by dancing while sitting in the passenger seat as we’re going down the road. Even though Ann does like to bop to music while she drives, we don’t recommend this while you’re driving since you have to put a lot of energy into it for the Apple Watch to count it as exercise. Ann does tone it down a bit when vehicles pass us so that her movements are not wrongly interpreted as some kind of message for help or insult.
Tip Three: Use booster seat as back rest
Because the dinette table folds down, the dinette seats are just a little further back from the table than what would be ergonomically ideal. Ann’s back and neck start bothering her if she sits working on her laptop at the dinette table for long periods of time. The EKKO comes with a couple of booster seats for the front seats when they are turned around. Ann found that placing the booster seat behind her as a back rest puts her in a better position for working at the dinette table.
Tip Four: Keep griddle away from side of RV
When we cook on our Blackstone griddle (paid link), we usually set it up on our folding table. For some reason, it seems natural to put the table right up against the RV while cooking. However, we didn’t care much for the grease splatters that end up on the side of our rig. It’s not a good look. Setting up the table a few feet away from the rig eliminates the problem. It’s also probably less of a fire hazard that way.
Tip Five: Mark positions of wheels
Camp sites are rarely level. Many times, when we first arrive at a camp site, we spend some time moving our RV around the site trying to find the most level spot. So, if we later want to leave in our RV for the day and come back, we would rather not go through that process again. Marking the positions of the wheels before you leave for the day lets you quickly go right back to that perfect spot. You can mark the wheels with rocks, sticks, wheel chocks, or leveling blocks. Leaving the door mat on the ground at the bottom of the stairs also helps you return to the same spot.
Tip Six: Put rug between GoTreads and 2x6’s
There are times when camp sites are so unlevel that we need to block up one or more wheels by more than four inches. To get that much lift, we need to put our GoTreads (which give us four inches) on top of our 2x6’s. Unfortunately, the GoTreads like to slip on the top of the boards. Luckily, we had a door mat with us that we didn’t like and had already replaced. We cut it in half and put it in between the GoTreads and the 2x6’s. This provided enough friction to prevent the slipping.
Tip Seven: Have funnel for pouring hand-carried water
Not all campgrounds have water fill stations for RV’s. Sometimes you need to fill up a jug and pour it into your fresh water tank. The tank fill on the EKKO is up rather high, which makes pouring a jug into it rather difficult. However, a (clean) funnel really helps. We’ve tested this out, but have never really needed to do it. We usually try to plan ahead and we change campgrounds often enough that we can make our water last through a place that doesn’t have a fill station. However, we still carry the funnel with us, just in case.
There is another option for getting a jug of water into the fresh water tank if you carry your antifreeze siphon tube with you. If you hook up the tube to the city water port, put the other end in the water jug, and set the valves to the Sanitize configuration, then you can turn on the water pump to siphon the water into the tank. No lifting of the water jug required. It is just like the sanitization procedure, but you’re siphoning fresh water instead of a bleach solution. Just remember to reset the valves back to the Dry Camping configuration when you’re done. The disadvantage of this method is that it will put more wear and tear on your water pump compared with the gravity fill method. However, if you don’t do it that often, it’s probably insignificant.
Tip Eight: Clean up RV antifreeze spills right away
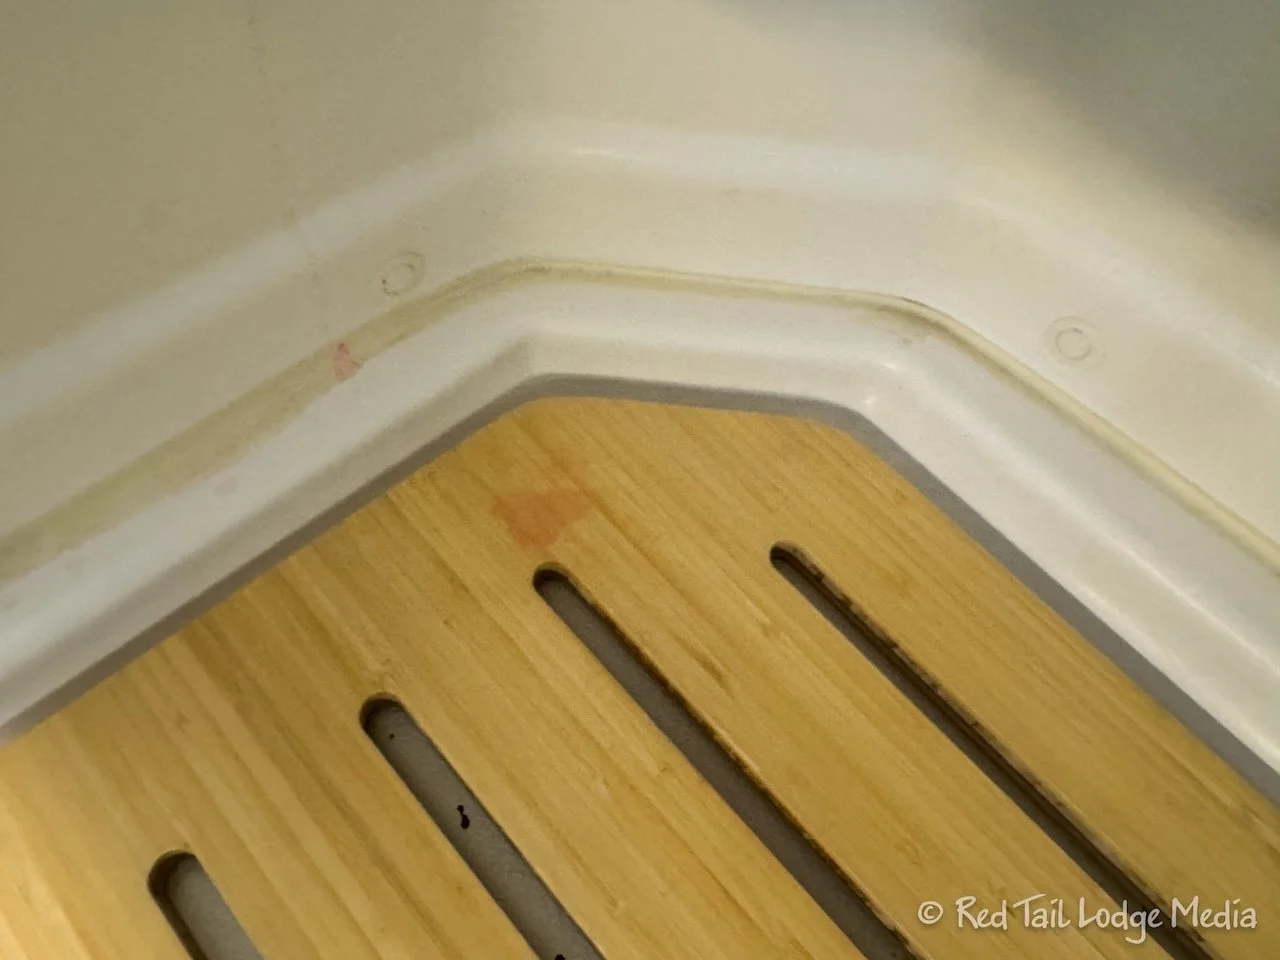
RV antifreeze is bright pink. Spills and drips happen. We didn’t think much of it, since we thought the antifreeze wouldn’t harm anything. However, some ended up on our wooden shower floor. We didn’t notice it right away. It is now a permanent stain.
Tip Nine: Mark filler tube for measured amount of sanitization
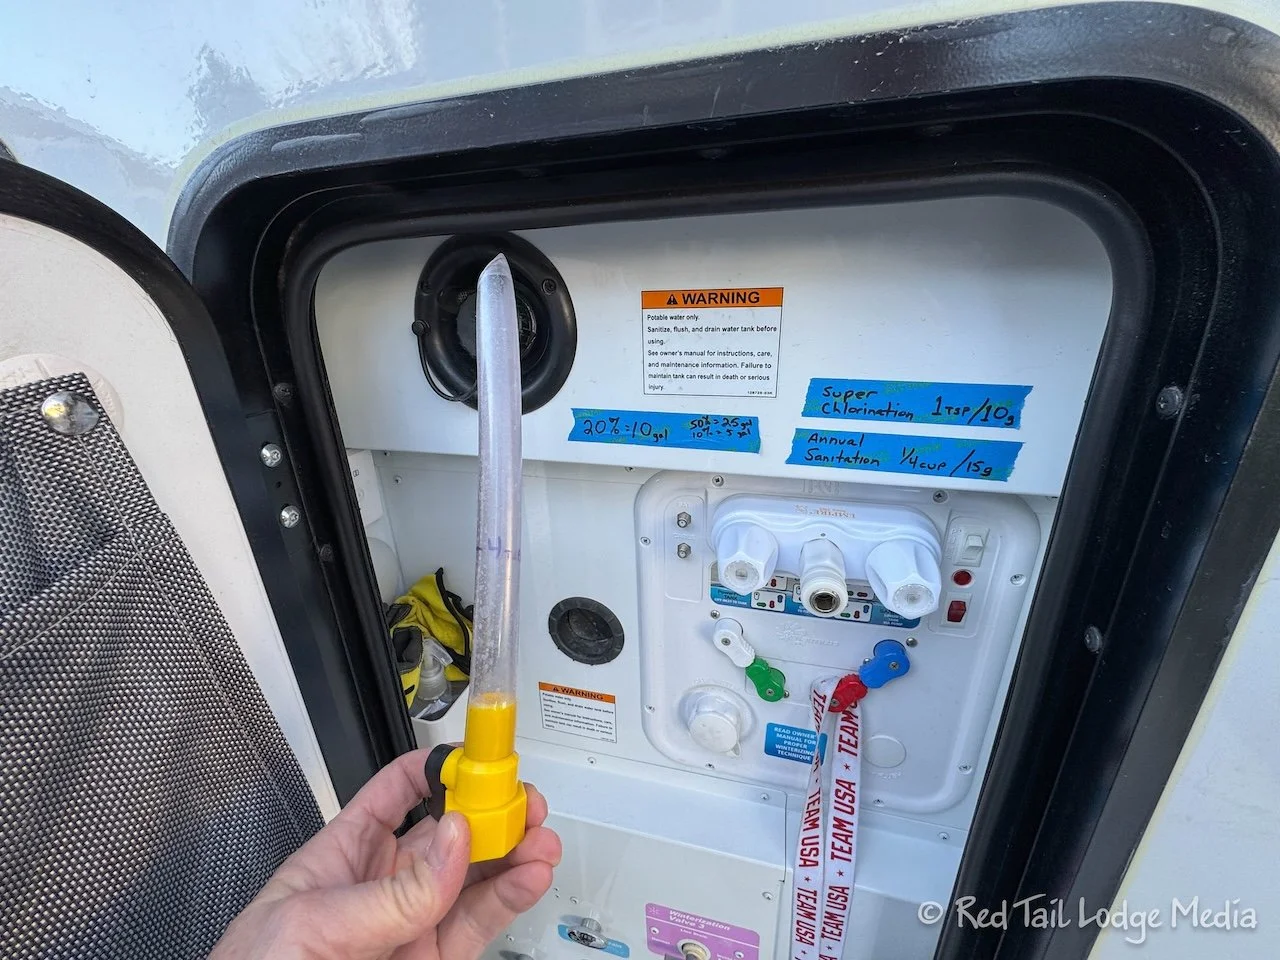
Every couple of weeks or so, we like to add bleach to our fresh water tank to make sure it stays fresh and clean. Instead of getting out the measuring spoons or cups every time, we marked the filler tube (paid link) for 4 teaspoons of bleach, which is the right amount for 40 gallons of water (we normally only fill our tank to 80%). Now we close the valve on the filler tube, pour in bleach up to the line, then put the tube into the tank fill and open up the valve. The bleach flows into the tank and the water flushes the bleach into the tank as we fill the tank. We don’t even need to look up how much bleach we need to put in. Although we do keep the amounts for both the periodic sanitization and the annual sanitation posted inside the water compartment.
Tip Ten: Use pot holders to level induction cook top
There are times when our rig is not perfectly level. Sometimes because we were too lazy to level our rig, or the site was too far off level that our leveling blocks were not enough. One of the hardest things to live with when we’re not level is cooking on the induction cook top (paid link). It is a smooth surface and pans like to slide off when it’s not level. In that case, we just put pot holders under the induction cook top, using a small bubble level to help us determine level. Sometimes it is a little tricky to pull the pot holders out when they are needed to grab the pot off the cook top, but we make it work.
Tip Eleven: Wear sun gloves when hiking
We are outside a lot. Skin cancer is something we would like to avoid. This season we decided to buy sun gloves to use while we are hiking. In addition to protecting the back of our hands from the sun and reducing the amount of sun block we need to use, they also help keep a better grip on our trekking poles when our hands get sweaty.
Tip Twelve: Use foot stool when steps stop working
Near the end of Season Six, the retractible entry steps stopped extending. First it would work sporadically, but then stopped working permanently. In order to get in and out of our entry door, we started using a foot stool. We even stopped at a hardware store to buy a slightly taller foot stool to make it a little easier.
Tip Thirteen: Use ratchet straps to retract steps when motor breaks
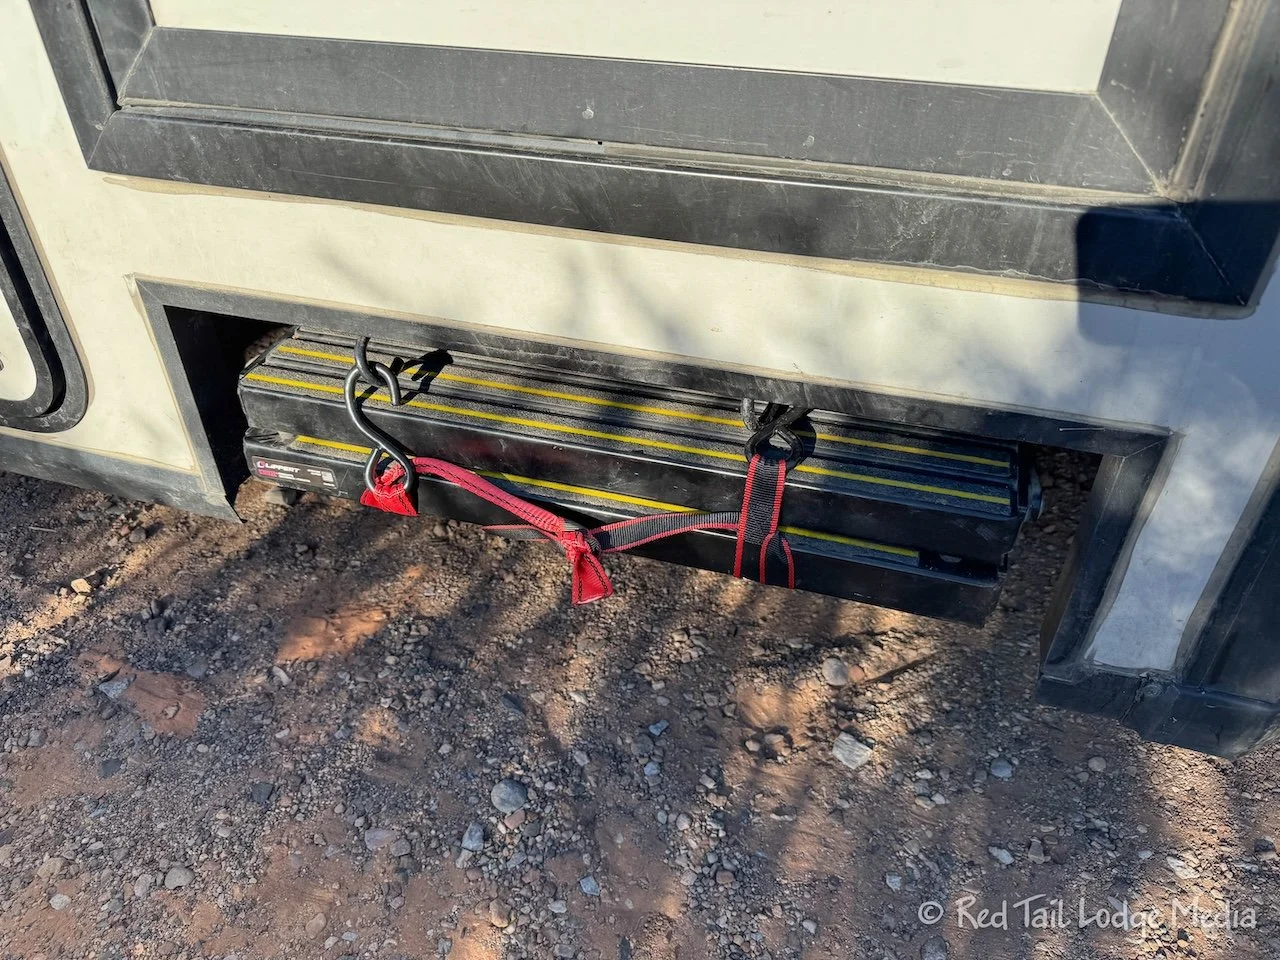
Using the foot stool to get in and out of our rig after the steps stopped working got a little old after a while. Removing the broken motor allowed the steps to extend so that we could use them while we were set up at camp. However, that also meant that the steps would no longer stay retracted. We couldn’t drive down the road with the steps extended, so we used ratchet straps to hold the steps in the retracted position on travel days. Then we just used the step stool when we made a quick stop somewhere along the way, since removing and reattaching the ratchet straps was not a quick and easy process.
Tip Fourteen: Attach phone to life jacket when paddling
It took a while, but Ann finally figured out a way to safely carry and use her phone when on her stand up paddle board (paid link). During Season Five, she would put her phone in a floatable case (paid link) that still allowed use of the phone while in the case. The case was then strapped to her life jacket. However, she had trouble using the phone while in the case due to glare. It was difficult to read the screen and sometimes glare would show up in the pictures she took while the phone was in the case. At the beginning of Season Six, she bought a Peak Design bike handle bar mount (paid link) for her phone. That required switching her phone case to one from Peak Design (paid link). The new phone case has a way for attaching things to it. Since the phone is waterproof, she didn’t need to have it encased for water protection. She just needed a way for it to float. This was accomplished with attaching two camera floats (paid link) to the phone case. Then she just wanted a way to help prevent from dropping it in the water to begin with. At first she tried attaching the phone to a Peak Design wrist strap (paid link), but the phone would constantly bump up against the paddle as it dangled from her wrist, which was rather annoying. So she attached her phone to her life jacket instead. Almost back to where she started, but without the case that caused glare. She’s much happier with this set up as the phone is now convenient and easy to use while still being protected from dropping or sinking to the bottom.
Tip Fifteen: Put 10 essentials in packing cube
We normally travel with two backpacks each, three if we are planning on backpacking. We use a small backpack for short day hikes when we only need to carry one bottle of water or not much weight. The larger backpack with better support is for longer day hikes when we need to carry two or more bottles of water or carry more weight. We try not to duplicate our equipment, so we are constantly transferring it back and forth between the two packs. To make that easier, Ann put all of her Ten Essentials into a packing cube. She liked that better. Now she doesn’t have to worry about forgetting to transfer something over. For more information on what the Ten Essentials are, check out our post: Hiking Ten Essentials.
Tip Sixteen: Turn on RV AC before reaching campground
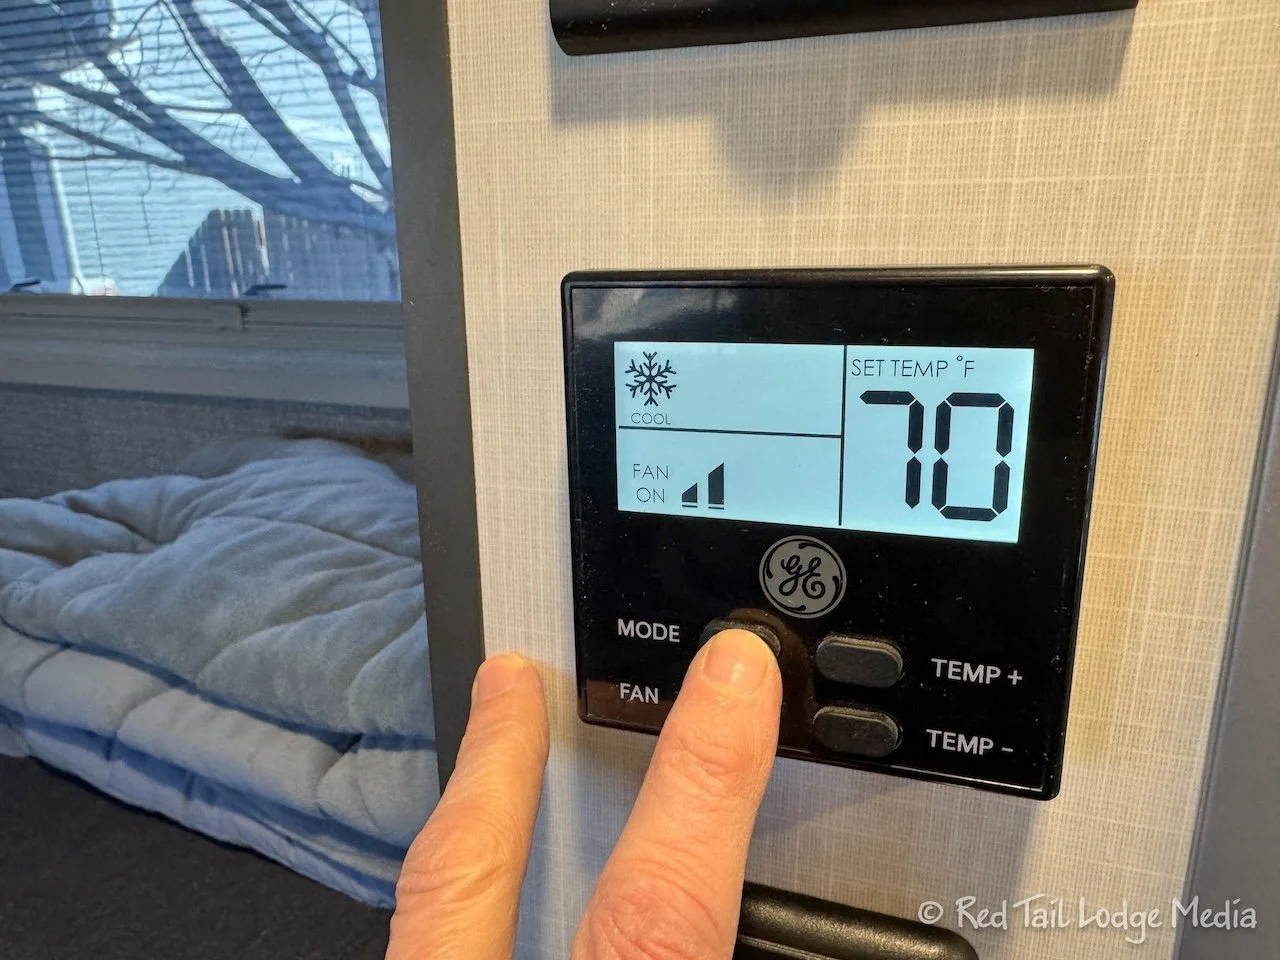
The Ford Transit air conditioner really only cools down the cab, at best. It doesn’t really affect the rest of the inside of the RV. We generally don’t run our RV air conditioner unless we are plugged into shore power. However, we have found that we can run the RV air conditioner from our lithium house batteries for quite a few hours. So, if it is really hot, we’ll turn on our RV AC before we reach the campground, especially if we know we’ll have shore power to recharge the batteries after we arrive. That way we have a nice cool RV to be in instead of waiting for it to cool down after we set up camp.
Tip Seventeen: Use silicone to reattach loose trim inside rig
A trim piece on the corner of the bench seat came loose. We originally repaired it with super glue. However, super glue is rather brittle and it didn’t take long before it came loose again. Then we used silicone to reattach it. Silicone is more flexible and was able to take the flexing that is caused by the RV going down the road. The trim piece has not come loose since, even after several months of traveling.
Tip Eighteen: Use superglue to repair broken bathroom handle
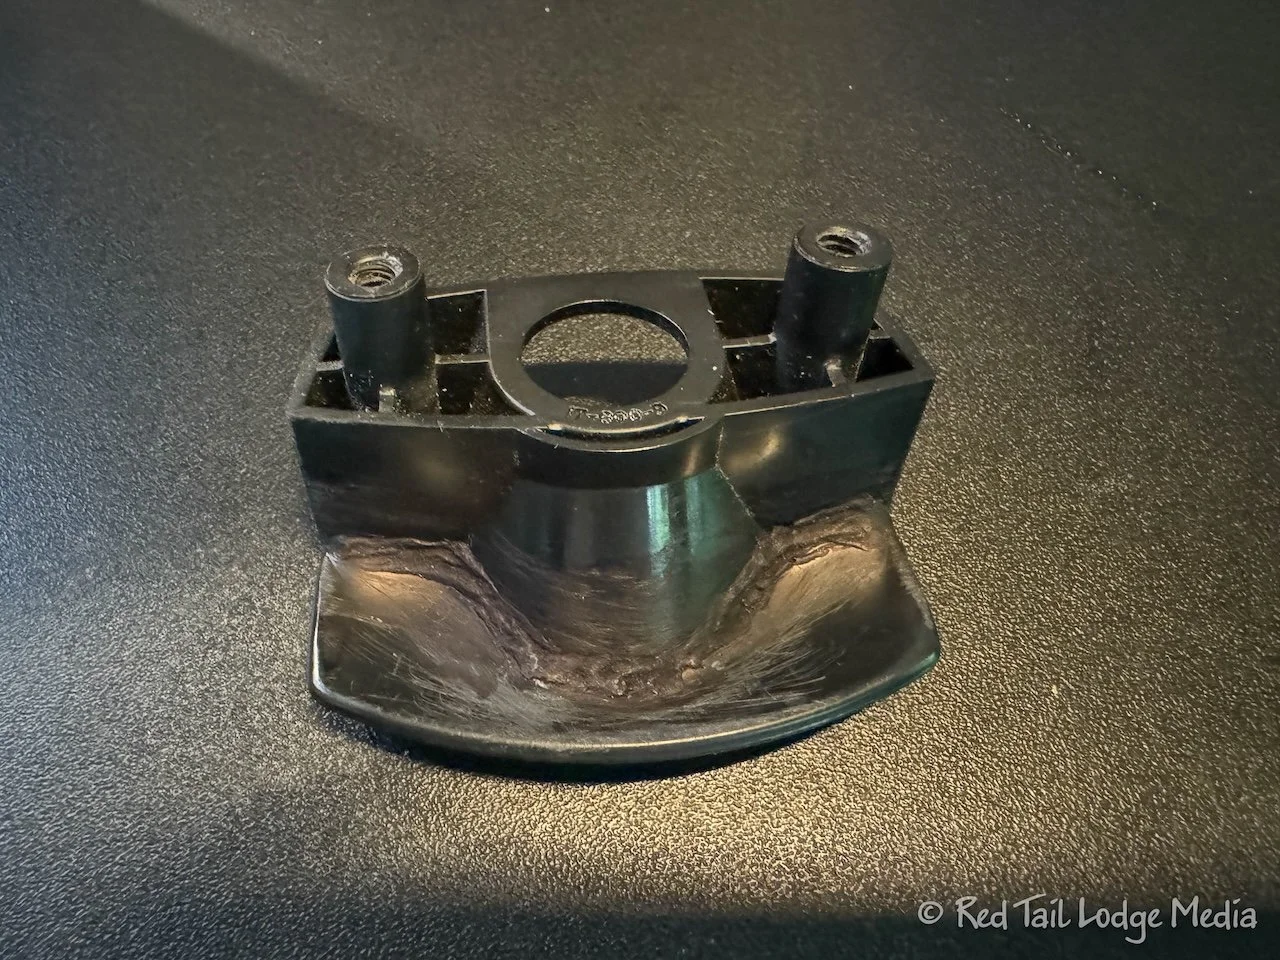
The handle on our bathroom door cracked, so Keith fixed it. The bathroom handle doesn’t flex like the trim does and needs to be strong since we pull on it multiple times per day. So superglue was a better choice in this case instead of silicone. Keith squeezed a bead of super glue along the crack, then sprinkled a liberal amount of baking soda on top. The baking soda causes super glue to cure faster and allowed him to push the glue into the crack with his finger, without getting glue on his hands.
Tip Nineteen: Use 50A doggone when 30A outlet doesn’t work
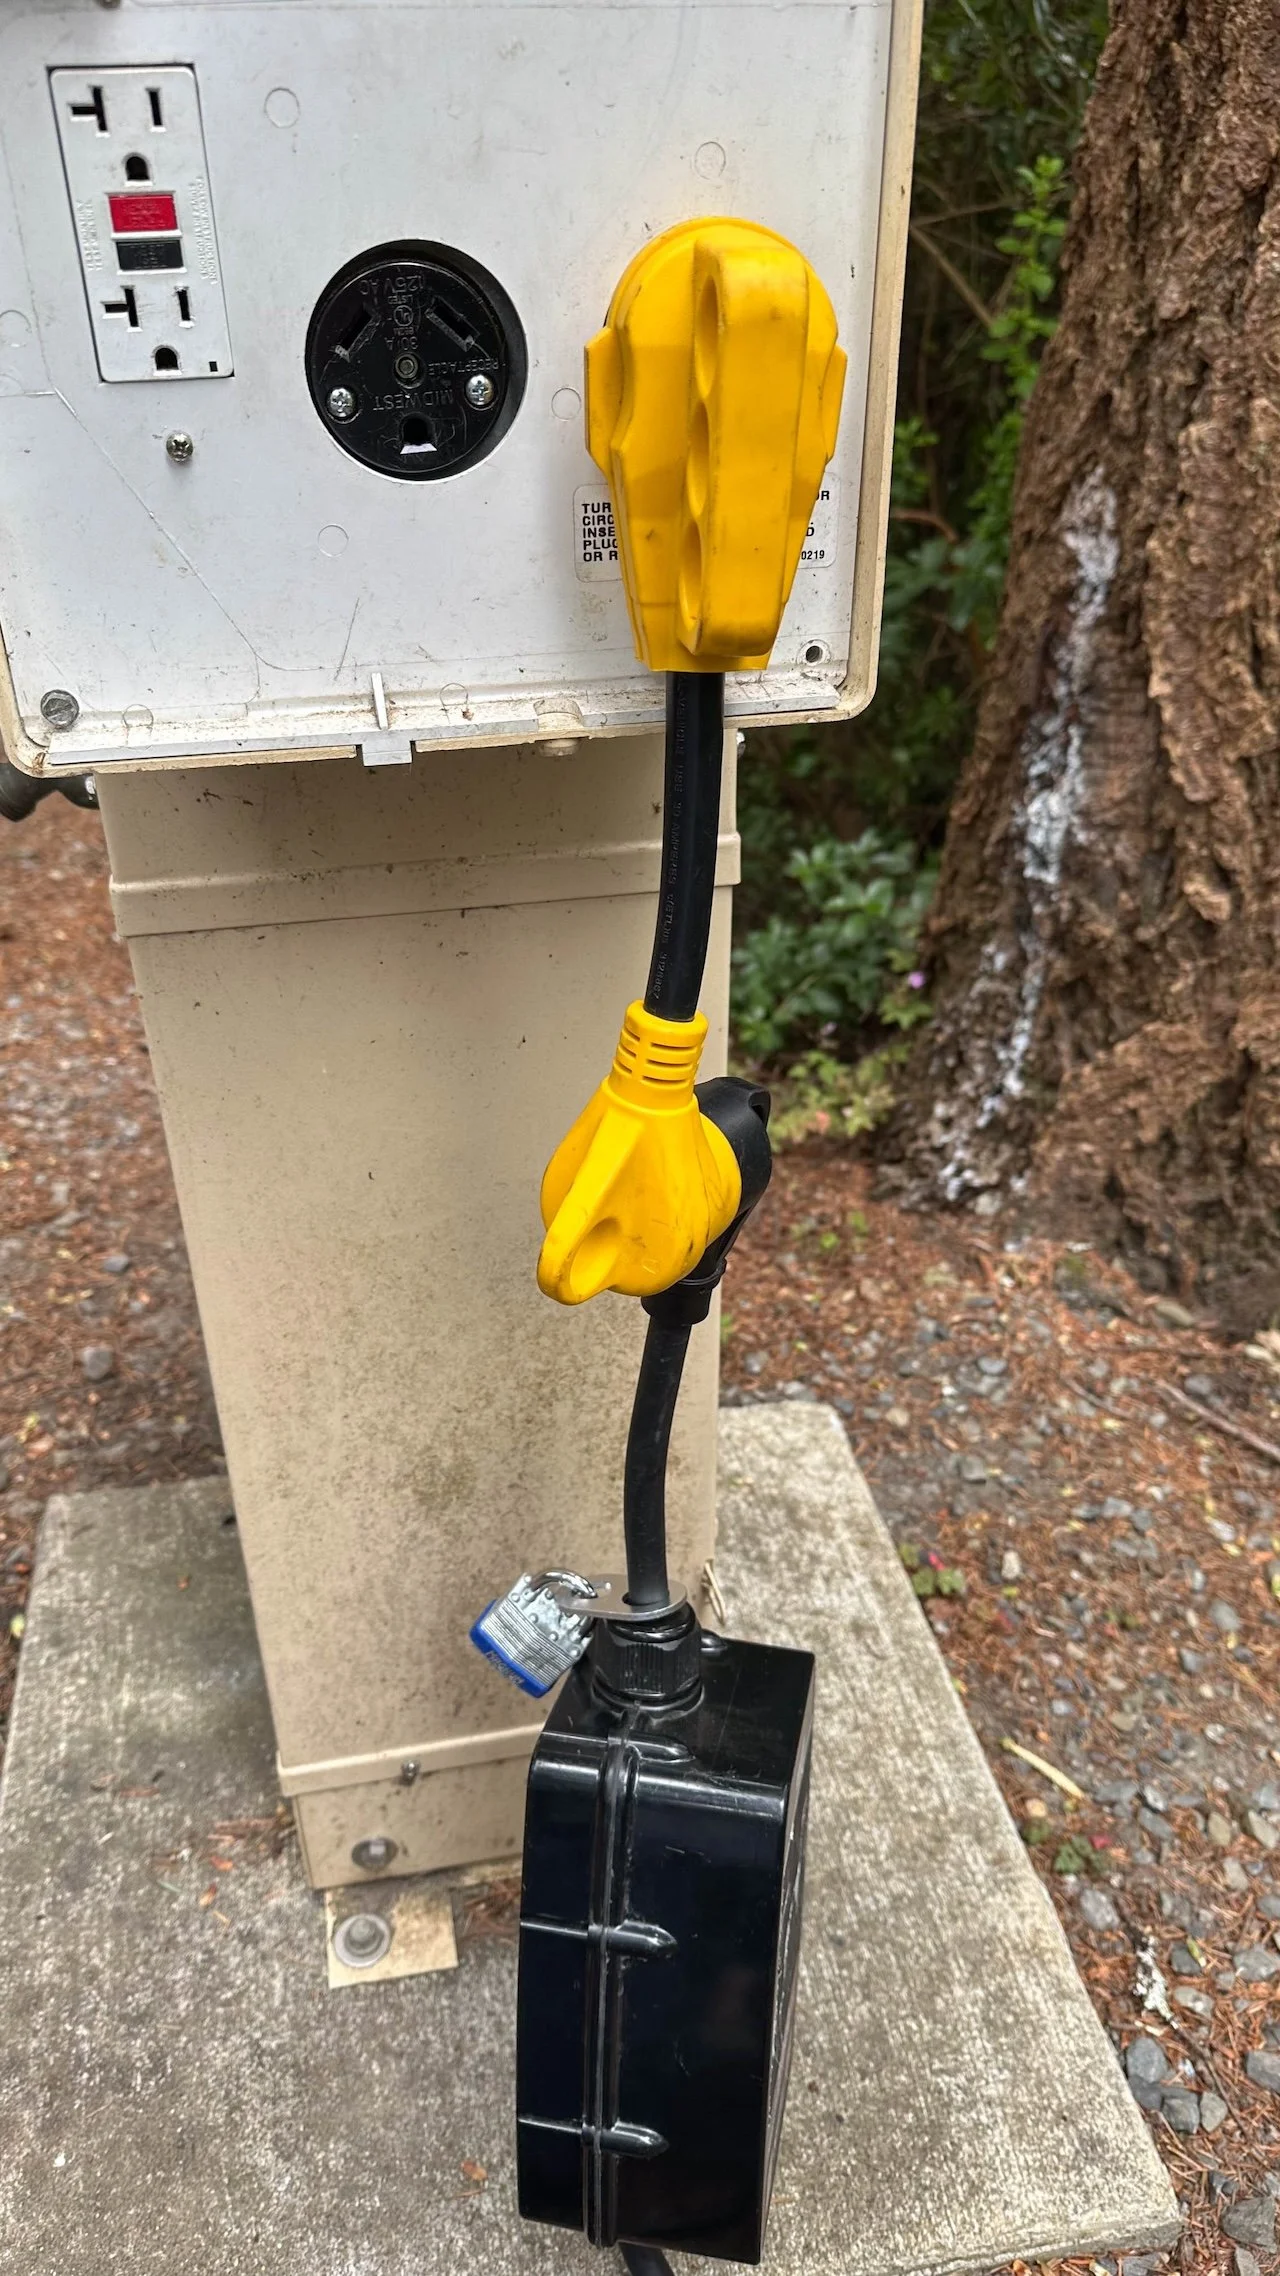
At one of our camp sites, the 30A outlet was installed upside down on the camp site pedestal. That caused our surge protector (paid link) to hang awkwardly from the outlet. We were concerned about the strain on the connector. So we pulled out our 50A to 30A dog bone (paid link), plugged it into the 50A outlet, and connected the surge protector to the dogbone. That allowed the surge protector to rest on the ground with no strain on the cable.
Tip Twenty: Remove vent cover to see water tank
Our fresh water tank sensor stopped working. As a temporary solution, we removed the vent cover under the bed above the bedroom steps. That allowed us to see the water tank (which sits under both beds). In order to see the water level in the tank better, we moved the step light over to the water tank. It was a low tech solution until we could get home and create a more permanent solution.
Tip Twenty one: Remove cold water filter before winterization
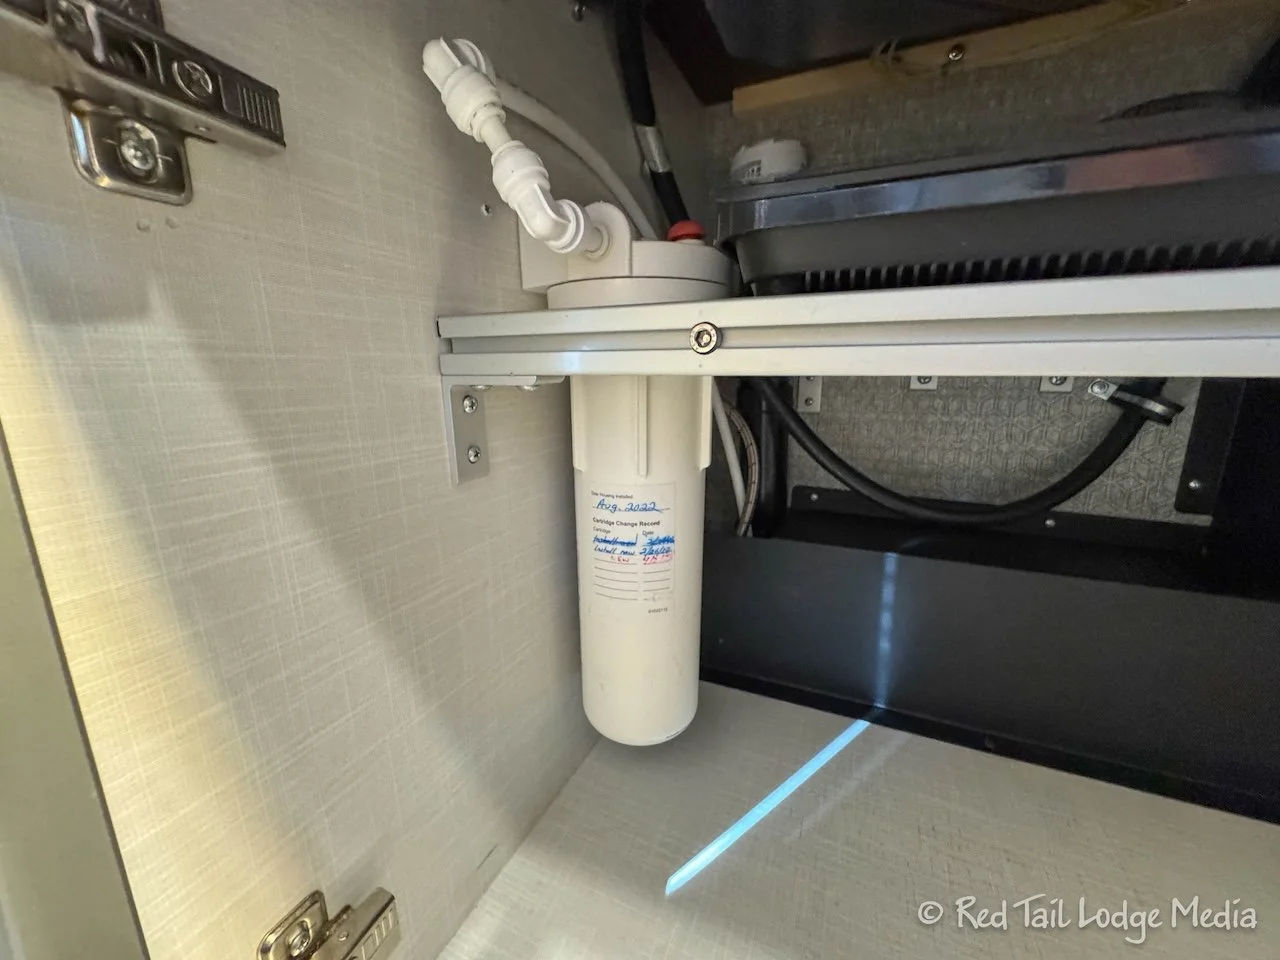
We replaced the original cold water filter with a better filter (going from a 5 micron filter to a 0.5 micron filter - paid link) at the end of Season Five. As we were winterizing at the end of Season Six, Keith kept pumping more antifreeze in, waiting for the cold water at the kitchen faucet to turn pink. After wasting a bunch of antifreeze, it finally occurred to him that the filter was filtering out the antifreeze. After removing the filter, the water instantly turned pink. Hopefully, we’ll remember that the next time we are winterizing.
Tip Twenty two: Attach dead cat with thread to mic mount
Because the built-in microphone on Ann’s Canon Powershot camera (paid link), she has attached an external microphone with a dead cat to reduce wind noise. She usually carries her camera on a Peak Design clip attached to the strap of her backpacks, so the camera lens is pointed down to the ground. The dead cat is just friction fitted onto the mic. So it has a tendency to fall off as Ann is bouncing down the trail while walking, hiking or biking. The fix was simple. She ran a thread through the material of the dead cat and wound it around the microphone mount. She went the whole season without the dead cat falling off and the thread is still holding.
Tip Twenty three: Preview Google Maps route
Google Maps always tried to route you the fastest way to your destination. The fastest is not always the best. The only filters available to control the route is avoiding tolls or avoiding highways. We wish there was a “take the scenic route” filter. There are several reasons to take a different path. One is the size of your rig may not be allowed on some of the roads. This is usually more of an issue on the east coast than the rest of the United States. There are other apps that allow you to specify the dimensions of your rig, but we generally don’t use those. We’re not that big and we are in the habit of paying attention to the clearances of under passes and road restriction signs. Another reason is that we generally like to avoid dirt roads, as those usually put a lot of wear and tear on our RV and may cause things to bounce around inside.
But the most important reason to us is that we like to travel the scenic route, avoiding interstates (but not all highways), if possible. This gets a little tricky if you’re using Google Maps as your main navigation tool. We always have a paper road atlas with us. It helps us see the scenic roads, as they are clearly marked in the atlas. To get Google Maps to play along, you need to add intermediary stops along the way to force it to go the way you want. And then you have to ignore the messages that keep popping up, saying it has found a faster way. It is a little more effort, but it’s worth it to us. After all, we are the Backroad Buddies, not the Interstate Buddies. Using this method allowed us to drive through the cute town of Sonora on our way from Kings Canyon to Lake Tahoe.
Tip Twenty four: Use Gaffer’s tape to repair trail runners
The last couple of pairs of trail runners have not lasted as long as we expected them to. We bought Altra’s in the fall and they were wearing out by the time we started Season Six in the spring. Ann bought a pair of Topo trail runners in the spring and they wore out in just a few months. Ann didn’t want to buy yet another pair of shoes before the travel season was over, so she used Gaffer’s tape to cover up the frayed holes on the inside of the shoes to prevent blisters and make the shoes last the rest of the season.
Tip Twenty five: Use rubbing alcohol to remove pine sap from clothing
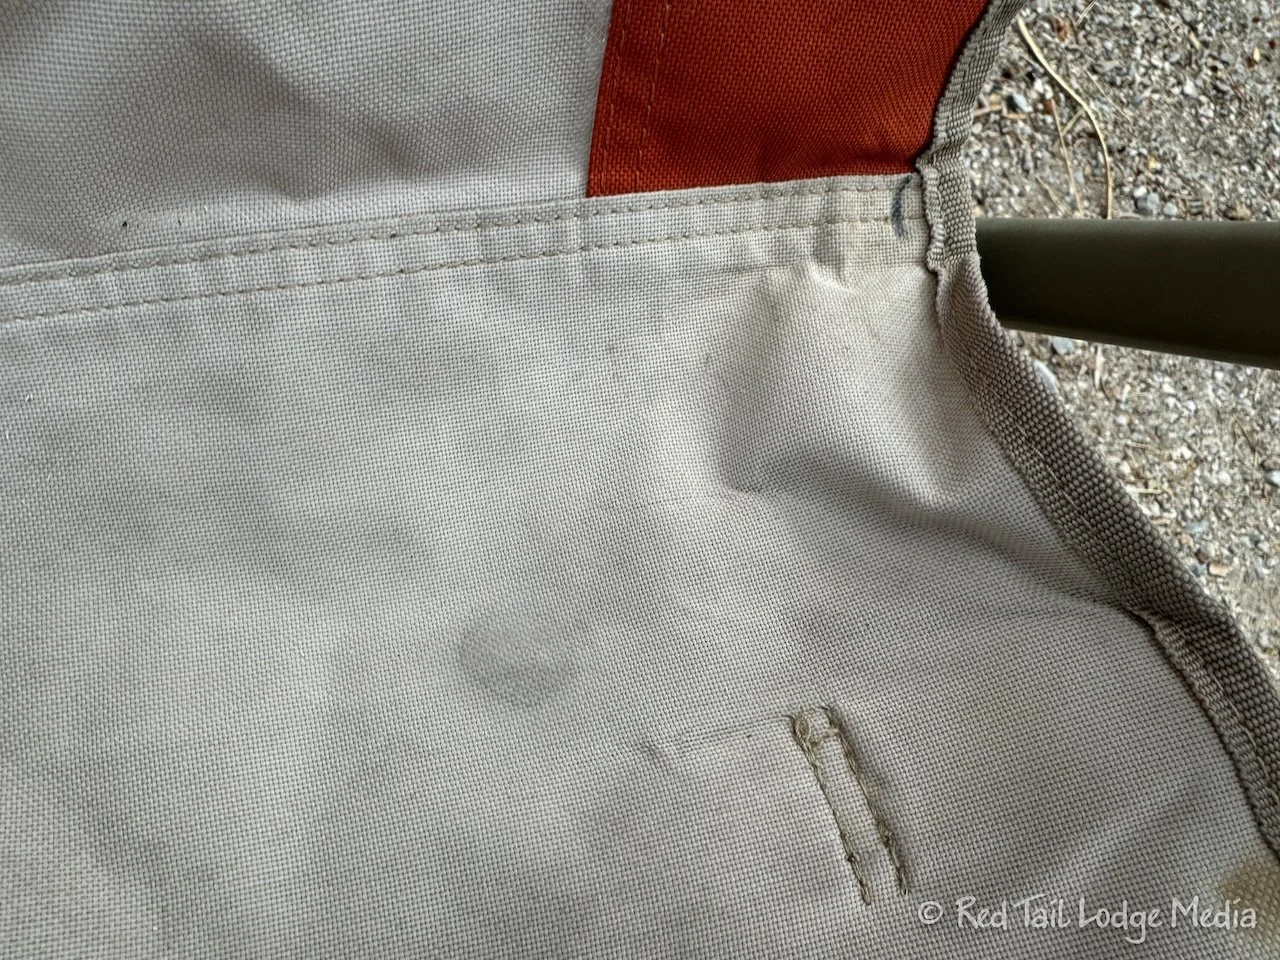
After one of our hikes, Ann was relaxing in her camp chair outside. When she got up, her pants sort of stuck to the chair and she noticed a spot on the chair. Is that pine sap? Yes, and it was on her pants. We’re guessing she picked it up while scrambling over one of the downed trees blocking the trail. Uh-oh! A quick search revealed that rubbing alcohol (70% isopropyl alcohol) is good at removing pine sap and it was something we had with us. The alcohol quickly removed all the pine sap from Ann’s pants, but it didn’t remove is completely from the camping chair. The chair wasn’t sticky anymore, but there was still a visible stain.
That’s all we have for now. We’re sure we’ll have another list of tips and tricks at the end of Season 7, so stay tuned!
Check out our related video: Tips and Tricks from Season Six 2024
(Ann)


