Hiking Ten Essentials
If you have done any hiking or scouting, you’ve probably heard of the Ten Essentials of Hiking. However, it seems like everyone has their own list of what those ten essentials are. Hopefully we can help remove some of the mystery of the ten essentials so you can develop your own list. We are also sharing what extra items we bring along for day hikes and for overnight backpacking trips.
We have done a lot of hiking and a few backpacking trips, but we are not hiking experts, not outdoor survival experts, nor medical experts. Don’t take our advice as gospel, do your own research.
The Ten Essentials first appeared in the third edition of Mountaineering: The Freedom of the Hills in 1974 (The Mountaineers: What are the Ten Essentials). The list has changed slightly over the years, as technology has changed. However, the items have always tried to address two basic questions:
1. Can you prevent emergencies and deal with ones that occur?
2. Can you safely spend a night outside on the trail?
The ninth edition of Mountaineering: The Freedom of the Hills, published in 2017, defines the Ten Essentials as 1) Navigation, 2) Headlamp, 3) Sun Protection, 4) First Aid, 5) Knife, 6) Fire, 7) Shelter, 8) Extra food, 9) Extra water, and 10) Extra clothes.
Remember, no one plans on getting hurt or lost. The purpose of the Ten Essentials is to help you survive should you get hurt or lost while hiking. What exactly those ten essential items look like can vary depending on where you are hiking, how remote of an area it is, how available water is on the trail, what time of year it is, and what weather are you likely to encounter. Keep in mind, that the weather can change quickly, especially in the mountains or as the sun sets.
We split our related videos up into three separate videos: Hiking Ten Essentials, Additional Hiking Gear, and Additional Backpacking Gear.
Feel free to use the links below to jump directly to a particular item that you are interested in:
Ten Essentials
Additional Hiking Gear
Hiking 3: Comfortable Footwear
Hiking 7: Paper and Pen or Pencil
Additional Backpacking Gear
Backbacking 1: Backpacking Tent and Ground Cloth
Backbacking 2: Inflatable Sleeping Pad
Backbacking 3: Sleeping Bag or Quilt
Backbacking 4: Inflatable Pillow
Backbacking 5: Dry, Clean Clothes To Sleep In
Backbacking 6: Backpacking Stove and Fuel Canister
Backbacking 7: Small Butane Lighter
Backbacking 8: Backpacking Pot, Cup, and Utensil
Backbacking 12: Breakfast Food
Backbacking 14: Toothbrush and Ttoothpaste
Backbacking 15: Hair Brush and/or Comb
Backbacking 17: Waterproof Liner
Backbacking 19: Petroleum Jelly and Zinc Oxide
Backbacking 20: Stadium Chairs
The Ten Essentials
Essential 1: Navigation
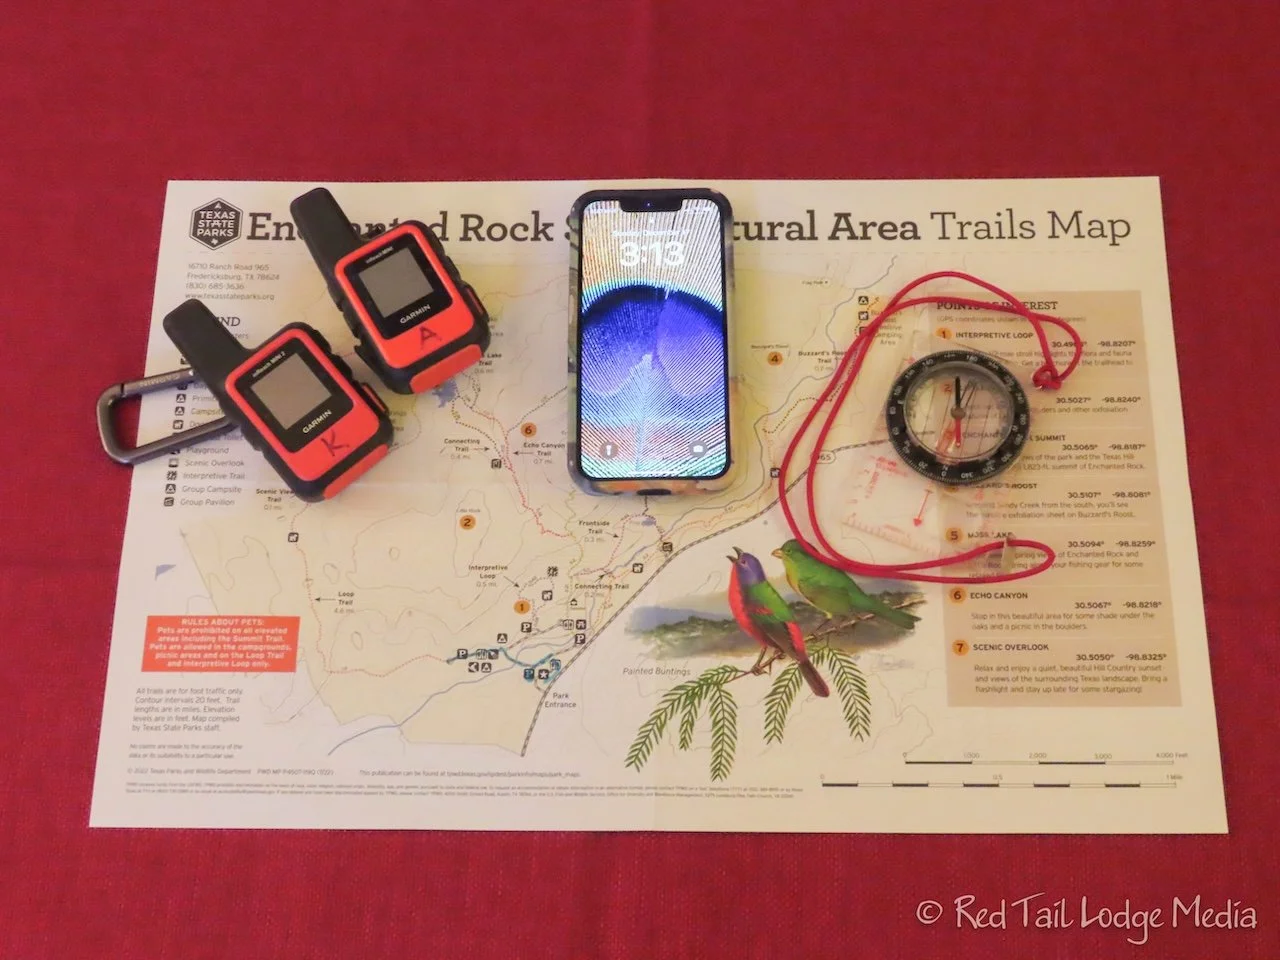
This is not one item for us, but several. We both carry an iPhone, a Garmin InReach (paid link), a compass, and sometimes a physical map. On our phones, we usually track our route using the AllTrails app and sometimes the Hiking Project app. We have the paid version of AllTrails which allows us offline use, showing us exactly where we currently are on the map. The InReach is a satellite communicator which we use to send text messages to our kids when we start and end a hike along with a message about half way through to let them know we are OK. The messages contain our GPS location from the time we sent the message. The InReach also tracks our route, allowing us to retrace our steps if needed. Most importantly, the InReach has an SOS feature that allows us to send for help and two-way messaging with emergency services. The compass is not all that useful without a map, but we carry it anyway. It makes us feel better having a backup that doesn’t rely on batteries. At the very least, even without a map, we can get our bearings and hopefully prevent ourselves from going in circles. If there is a map posted at the trailhead, we’ll take a picture of it with our phones. Likewise, if we have a paper map of the area or trail, we’ll bring it with us. Some people might say we’ve gone overboard on navigation, but we feel more secure knowing it would be pretty hard for us to get lost or stranded for an extended period of time. Keep in mind that even though you may be able to contact emergency services for help, it could be hours or days before help can arrive, depending on how remote your location is and what the weather is like.
Essential 2: Headlamp
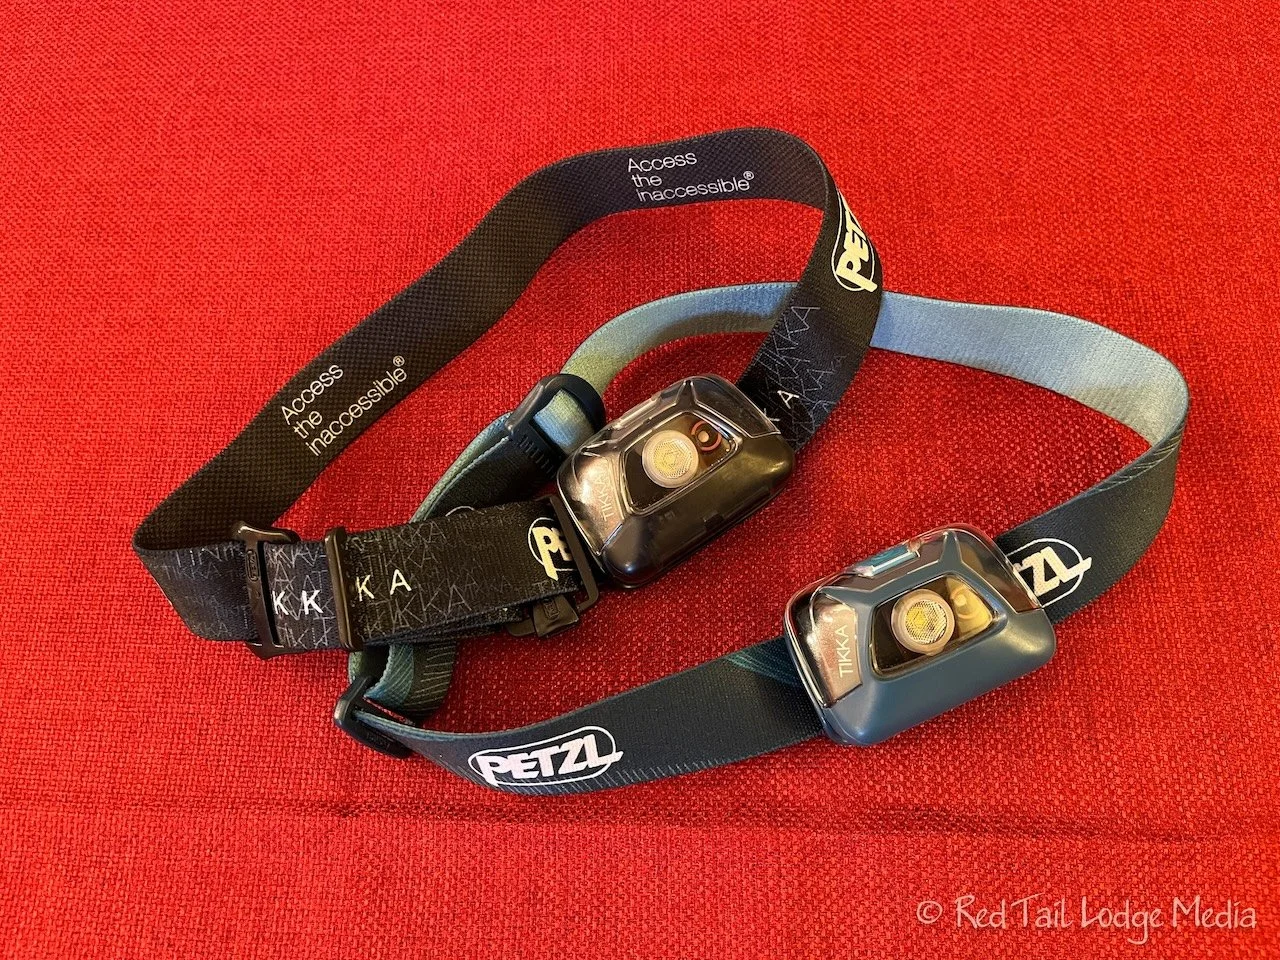
We’re not sure why the Mountaineers lists headlamp instead of a more generic term like “light”. A flashlight would serve the same purpose, although not quite as well. Having a light if you are stuck out on the trail after sunset is essential. A headlamp (paid link) has the advantage over a flashlight, as it leaves your hands free while providing you light to see what you are doing, like setting up an emergency shelter. Many headlamps have a red light in addition to a white light. Red light doesn’t disturb your night vision, nor bother the wildlife around you. Plus, a headlamp is also useful when camping. We both carry a headlamp. Be sure the headlamp batteries have a charge and/or bring spare batteries with you. Most cell phones also have flashlight functions on them, but that would greatly reduce the phone’s battery life. We prefer to save our cell phone batteries for navigation.
Essential 3: Sun Protection
The first thing that comes to mind for sun protection is sun block lotion. However, clothing is much better at sun protection than lotion. We normally hike in long pants and long sleeves, no matter how hot it is. Sometimes it feels like light clothing, which keeps the direct sunlight off of our skin, helps us stay cooler, especially after it becomes damp with sweat. In addition, we wear hats with wide brims (paid link) to keep the sun off our faces and necks. Sunglasses protect our eyes. And yes, we put sun block on our faces, ears, necks and the backs of our hands. And we try to remember to put on chapstick to protect our lips. That is something we need to be better about. Another option for sun protection is to wear hiking or biking gloves to protect the backs of your hands, especially if you use trekking poles that keep your hands facing the sun more than when your hands are down by your sides. If you hike a lot, remember sun protection not only prevents sun burns, but will help prevent skin cancer in the long run.
Essential 4: First Aid
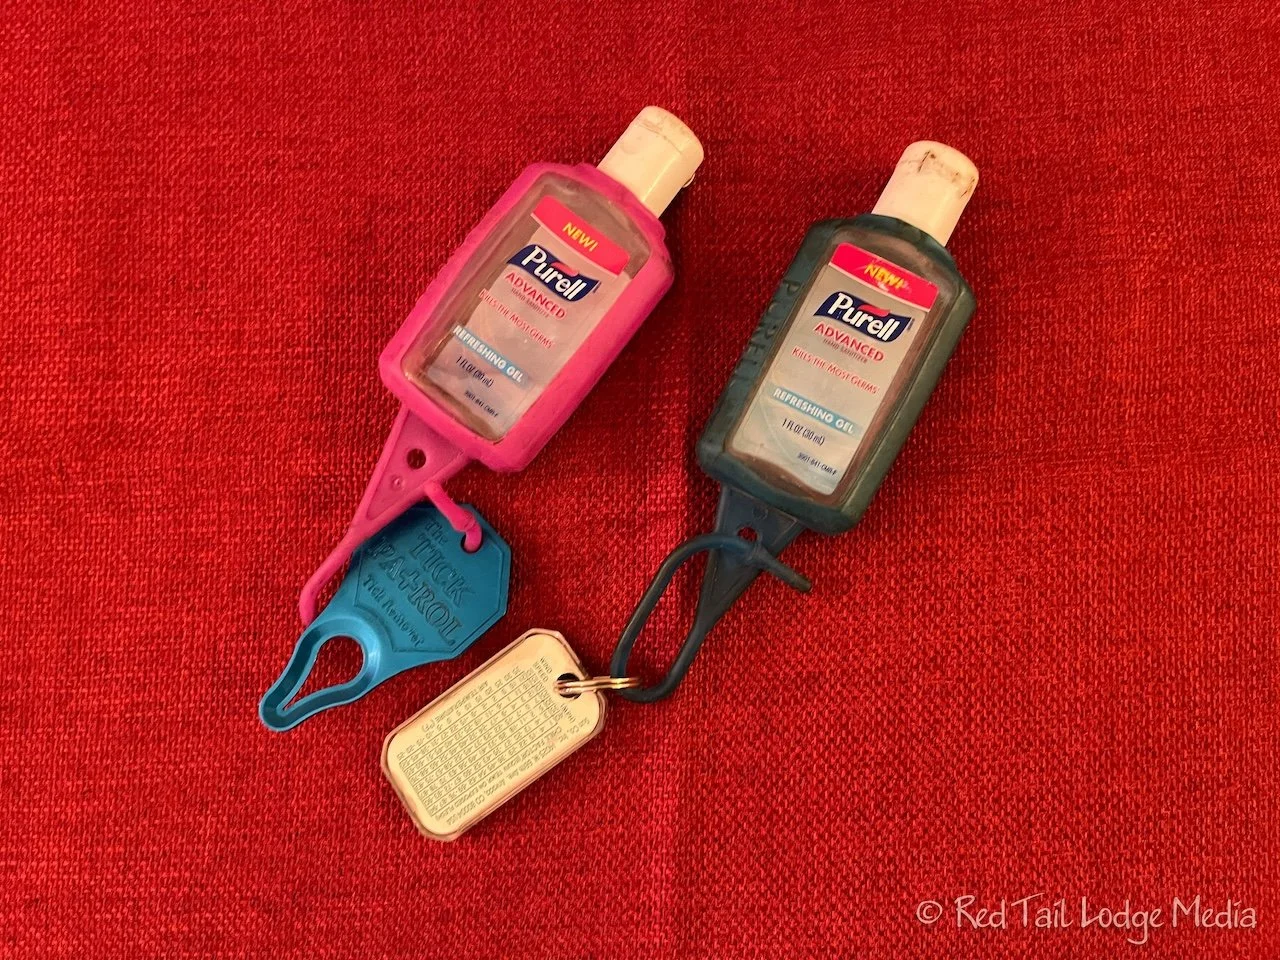
We carry a small first aid kit to treat minor injuries that may occur along the trail. It includes things like bandaids, alcohol wipes, antibiotic ointment, gauze, tape, pain relievers such as acetaminophin (Tylenol) and/or ibuprofen (Advil), molefoam (for treating blisters), tweezers (for removing splinters), and anti-diarrhea medicine (Imodium). If you have any medical conditions which may need additional items, such as medications, be sure to bring along a day or two’s worth with you. It’s not in our first aid kit, but we also carry a tick removal tool (paid link) attached to the outside of our packs.
Essential 5: Knife
The Mountaineers label this as just a knife, but in their explanation, it also includes items needed for repairing gear. A simple, single blade knife is essential, but a multi-tool is also very useful. Something that you can cut small pieces of wood (for starting a fire or making a splint) or cut a piece of rope. Other repair items might include strong tape and rope or cordage. One of us carries a pocket knife, while the other carries a small multi-tool (paid link). In addition, we have some duct tape and shock cord.
Essential 6: Fire
If you are stuck out on trail overnight in cold weather, the ability to make a fire may mean life or death, or frostbite. A fire can also be used to help rescuers find you. Again, we carry a couple of different options. A lighter, wooden matches in a waterproof container (paid link), and a magnesium fire starter (paid link). We carry all three along with a wooden fire starter stick. They are all pretty light and small, so why not? A lighter may fail to work or run out of fluid. Matches may fail to light. And a sparker may be hard to use. By having all three, hopefully at least one of them will work.
Essential 7: Shelter
If you are just going on a day hike, carrying a backpacking tent is not necessary, as it is rather bulky and heavy. However, you still need to bring something to use as a shelter. Remember, you’re not trying to live in luxury overnight, just something to keep you alive by protecting you from the rain, wind, and cold. It could be as simple as a large lawn & garden trash bag. Space blankets are light weight but no longer recommended since they easily tear and do not completely protect you. Ann carries an emergency bivvy from SOL (paid link). It is a lightweight (3.8 oz), stretchy, tear-resistant polyethylene in a large bag form that you can crawl inside. It traps your body heat and keeps you warm along with protection against wind and moisture. Keith carries a small tarp (paid link). We use the tarp mainly as a sit pad when we stop for breaks to keep us off the wet ground, but it also can be used to block the wind and rain. Due to the bright color and reflective surface of both the tarp and the bivvy, they both can also be used to signal a rescue team that may be flying overhead.
Essential 8: Extra Food
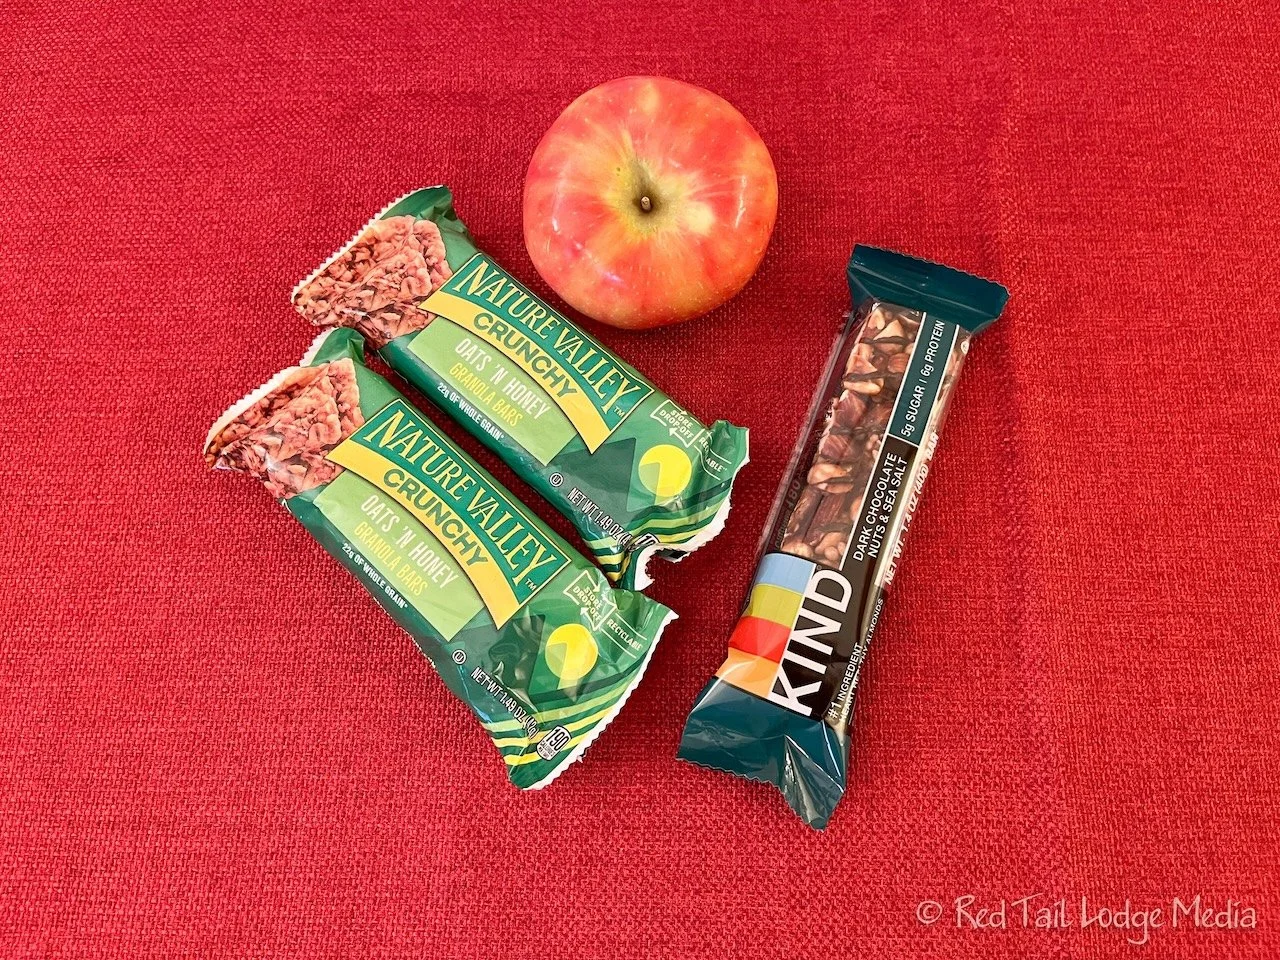
What food to bring along is highly variable, depending on the weather, terrain, and length of hike. Always take more food than you think you need for the hike, enough to survive overnight. The colder the temperatures, the more calories you need to stay warm. The more strenuous the hike, the more calories you need. We typically don’t eat a lot during our day hikes, but we do bring along an extra granola bar or power bar, perhaps more if we are in a remote location. During the hike we typically eat things like granola bars and nuts. In addition to granola bars, Ann likes to eat an apple. Sometimes we’ll bring along cheese sticks, but they don’t do well in hot weather.
Essential 9: Extra Water
This is another highly variable item. Always take more than you think you will need. This is a tough one, because water is heavy, but dehydration can kill you pretty quickly. Water is more important than food. Obviously, if it is hot out or the hike is strenuous, take more water than normal. We typically take two liters of water each. Only if it is a short hike with the trail near a road or other type of support would we take less.
We took four liters of water and sports drinks for each of us on a 8 mile hike with an elevation gain of 3000 feet in temperatures into the upper 90’s and it was barely enough. That hike also taught us a lesson about electrolytes. When hiking in extreme heat or high altitude or both (as with this hike), drinking a lot of water to stay hydrated can throw off your electrolytes, known as overhydration or water intoxication (Electrolyte Imbalance). To counteract the imbalance, you need to make sure you are also taking in electrolytes, by eating food, drinking sports drinks, or adding electrolyte powder or tablets (paid link) to your water. On this particular hike, Keith switched to a sports drink early in the hike. Ann waited until we were over a third of the way through our hike, over half way up our intended elevation gain, before switching to sports drinks. That turned out to be too late. Ann started not feeling well as we approached the summit. It got to the point that she had to stop about every ten steps to catch her breath. We were in sight of our goal, which was only about a tenth of a mile away when Ann crawled under a bush to take a break in what little shade we could find. After about ten minutes or so and after eating some food, she still was not feeling much better. We turned around and started heading back down. We don’t know if it was elevation sickness or an electrolyte imbalance or a combination of both. Ann felt better going downhill, as it was less exertion, but quickly lost her breath again at the slightest incline along the trail. Luckily it was downhill most of the way back. It took her about 24 hours for her to feel fully recovered (look for our post on Guadalupe Mountains National Park coming out in Februrary 2024).
In addition to water, we also carry a water filter (paid link) and water purification tablets. These are great options when going on a long hike or backpacking, so you don’t need to carry as much water. However, you need to know where reliable water sources are along the trail if you are relying on collecting and treating water on trail. Be sure to check current conditions before heading out on trail. A water filter or water purification tablets do you no good if there is no water to collect. Most water filters cannot tolerate being frozen. We found that out the hard way. We used to store our water filters in our backpacks in our garage. On our hike to Sentinel Pass in Banff (Lake Louise, Alberta - September 21st to 22nd, 2022), we were running low on water and tried to use our water filter. Since it had probably been frozen at one time, it would not let any water flow through it. No problem, we had water purification tablets. Then we read the instructions on the tablets. You are supposed to let the tablet sit in the collected water for four hours before drinking it. We would hopefully be done with the hike by then. Luckily we made the water we had last until we returned to the trailhead. There are faster acting water purification tablets (paid link) on the market, so shop around.
Essential 10: Extra Clothes
Use common sense here. While you are hiking, you will need less clothing than when you are sitting still. That means you need to carry extra layers to keep you warm if you end up injured and sitting alongside the trail for hours, or stuck out on the trail overnight. Bring only synthetic or wool clothing. We’ve heard people say “cotton kills”. When cotton gets wet or damp from sweat or rain, it will no longer keep you warm. Pay attention to the weather forecast, not just for the day, but also what the temperature, wind and precipitation will be overnight. Remember wind will make it feel even colder. We always bring along rain gear, both a jacket and pants. They not only protect us from rain, but also help break the wind and keep us warmer. Hats and gloves are also nice to have overnight. A dry spare pair of socks may save your toes from frostbite overnight. A puffy coat provides a lot of warmth, doesn’t weigh a lot, and squishes down small inside a pack, although they can be expensive. We often carry our puffy coats in our packs. Ours are the Torrid jackets from Enlightened Equipment with synthetic insulation.
In addition, Ann often brings along foot warmers. She has come close to frostbite on her toes a couple of times, so they are now very sensitive to the cold. It doesn’t even have to be below freezing for her toes to be affected. Foot warmers give her that extra sense of security. If we are hiking or snowshoeing in freezing temperatures, she now puts foot warmers in her boots right from the beginning of the hike. It is much easier to keep your toes warm than trying to warm them back up on the trail after they’ve gone numb.
Additional Hiking Gear
There are other items we usually hike with that are not part of the Ten Essentials, but help us remain comfortable on the trail.
Hiking 1: Trekking Poles
Trekking poles (paid link) help with maintaining our balance on rough trails or during water crossings. They also allow us to take the weight and pressure off of our knees and hips, especially on steep trails. Using trekking poles has the added benefit of keeping your hands from swelling during long hikes, as your hands are held up higher instead of dangling low at your side.
Hiking 2: Bandana
Ann likes to wear a bandana around her neck while hiking. She sweats a lot and likes having the bandana handy to wipe the sweat from her forehead to keep it from running into her eyes. Also, having a wet bandana on your neck can help keep you cool.
Hiking 3: Comfortable Footwear
We’ve seen people wear all kinds of foot wear on the trail, from flip flops to hiking boots. Some long distance hikers wear nothing but trail runners. We prefer hiking boots on long hikes, rough terrain, or muddy trails. On shorter hikes with easy terrain, we’ll wear our trail runners, since they are lighter. But we like the support of our hiking boots. Ann has had issues with plantar fasciitis in the past, so she has supportive insoles in both her boots and trail runners. She also seems to have a tendency to get blisters more than Keith, so she usually wears Wrightsock socks which have two layers to help prevent blisters. Whatever foot wear you choose to wear, make sure they are comfortable and give you the support and protection you need or want. Don’t buy a new pair of boots or shoes and wear them for the first time on a long hike. That is asking for trouble. Break them in first. Try them out on a short hike. Make sure they are comfortable. Keep in mind that your feet will probably swell as you hike. You may want to buy shoes or boots that are half a size larger than what you would normally wear. Take the time to stop and adjust your footwear the minute something doesn’t feel right. If you wait, you’ll probably end up with painful blisters. Hiking is no fun when you’re in pain. You will probably need to adjust your shoes or boots at least once on a long hike, as your feet start to swell.
Hiking 4: Toilet Supplies
Ann’s least favorite part of hiking and backpacking is going to the bathroom in the woods. Even if you don’t plan on going while on trail, you never know when nature may call. Be prepared. We’re not quite sure why these items are not in the ten essentials, other than it is not life threatening to be without them. A shovel, toilet paper, and ziplock bags to haul out your used toilet paper are the basics. Other than leaving your poop at the bottom of a hole (and covering it back up), you should carry everything else back out with you.
Hiking 5: Hand Sanitizer
It is just common sense to having clean hands when you eat your snack on the trail and after you’ve used the great outdoors as your toilet. Enough said.
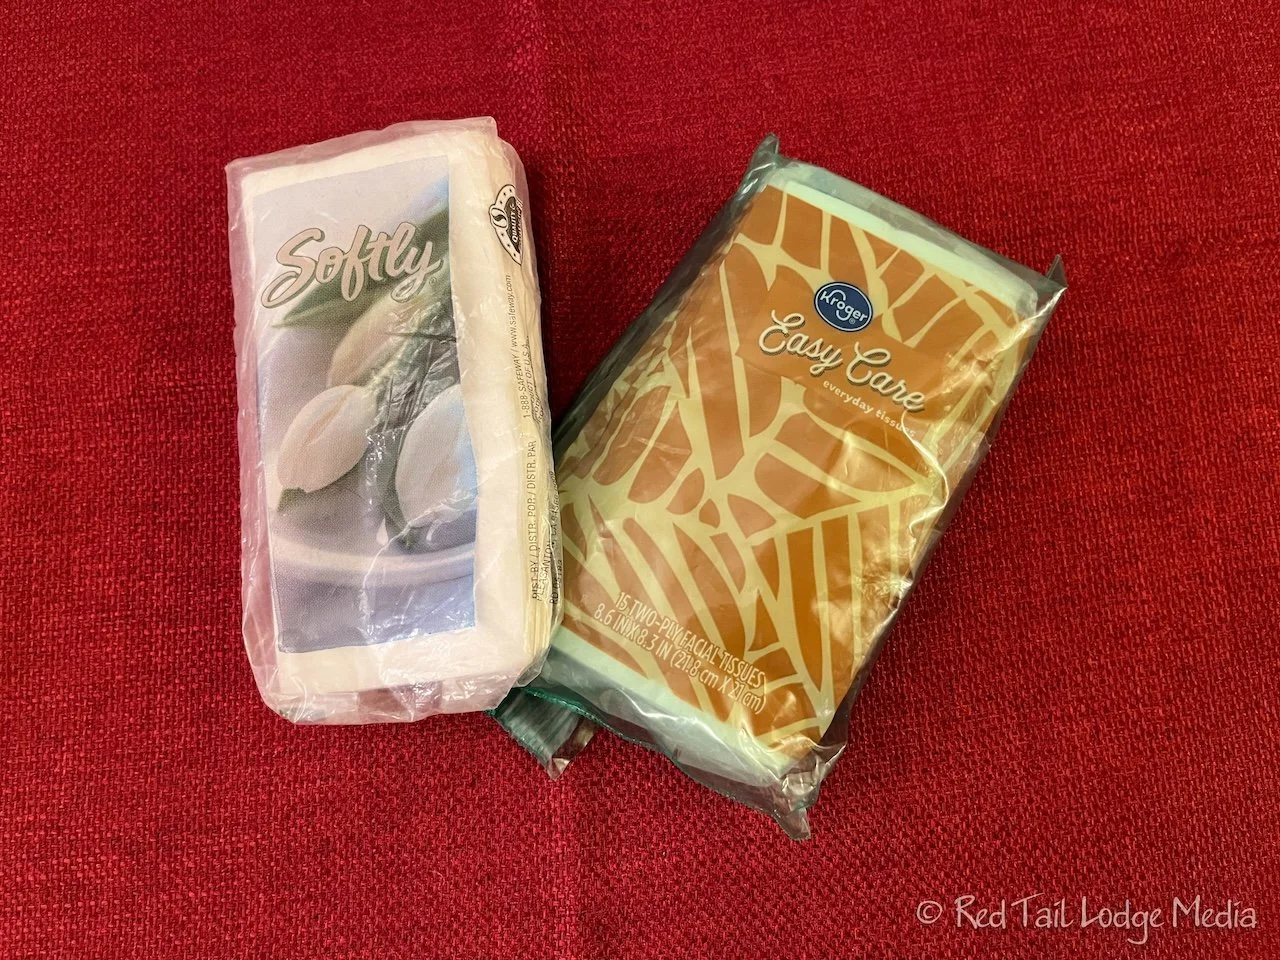
Hiking 6: Tissues
Just another comfort item. Noses run, especially when it is cool outside or you have pollen allergies. Have a baggie to store the used ones in.
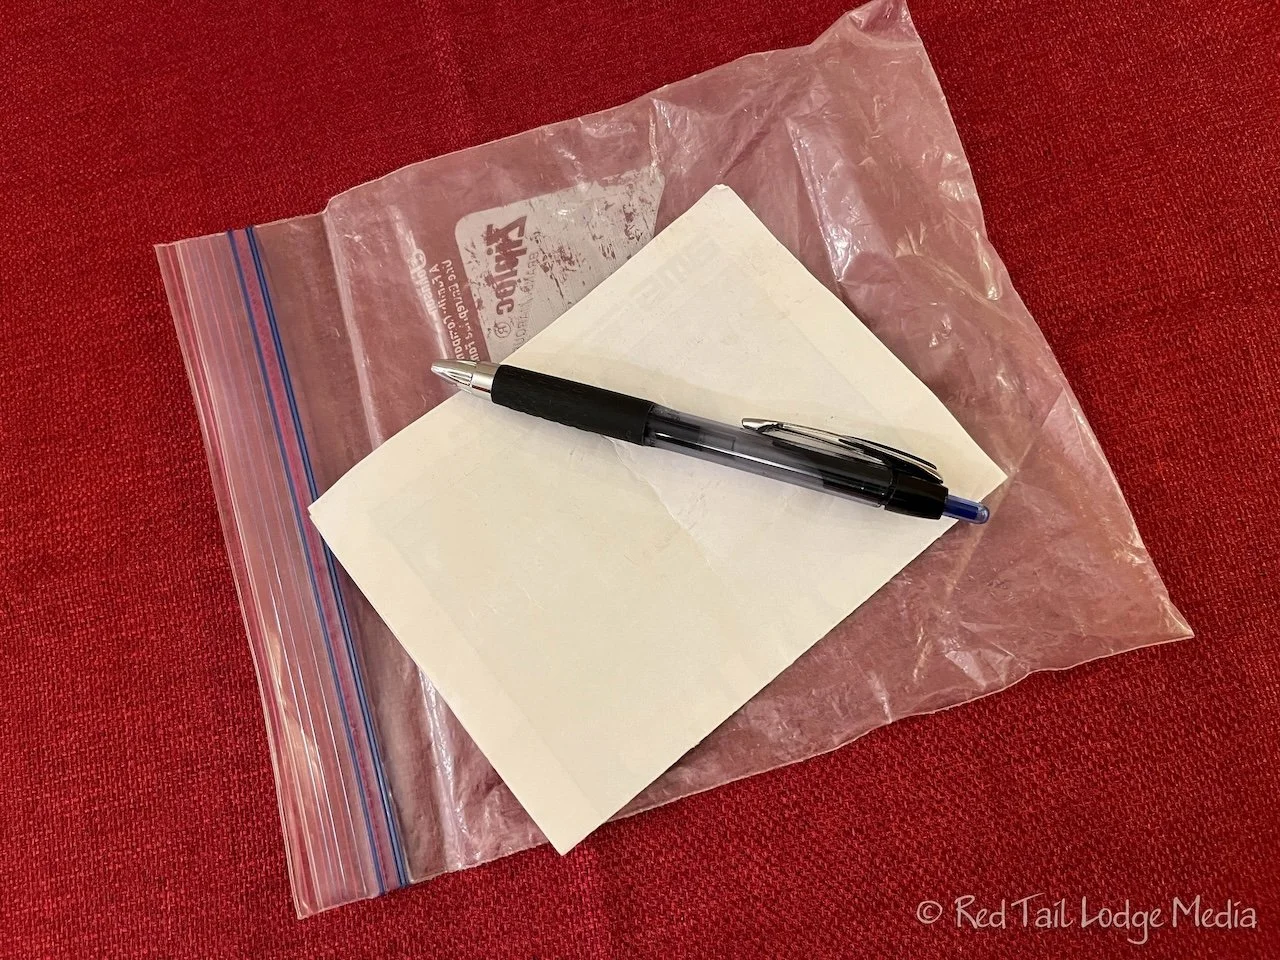
Hiking 7: Paper and Pen or Pencil
Just an extra safety item. If you need to leave a note for someone on the trail, warning them about conditions in the area or to help rescuers find you, you have a way to do that.
Hiking 8: Insect Protection
We usually have insect repellent on us, just in case. Swarms of insects can be rather annoying at times. We sometimes also carry a head net (paid link), for when bugs are really bad. We’ve used the head net in Alaska and in the Florida Everglades. It may not be fashionable, but it sure works.
Hiking 9: Reading Glasses
We’re old. We both need reading glasses to, well, read. What do we need to read while on the trail? Mostly things on our phones. Or see that splinter in our finger so we can pull it out.
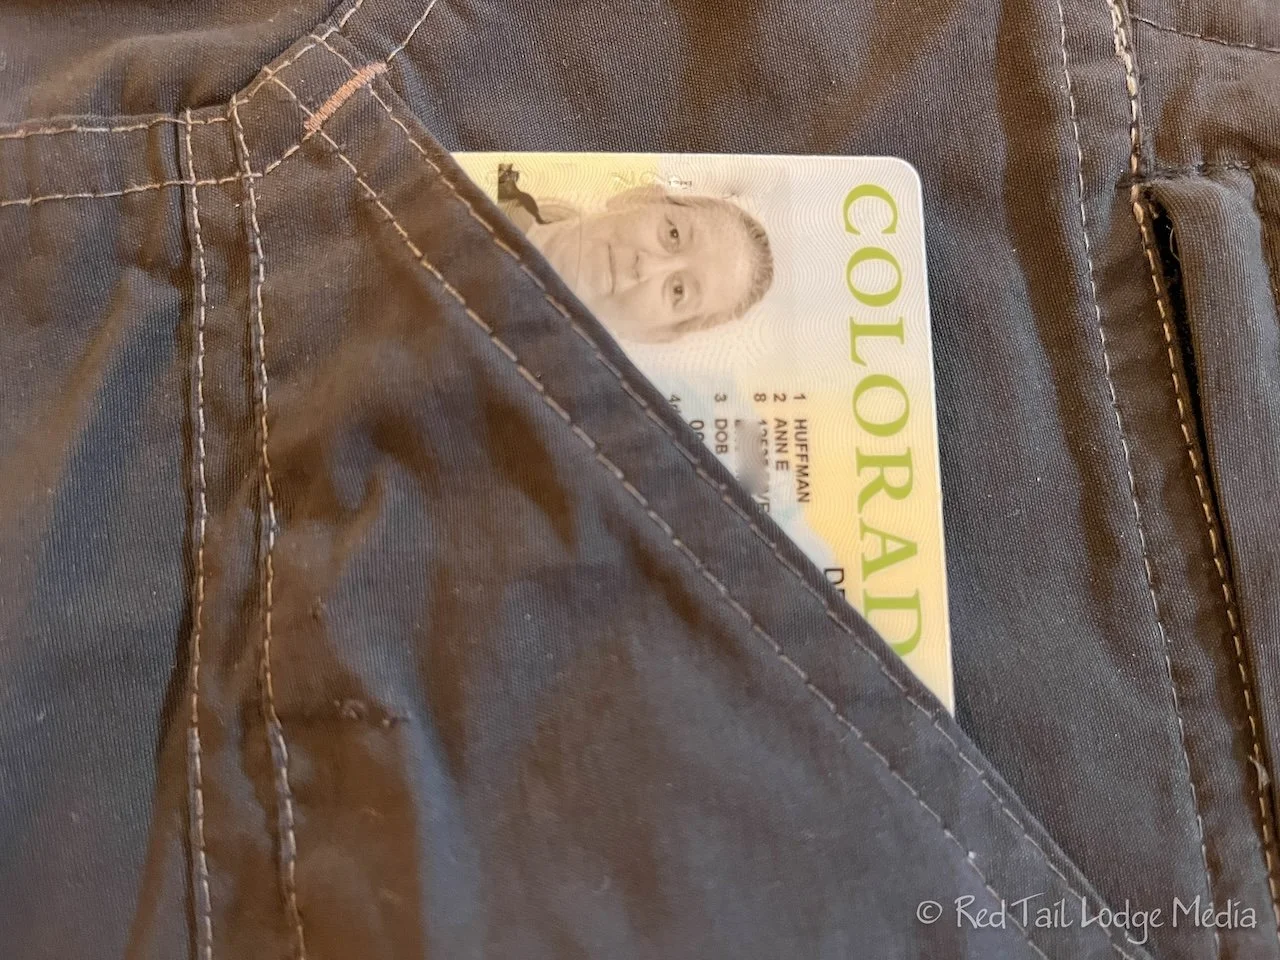
Hiking 10: Photo ID
Another safety item. If someone finds us unconscious or worse, they can at least identify us.
Hiking 11: Binoculars
We don’t always carry these, but they come in handy to see wildlife from a distance. Ann can use her Canon Powershot camera as binoculars, since it is a super zoom, but that doesn’t help Keith much. He carried binoculars (paid link) most of the time we were in Denali National Park in Alaska (Denali National Park: Teklanika River, Alaska - August 4th to 8th, 2022).
Hiking 12: Camera Gear
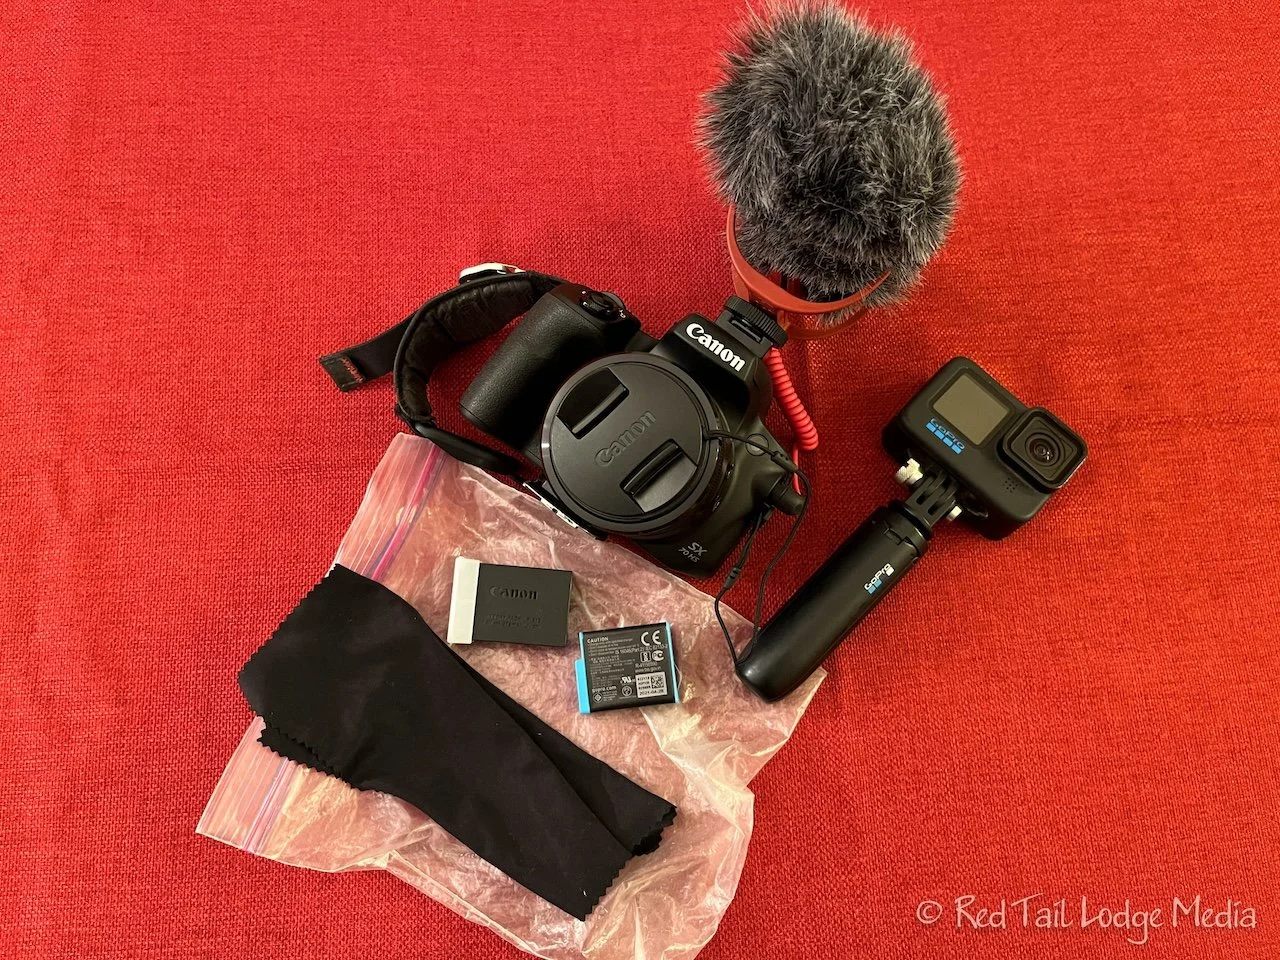
In addition to our iPhones, Ann carries her Canon Powershot camera (paid link) along with a GoPro (paid link) with a Shorty Tripod (paid link). The Powershot attaches to the strap of her backpack using a Peak Design clip (paid link). The GoPro slides into the thigh pocket of her hiking pants. Both cameras are quick and easy to grab while hiking. Her other pocket holds a ziplock bag containing spare camera batteries and a lens cloth. The bag keeps moisture off the contents. Ann has found that a sweaty lens cloth doesn’t clean a camera lens very well. If it is raining, she may also carry a plastic bag to cover her Powershot camera, as it is not waterproof like the GoPro. While on our wildlife cruise in Valdez, Alaska, she got water inside the viewfinder and the main lens, which made the camera useless until it dried out again a day later (Valdez, Alaska - July 20th to 25th, 2022).
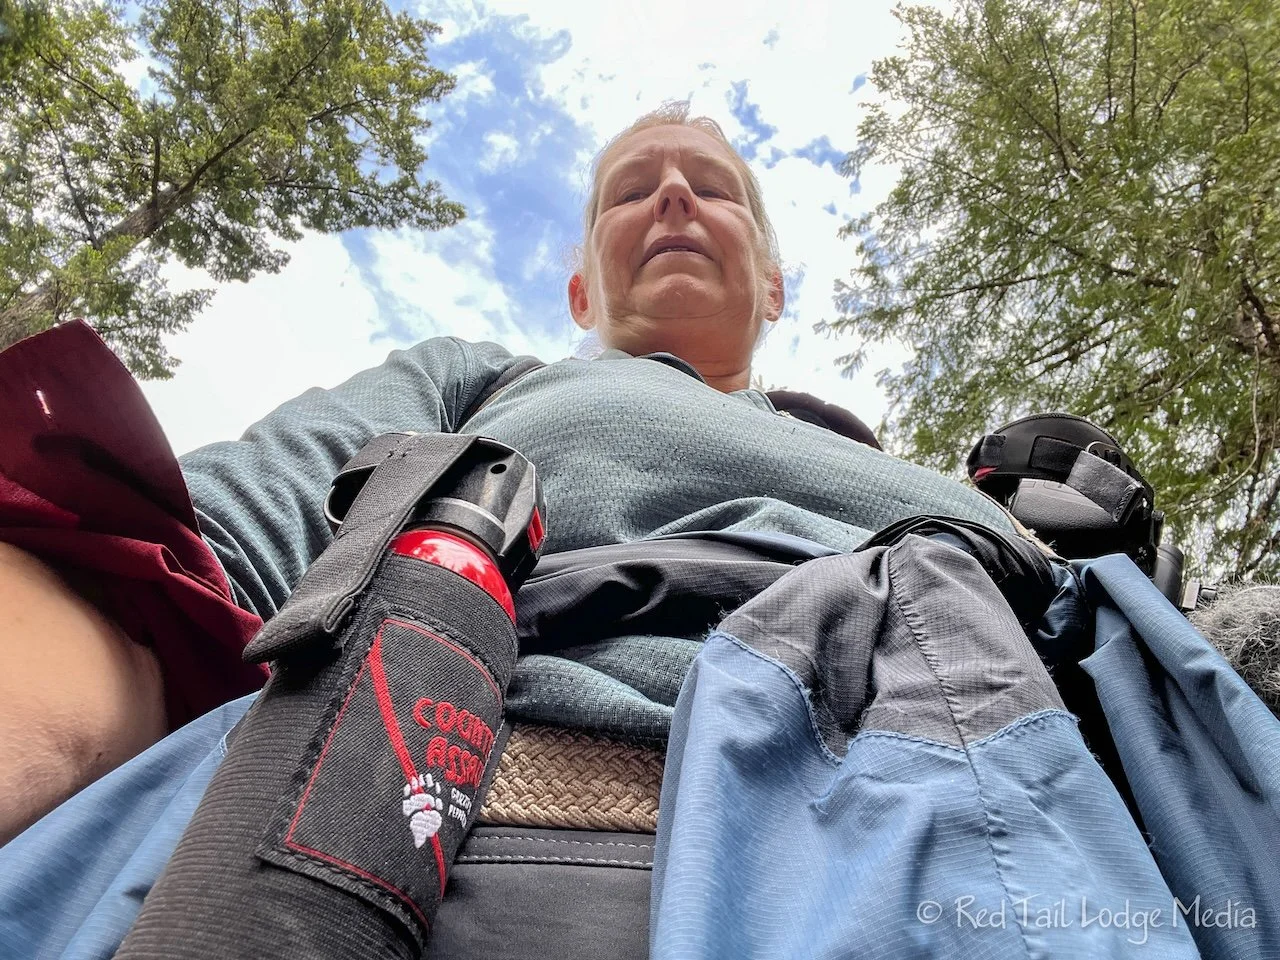
Hiking 13: Bear Spray
We only carry bear spray (paid link) when we are in grizzly bear country. If you carry it, make sure you know how to use it. Also make sure that bear spray is allowed in the area that you are hiking. Some places don’t allow it.
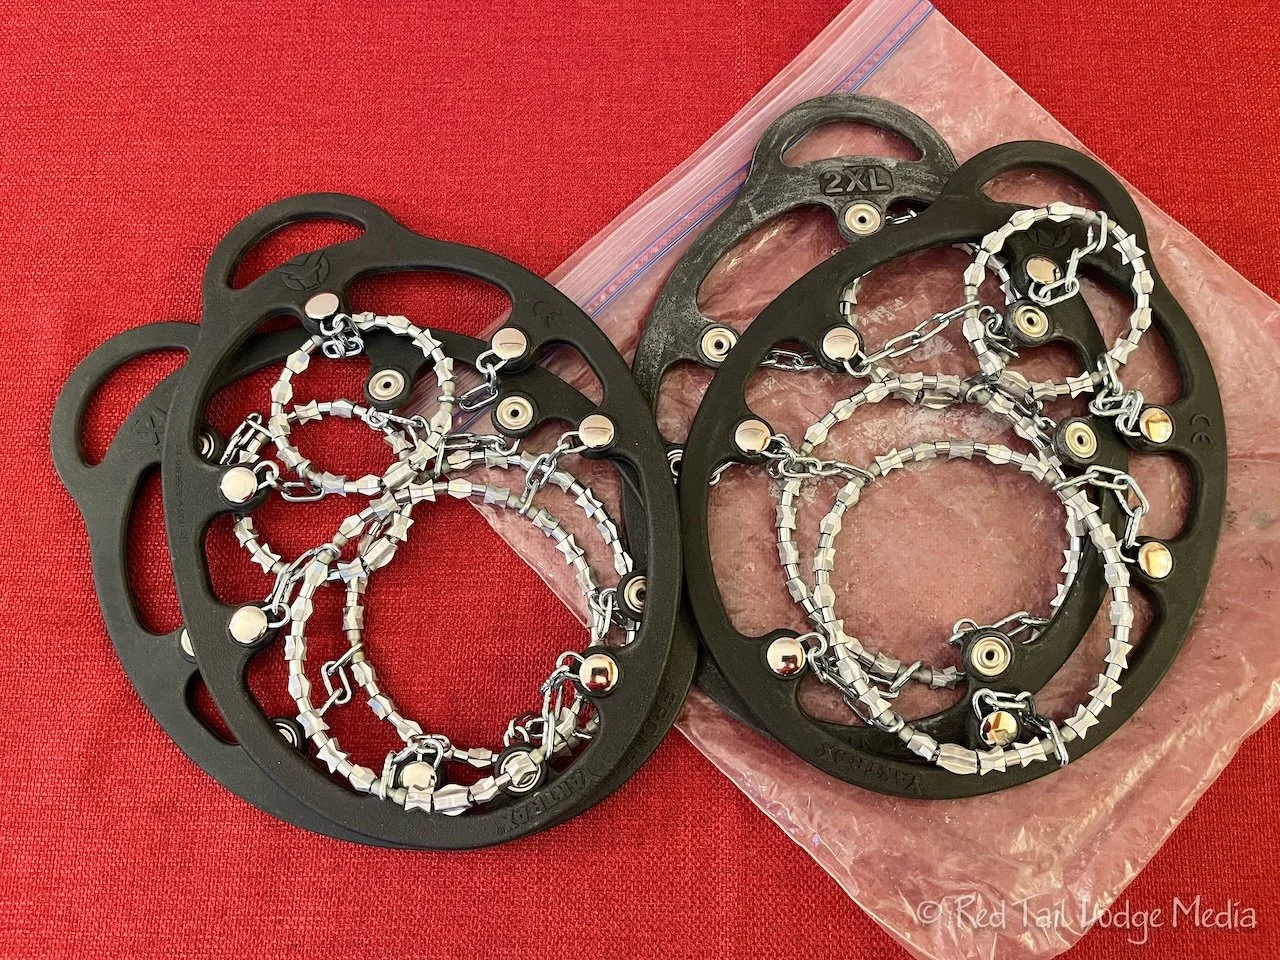
Hiking 14: Yaktrax
Yaktrax (paid link) are a traction device that you slip onto your shoes or boots. They are not quite as aggressive as micro spikes, but they have more grip on rocks than spikes. We only carry these if there is a chance we might encounter icy or snowy trails. If we think the trail is going to require micro spikes, we won’t go.
Additional Backpacking Gear
We’ve only backpacked together three times, where we planned on spending the night out on trail. The first time was three days and two nights on the Appalachian Trail (Day One on the Appalachian Trail - July 29, 2019). The second time was five days and four nights hiking rim to rim in the Grand Canyon (Day One Below Rim: Grand Canyon - Sep 16, 2019). The third time was three days and two nights in the Wheeler Geological Area in Colorado (look for a post to come out in March of 2024). The ten essentials stay pretty much the same, although extra water usually means planning on filtering water. Knowing where your reliable sources of water are should be part of your backpacking planning. Even though the Ten Essentials includes a shelter, the shelter we carry for day hikes is only meant for survival. It is not a comfortable way to spend a night on the trail. We also like to have warm food and drinks when backpacking, something we do not do for day hikes.
Backpacking 1: Backpacking Tent and Ground Cloth
We share one backpacking tent between the two of us. It is a two-man tent, or should we say was. The last time we used it, we found out it was no longer water-proof, so we no longer have it. We wanted to get a lighter tent anyway. It would probably be safer if we each had our own tent, in case we got separated, but we felt the risk of having only one tent was worth the reduction in weight. If we did get separated, we still each have our emergency bivvy or tarp. The ground cloth goes under the tent, to protect the floor of the tent.
Backpacking 2: Inflatable Sleeping Pad
We prefer an inflatable pad over a closed cell pad because we find them more comfortable. We are both side sleepers and closed cell pads are usually not comfortable for side sleepers. The one we use is the Therm-a-rest NeoAir XLite. It is lightweight and inflates pretty quickly. The only thing we don’t like about it is that it is noisy. The fabric crinkles loudly, so every time you roll over, it sounds like you are crinkling up a potato chip bag. Therm-a-rest claims the latest version (paid link) of this pad is quieter.
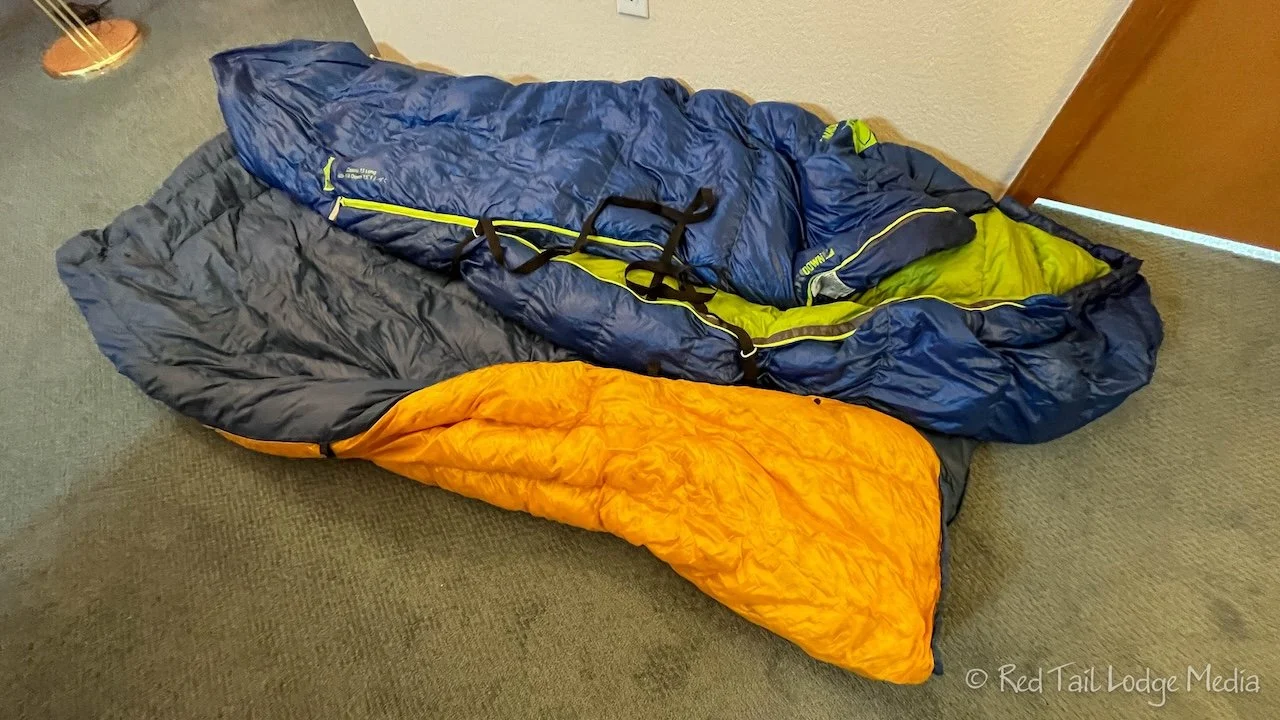
Backpacking 3: Sleeping Bag or Quilt
A good sleeping bag or quilt will keep you warm and comfortable at night. Be sure to use one that squishes up small, so it doesn’t take up much room in your pack. Keith uses a mummy sleeping bag, but Ann doesn’t find those very comfortable. She uses a down sleeping quilt from Enlightened Equipment (Revelation, down type 850, long and wide, 20 degree rating). The quilt has straps that go around the sleeping pad along with a toe-box that cinches up, so it fits snug to the pad. Ann lies directly on the sleeping pad with the quilt on top of her. She finds it very comfortable. The idea is that the down beneath you in a normal sleeping bag does no good for warmth because it is squished flat. The quilt allows more freedom of movement to roll over during the night.
Backpacking 4: Inflatable Pillow
A pillow provides so much comfort when sleeping. An inflatable one doesn’t take up much space and doesn’t weigh much. The ones we use are from Trekology (paid link).
Backpacking 5: Dry, Clean Clothes to Sleep In
You could sleep in your hiking clothes, but they are usually moist from sweat and a little stinky. Having separate clothes to sleep in makes us more comfortable at night. It is usually something as simple as a t-shirt and spandex shorts along with a change of underwear. A clean, dry pair of socks can help keep the tootsies warm.
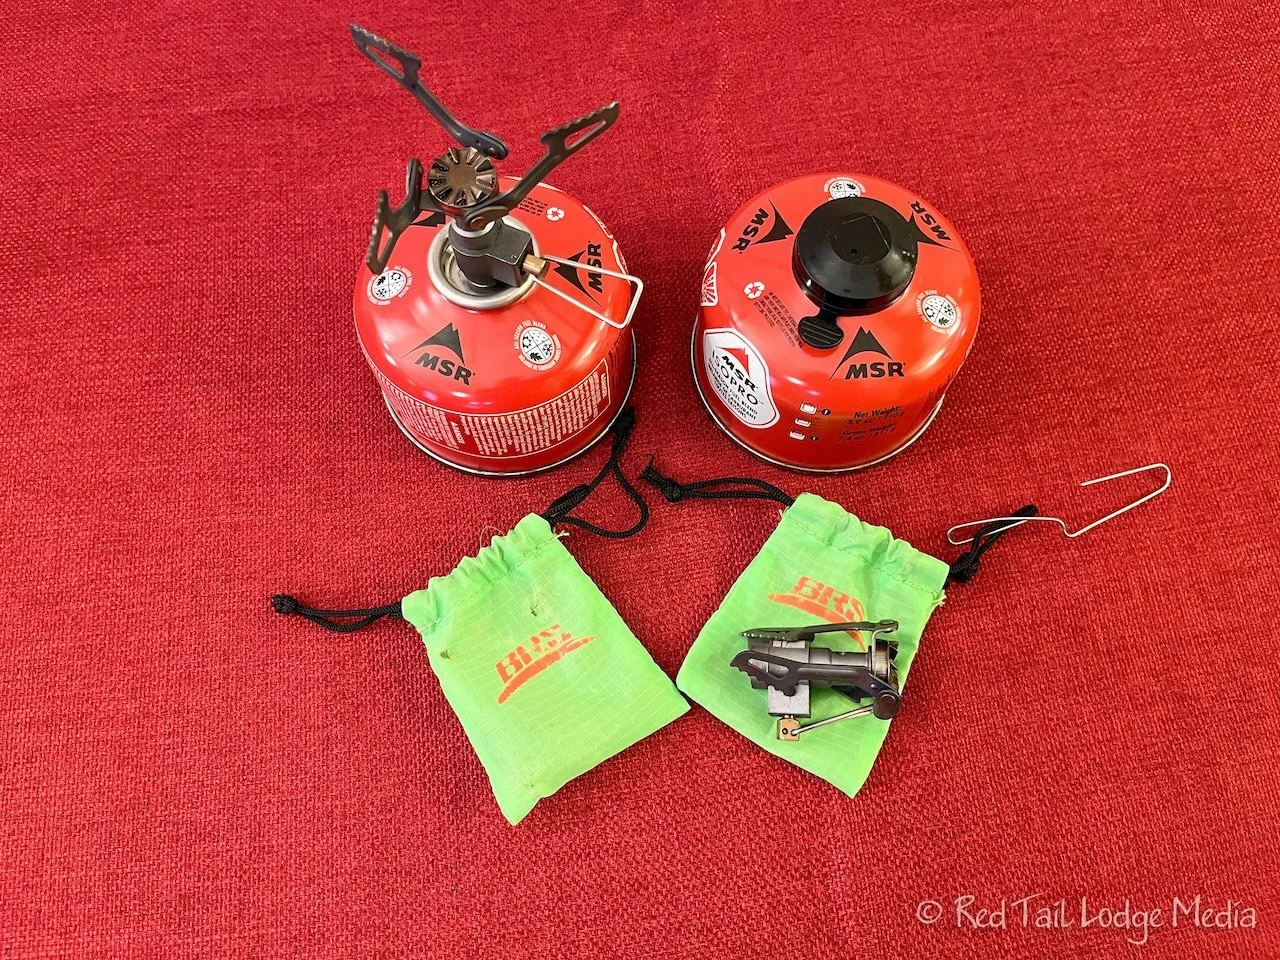
Backpacking 6: Backpacking Stove and Fuel Canister
Again, small and light is the goal for backpacking gear. Our stoves definitely fit that goal. We don’t think you can get any smaller than the BRS Portable Folding Ultralight Camping Stove (paid link). We’ve used them on all three of our backpacking trips. The stove screws directly onto a 4 oz fuel canister, such as an MSR Isopro all-season fuel blend.
Backpacking 7: Small Butane Lighter
Although you could use sparks or wooden matches to light the backpacking stove, we found a small butane lighter works pretty well. Before you start your trip, make sure it works and has plenty of fuel left. Or bring a backup.
Backpacking 8: Backpacking Pot, Cup, and Utensil
For cooking food and hot drinks, we use TOAKS titanium pots and cups. There are lightweight, but expensive. We have four different sizes between the two of us (not quite sure why). The two larger ones (1100 ml and 900 ml - paid links) are used for cooking our food. The smaller ones (550 ml and 450 ml - paid links) are used for heating up drinks. We each cook our own food and drinks. We eat and drink directly from the pots, using a bandana as a hot pad to keep from burning our hands. The only utensil we use is a long handled titanium or aluminum spork such as a Valtcan (paid link) or Sea to Summit (paid link). The spork is used to stir our food and to eat with.
Backpacking 9: Two Bandanas
We each have our own pair of bandanas. One for drying dishes and another one for wiping down our bodies at the end of the day.
Backpacking 10: Hot Drinks
We use single packets of instant coffee and hot chocolate along with tea bags. Then all we need to do is add hot water that we’ve heated up on our backpacking stoves.
Backpacking 11: Dinner Food
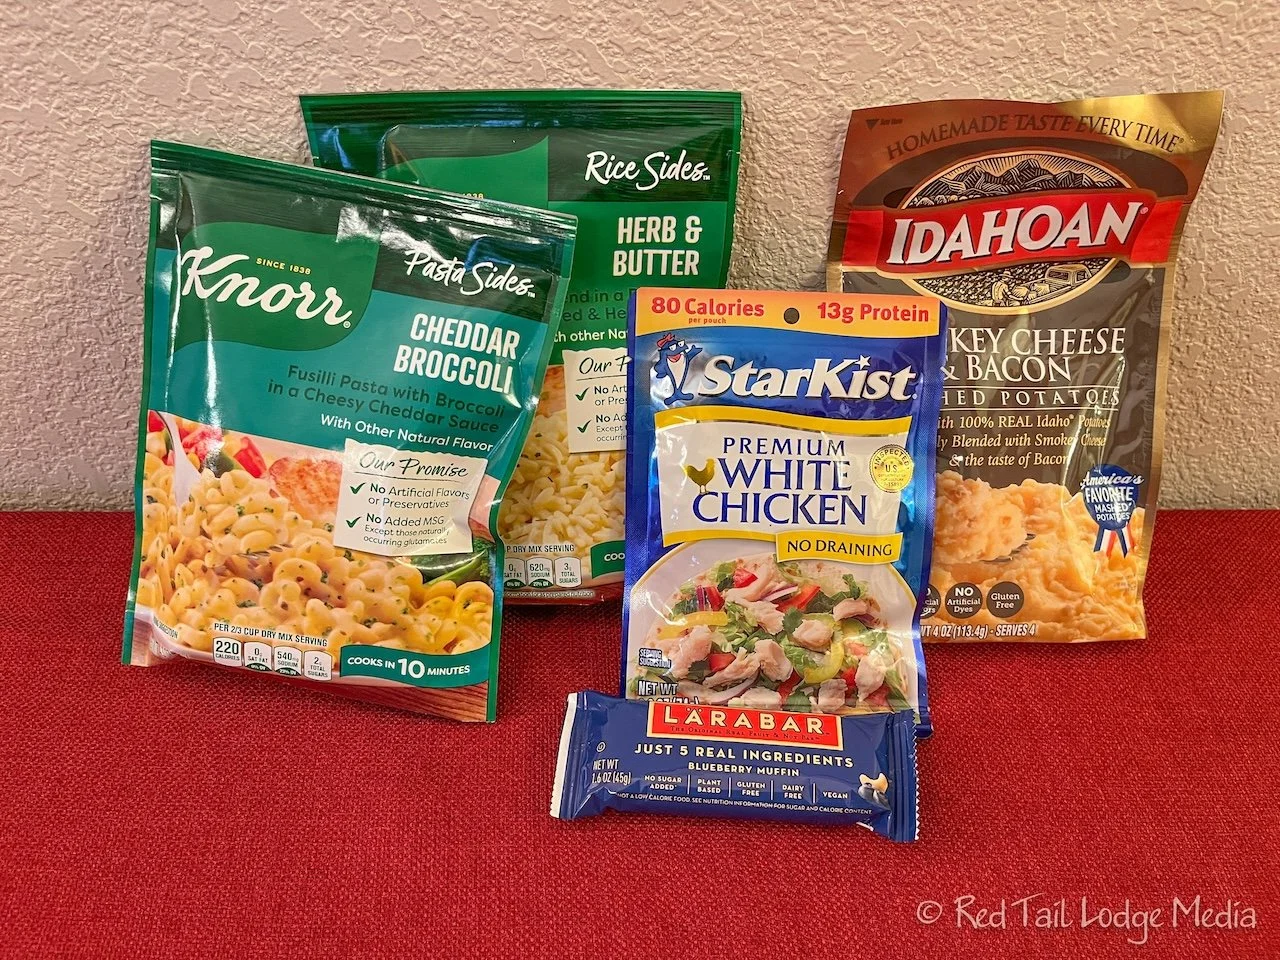
We bring along enough dinner meals for the number of planned nights on trail plus one. We don’t use expensive backpacking meals. Instead we use a combination of flavored Knorr pasta or rice flavored side dish packets or Idahoan flavored packets along with pouches of chicken or tuna, Most of the side dishes just require cooking in boiling water for a few minutes. For dessert, we bring along Lärabar fruit and nut bars.
Backpacking 12: Breakfast Food
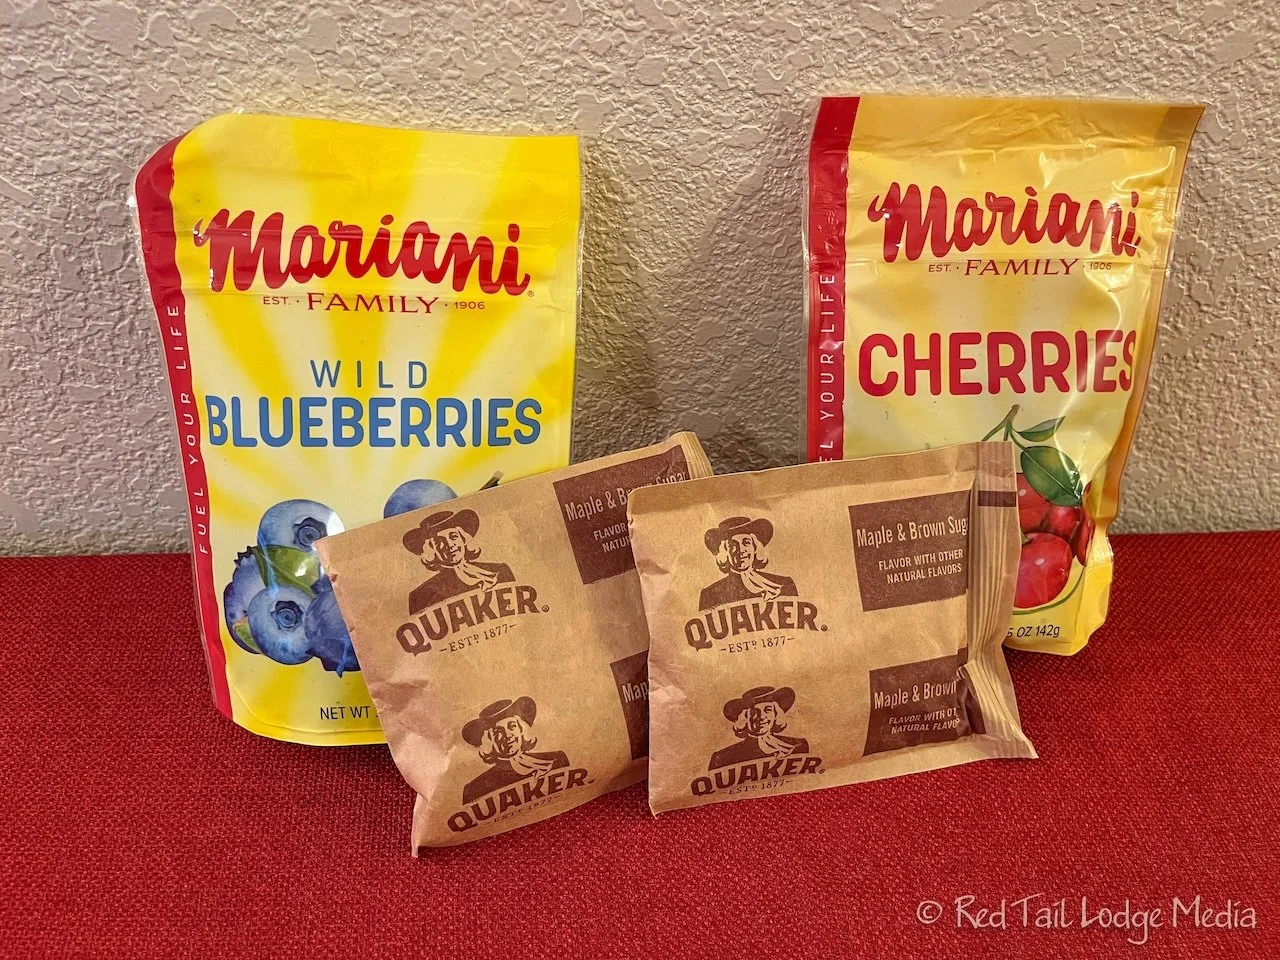
When we are not backpacking, Keith normally doesn’t eat breakfast and Ann usually has cold breakfasts consisting of yogurt, granola, and fresh berries. But when we are backpacking, we both like a hot breakfast. We keep it simple with packets of instant oatmeal along with dried fruit, such as blueberries and cherries. Again, we bring along enough for the number of breakfasts on the trail plus one.
Backpacking 13: Bear Bag
Food and other odiferous items should never be stored in or near your tent, as they attract critters, including bears. We store all our food and smelly items (such as toothpaste) in a bear bag (paid link). In addition, we sometimes line the bear bag with a plastic bag designed to seal the odors in (OPSAK - paid link). Not only does a bear bag protect your food against bears, it also protects it against other pesky animals like mice and squirrels. Some people prefer bear canisters instead of bear bags as they are more “bear proof”, but they are heavy and bulkier. A friend of ours likes the added benefit of a bear canister as something to sit on. We also bring along a rope and a small rock bag which allows us to hang the bear bag from a tree, out of reach of most critters.
Backpacking 14: Toothbrush and Toothpaste
Another comfort item. We use small, compact brushes along with a sample size of toothpaste.
Backpacking 15: Hair Brush and/or Comb
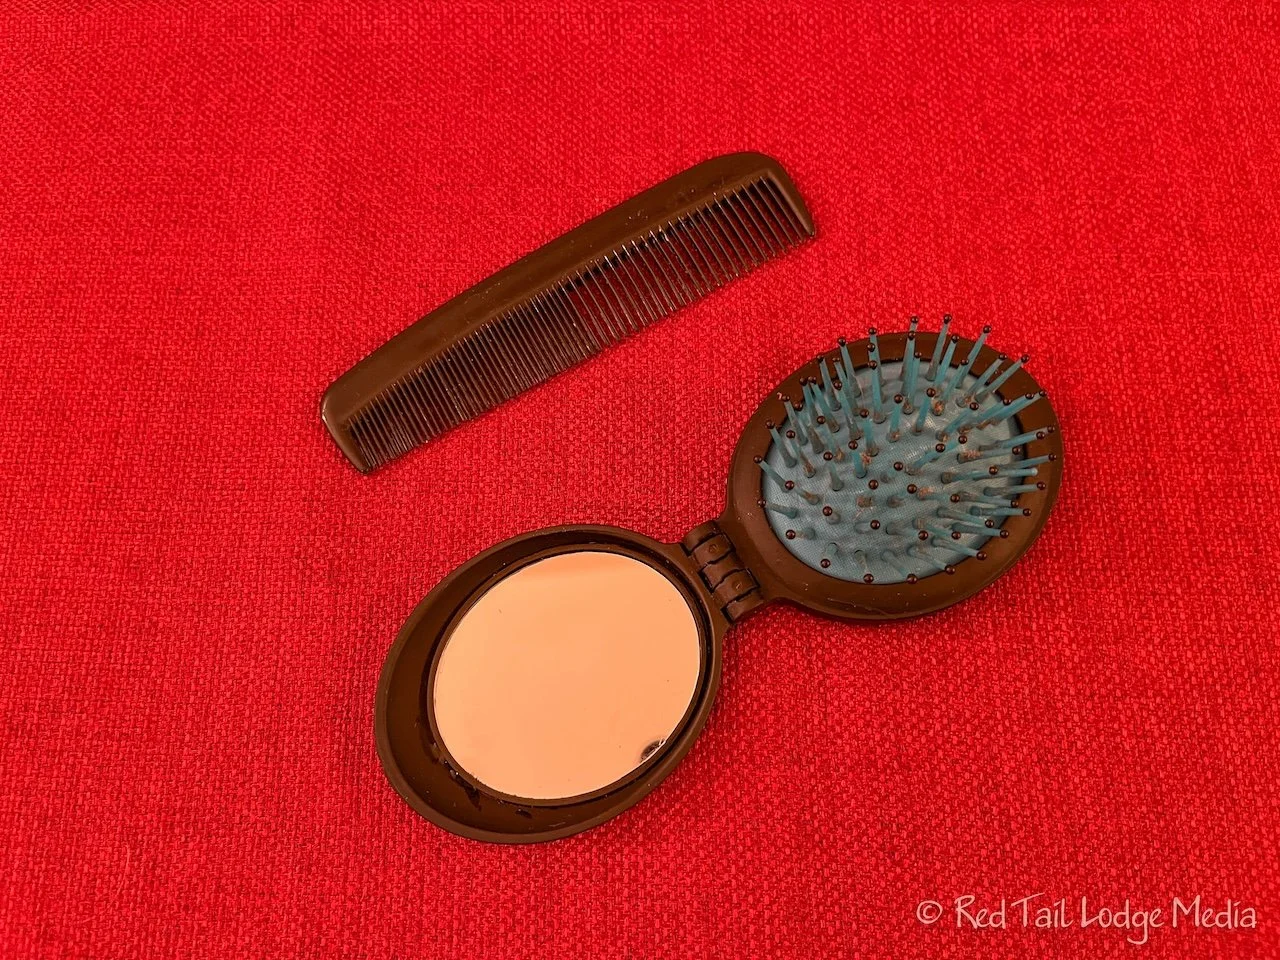
Keith carries a small comb while Ann carries a small hair brush. Being able to brush out the tangles every morning makes us feel better. Again, travel size, small and light.
Backpacking 16: Battery Bank
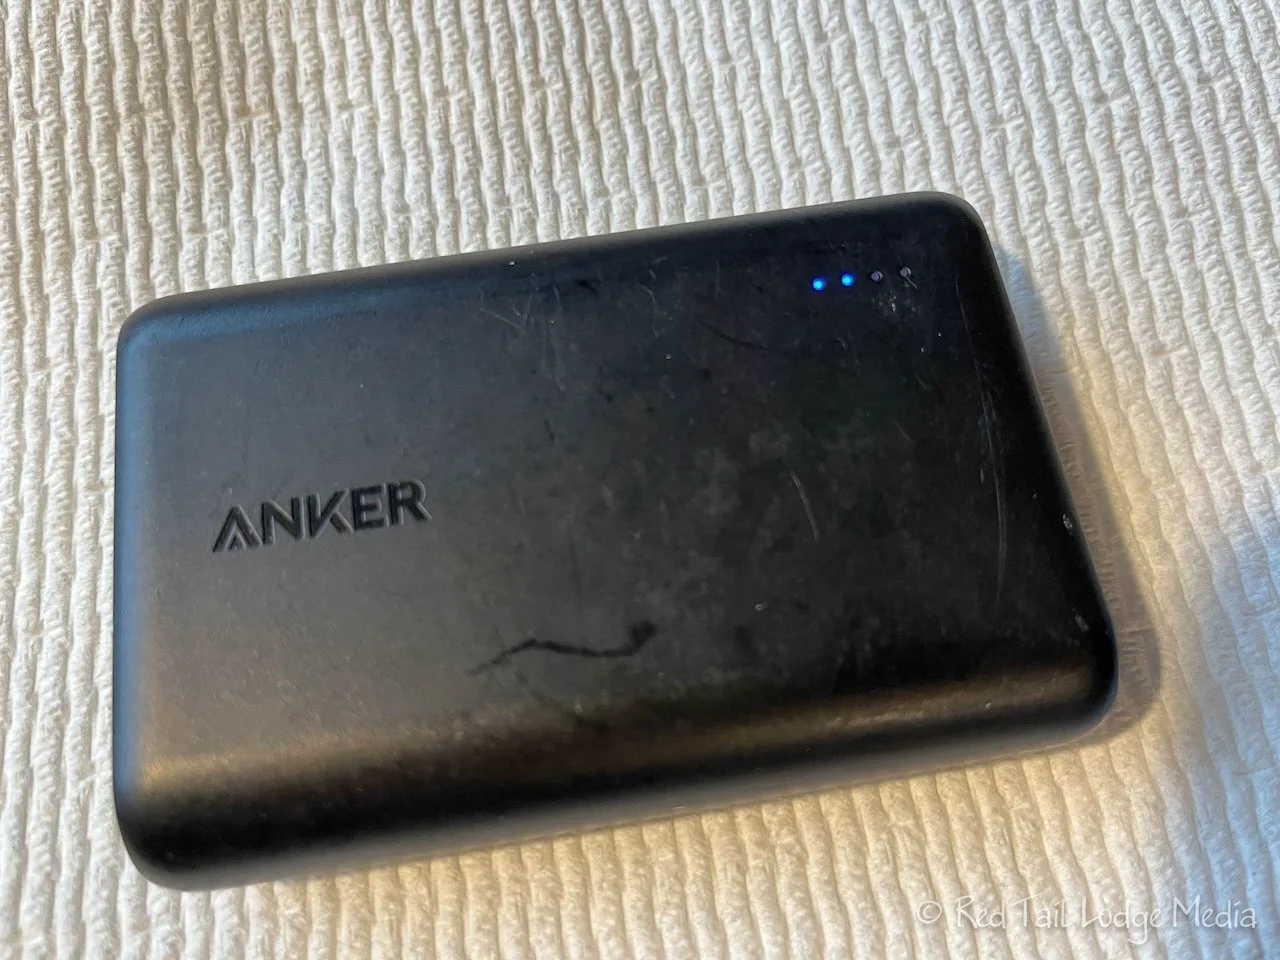
No, not a large lithium power bank like we have in our RV. It’s just a small backup battery that we can use to recharge our phones (Anker Powercore 10000 - paid link). Since we rely on our phones for navigation, keeping them charged is important. For Ann’s cameras and our headlamps, we just bring spare batteries with us. The Garmin InReach has a pretty long battery life, so we haven’t needed to recharge them during our three to five day backpacking trips.
Backpacking 17: Waterproof Liner
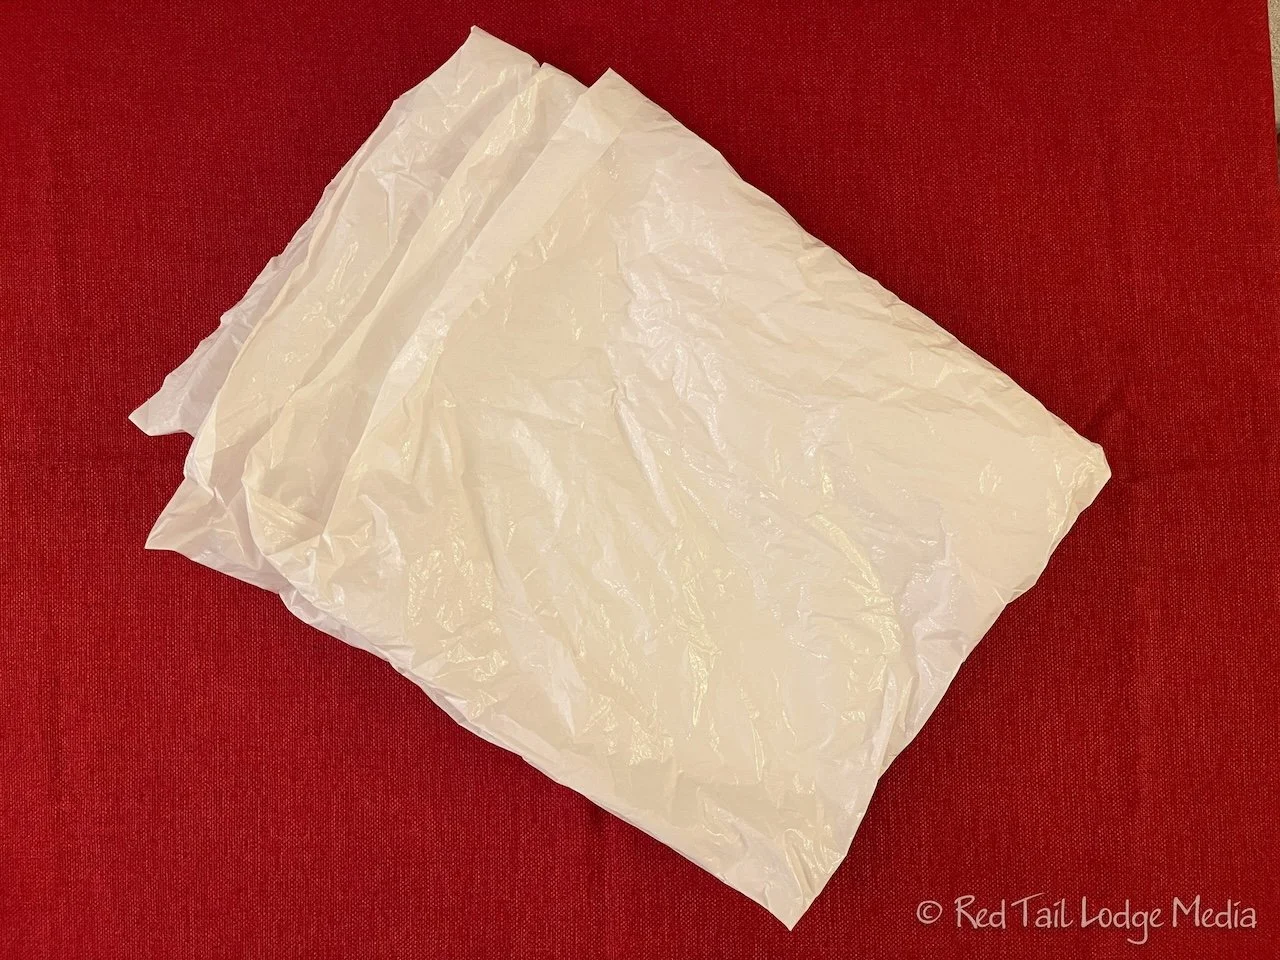
Keeping your clothing and sleeping bags dry inside your backpack is important. No backpack is waterproof, even with a backpack cover. Using a waterproof liner is the solution. There are waterproof pack liners that you can buy, but we just use trash compactor bags. They are cheaper, but, unfortunately, you usually cannot buy just one of them.
Backpacking 18: Alcohol Wipes
Deodorant is one of those items that has a scent that may attract animals. Some people claim you shouldn’t wear deodorant while backpacking. Ann is allergic to antiperspirant, so she generally only uses isopropyl alcohol as a deodorant to begin with. Normally she uses a small spray bottle of alcohol, but didn’t want to carry that while backpacking. So instead, she brings along packets of alcohol wipes. In addition to being used as deodorant, they can also be used to clean out wounds.
Backpacking 19: Petroleum Jelly and Zinc Oxide
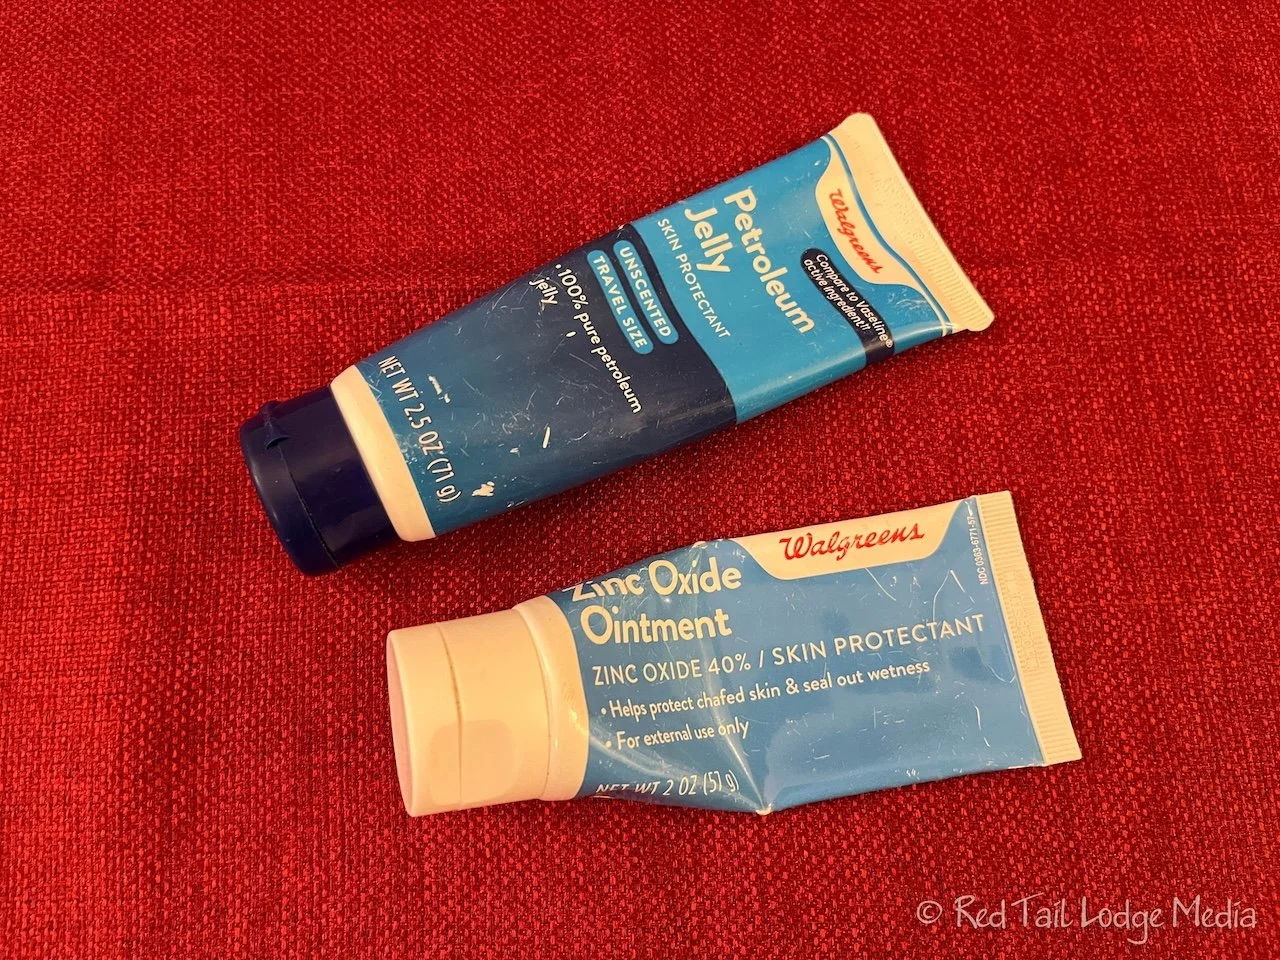
When hiking for long periods of time, things can rub and irritate your skin. On our first backpacking trip, Ann’s hiking pants rubbed her inner thighs and caused a painful rash. She’s found that petroleum jelly is great at reducing friction and preventing issues while zinc oxide heals sore spots quickly. Now she makes sure she always travels and backpacks with tubes of petroleum jelly and zinc oxide. Pain is no fun.
Backpacking 20: Stadium Chairs
This is a pure luxury item. We only carried our Crazy Creek stadium chairs (paid link) on our last backpacking trip. Many times, when backpacking, there is no comfortable place to sit. The stadium chairs provide nice back support while sitting on the ground. They easily clipped onto the outside of our packs, so they didn’t take up space inside and they don’t weigh an awful lot. The added comfort at camp was worth the extra weight for us.
Backpacking 21: Sport Sandals
Sport sandals are another luxury item. On our last backpacking trip, Ann decided to bring along her Tevas. We had a water crossing on the first day of our three day trip and temperatures were expected to get close to freezing at night. Ann didn’t want to get her hiking boots wet on the water crossing, nor does she like to walk across a creek barefoot. Changing into sport sandals for the water crossing sounded better to her. She also appreciated having the sandals at camp, where she could change out of her hiking boots and let her feet breathe and her socks air out.
Backpacks
There may only be ten essentials, but we carry a lot more than ten items on us. What do we carry all that gear in? Well, we have three different backpacks, depending on our needs.
We each have a small 22 liter backpack (REI Flash 22) that we use for short hikes or just strolling around town. The pack is lightweight, but doesn’t have much padding. As long as we don’t need to carry much weight, we’ll use these. It is comfortable when carrying one liter of water, but we’ll move up to a larger pack if we think we need to carry two liters of water or more. Depending on the hike, we may not take all of the ten essentials with us.
Our mid-size backpack is for longer day hikes (Osprey Sirrus 24 and Osprey Stratos 24 - paid links). It doesn’t have much more capacity than our smaller packs, as it is only 24 liters, but it has more padding and a thicker waist belt. It allows us to carry more weight more comfortably. These are the packs that we store most of our ten essentials in, so we don’t have to gather them up every time we want to hike. We just need to add the appropriate food, clothing, and water to our packs and we’re ready to go.
For backpacking, we use our largest backpacks. Keiths has a 50 liter pack (Osprey Atmos AG 50 - paid link) while Ann’s pack is 55 liters (Gregory Maven 55 - paid link). As you can probably tell from the long list of extra items that we take with us when backpacking, the extra capacity is definitely needed. Since we don’t backpack very often, we rely on our checklists to make sure we don’t forget anything.
Conclusion
Hopefully our list of gear has helped you, either in understanding what the ten essentials are and why, or in giving you ideas on what to pack for your next hike. Gear is always a balance between how much weight you can or want to carry versus the risk of what can go wrong or what items you need to be comfortable while on trail. Make sure you understand the risks. A friend of ours, an experienced backpacker, was recently airlifted out of the mountains during a backpacking trip. He wasn’t doing anything dangerous, he just moved wrong and hurt his back. Things happen. Be prepared. Everyone has different priorities and needs, so everyone’s gear list is going to be different. It may take some time and experimenting, but you will figure out what works best for you.
(Ann)


