
Our EKKO Purchase Process
Purchasing an RV is a lot more involved than buying a car, at least it was for us. We are sharing the whole process we went through, from finding our rig, to putting it away in storage, and everything else in between. We included all the bumps we encountered along the way in the hopes that you may have a smoother ride. Every purchase experience is different. This is just the process we went through. Your mileage may vary.

Step One: Ordering an EKKO
Our process started in January of 2022. The Winnebago EKKO caught our eye quite a while before that, even before James and Stephanie’s Number One left the factory (from FitRV). We decided that the EKKO was the perfect fit for us and it was time to switch rigs. We found a local dealer and went for a test drive. A week later, we were placing our order for one. Even though the price in our purchase agreement was subject to change, our several thousand dollar deposit was refundable if we decided to back out. Not all RV purchase agreements are the same. Some lock in the price. Others may require a non-refundable deposit. Make sure you know what you are signing and weigh the risks.
Our hope was that it would be ready for us by fall, after we returned from Alaska, so we could have the EKKO ready to travel for Season Five in 2023. At the time we placed our order, it looked like delivery may be in August or September of 2022, before we got back. Our dealer assured us that if the EKKO arrived before we returned, they would hang on to it for us. Cool!
During our travels, we toured the Winnebago factory in Forest City, Iowa in April (Winnebago Factory Tours). We did not see a single EKKO on the factory floor. We knew that there had been some recall issues and some Ford chassis supply issues, but we felt we had plenty of time for those to be resolved and still receive our EKKO by the end of the year.
Then we waited. And waited. And waited some more. In about the August or September timeframe, our dealer was telling us that our order may not arrive until March or April of 2023. Uh oh! Our Season Five plans had us leaving town on March 1st, 2023. Our visions of what it would be like to switch rigs once we were on the road looked like a nightmare. We needed to figure out an alternative.
Step Two: Finding an Available EKKO
Switching to a different model of RV was not an option. We have not seen anything we like better than the camper van we currently had and the EKKO. Renting an EKKO was probably not an option either, as the model was too new to have inventory in the rental market, plus it would more than likely be too expensive to rent for seven to eight months.
Finding someone who wanted to sell their EKKO or a dealer who had an EKKO from a canceled order or purchase that fell through seemed like the only viable options, but we knew it would be difficult to find. Due to the popularity of the EKKO, we also knew any available EKKOs would go fast.
We are members of the Winnebago EKKO Owners and Wannabes Facebook group. A few people posted to the group that their EKKO’s were for sale. They did not have the ideal options that we were looking for, so by the time we debated and responded, the units were already taken. Then Keith found a Facebook group for EKKO buyers and sellers. We decided ahead of time what options we could live with or without and what options were deal breakers. That way we could pounce fast when a unit became available. A dealer posted an EKKO from a canceled order which had options we were willing to accept. We jumped on it.
Through Facebook, we contacted the person who posted the available EKKO. They gave us the phone number and name of the sales person at La Mesa RV Sales in West Sacramento, California. We were ready to put a deposit down for the rig and knew we needed to move fast, but we also wanted to be sure this was a legit transaction before handing over any money. First we did a Google search on the sales person. A LinkedIn profile popped up indicating they were a sales person at La Mesa. So far so good. Instead of calling the phone number that was given to us, we went to La Mesa’s website and called their main sales number. We asked for the sales person by name. They promptly transferred our call to the sales person. OK, now we felt comfortable that we were indeed dealing with La Mesa.
To complicate matters, we were not home yet from Season Four, but still three days away, at Custer State Park in Wyoming. We found a parking lot in town with a good cell signal where we made our phone calls and exchanged emails to complete securing the deal. We did not have a printer or scanner with us, but Keith’s iPad came in handy. Using the Markup App on the iPad allowed us to fill out the required PDF forms, save them, and send them back in emails. The Apple Pencil also made it easy to sign the appropriate paper work. Within an hour and a half of the original Facebook post, we had all the necessary paperwork turned in and the deposit paid, at the end of the day on a Thursday.
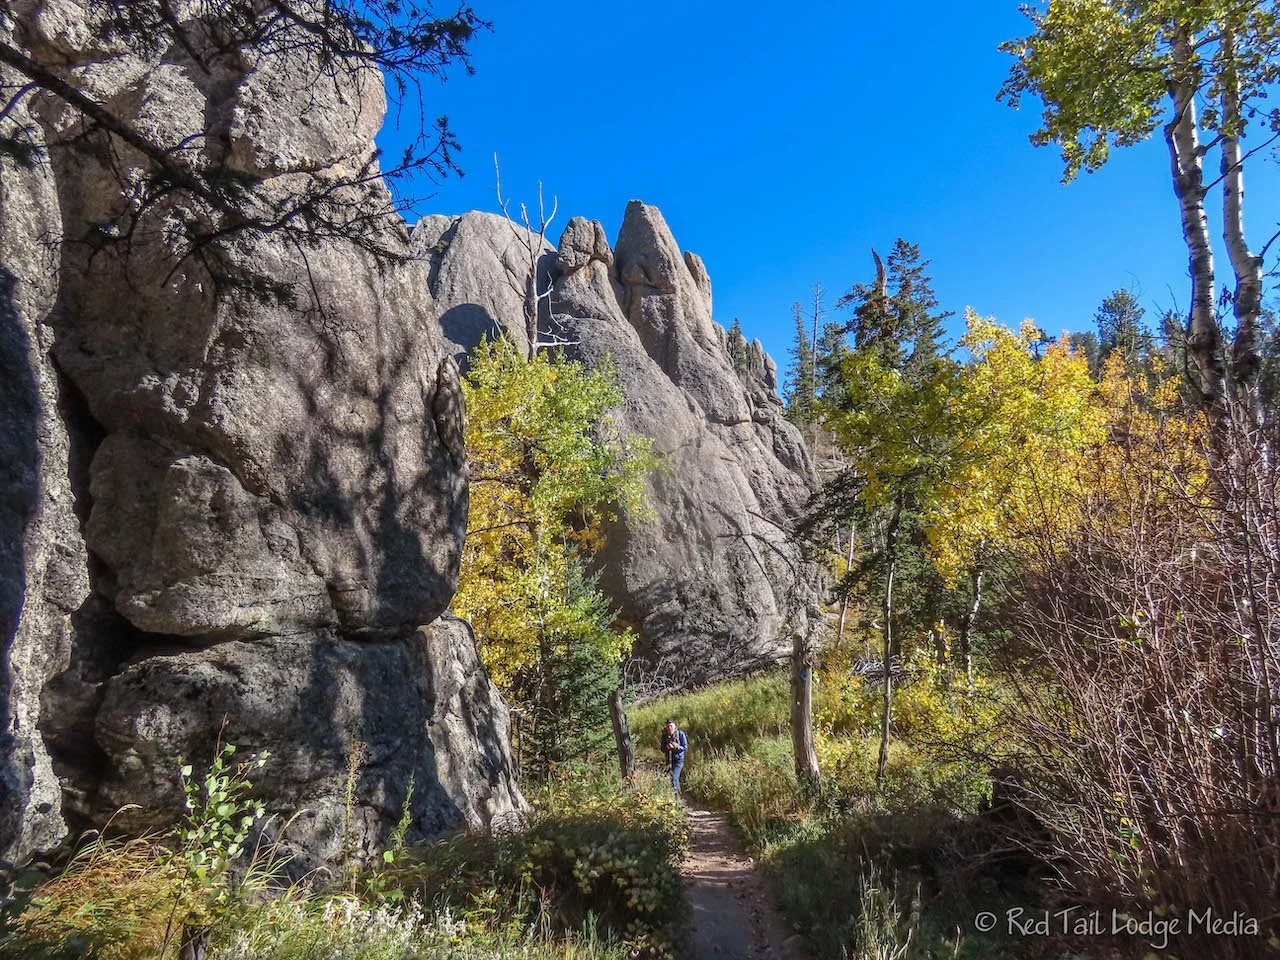
La Mesa wanted us to pick up the EKKO and complete the purchase within a couple of days. After explaining our situation to them, they allowed us to arrange for pick up eight days later, the following Friday. Thank goodness, because looking back on what needed to happen by then, we’re not sure we could have gotten it all done in less time. Somehow we managed to enjoy some time at Scotts Bluff in Nebraska on our way home, but the whirlwind of activity in preparation for our EKKO pick up had already begun.
Step Three: Arranging Finances
We already had the funds available for the purchase, so we thought rounding everything up would be easy. Of course, that was not the case. The money was spread out across a few different financial institutions, so we needed to sell some investments and transfer all the cash into one account in order to get a cashiers check written for the EKKO purchase. We already had our checking account linked to the other financial institutions, but the issue we ran into was a limit on how much money could be transferred per day. And nothing seems to happen on weekends at financial institutions. We transferred what we could on Friday, then ordered more transfers for Monday and Tuesday. We needed the funds in our checking account by Wednesday morning so we could get a cashiers check issued on our way out of town. In order for us to be at La Mesa on Friday morning, we needed to leave Wednesday morning, as it was a two day drive to get there.
On Monday, we met with our bank to see what other options we had. We were concerned that not all the funds would clear by Wednesday morning. We tried to set up a line of credit to cover the potential missing amount, but we couldn’t get that processed in time. The other option was to get the cashiers check from an associated branch in Sacremento. Our pick up was scheduled Friday morning before the banks opened, but we were hoping La Mesa would be willing to delay a couple of hours for us to get the funds. So that was our back up plan. Fortunately, the funds cleared in time and we had the cashiers check in our hands Wednesday morning, no back up plan needed. Whew!

Step Four: Insurance
We needed proof of insurance in order to complete the purchase of the RV plus, for our own purposes, we wanted to make sure we were covered on our drive back from California. This process went pretty smoothly. We were able to arrange the insurance with our agent over the phone and have soft copies of our insurance cards before we left for California. Unfortunately, our printer was not working, so we could not print the proof of insurance before we left.

Step Five: Preparing for the Trip to Pick Up Our EKKO
As we said before, we were not home yet when we secured the sale. We arrived home on Sunday. We would leave again on Wednesday morning for California. That gave us less than three days to prepare. Our plan was to drive out to California in two days in our camper van, so we reserved a campsite at about the midpoint, at Wendover KOA in Nevada. La Mesa agreed to let us camp in their parking lot Thursday night. This seems to be a pretty common practice among RV dealers for people picking up rigs or getting RV service done. Even so, you should always get permission first. Even though we had La Mesa’s blessing, we weren’t sure what the local ordinances and laws were, so we planned to stay as stealth as possible to reduce the risk of the police knocking on our door in the middle of the night.
After partially unloading our van on Sunday, we cleaned it up and did laundry. Then we started reloading the van with what we would need for the trip to California. Our plan was to sleep in the EKKO on the way back as our shake down trip. That meant we needed to get some items to make that happen. The most important item was bedding. Our van had a queen sized mattress, but the EKKO has two twin beds. So we purchased two sets of twin sheets and comforters. Other items that we purchased were a surge protector (paid link), a TPMS system (paid link), and a small hand-held vacuum cleaner (paid link). We did not have a surge protector for our van because we couldn’t find one for a 20 amp connection. Most of the surge protectors out there, such as the Hughes Power Watchdog, are for 30 amp or 50 amp connections. We purchased the TPMS system ahead of time, but we didn’t install it until after we returned home from California. During the trip home, we relied on the tire pressure monitoring built into the Ford Transit. The living space in our van was so small that a hand broom was all we used. Since the EKKO has a much larger living space, a dust buster seemed like a nice convenience.
We also purchased the Americanizer (paid link). This is an attachment designed and sold by James at the FitRV. It makes dumping the toilet cassette into an RV sani-dump easier. It allows the cassette to be attached to a regular RV sewer hose, such as the one that comes with the EKKO for dumping the gray tank. Thanks, James!
We also tried to familiarize ourselves with all of the EKKO’s features and systems before we left home. We downloaded and reviewed the EKKO’s owner’s manual, the Ford Transit owner’s manual, and the Ford Transit quick reference guide. In addition, we downloaded the FordPass app and the Lithionics app to our phones. Lithionics is the brand of the lithium house batteries installed on the EKKO.
To be prepared for our own inspection of the RV when we picked it up, we packed a few items. These included a pen and notebook, a list of questions, a tape measure, a 12V tester (our Bluetooth audio jack from our camper van) , a 120V tester, dot stickers, a thermometer (paid link), a phone charging cable, and a multimeter. But the most important item was the Delivery Checklist that a member of the Winnebago EKKO Owners and Wannabes Facebook group had put together.
There were several items that we waited to purchase until we were in California. They were RV toilet paper, chemicals for the toilet, and rubber gloves for dumping the toilet cassette. We didn’t have a real toilet in our van, just an emergency camping toilet, so we never had to purchase these items for an RV toilet before. RV toilet paper is essential, as regular toilet paper does not break down as easily, which can cause problems in an RV.
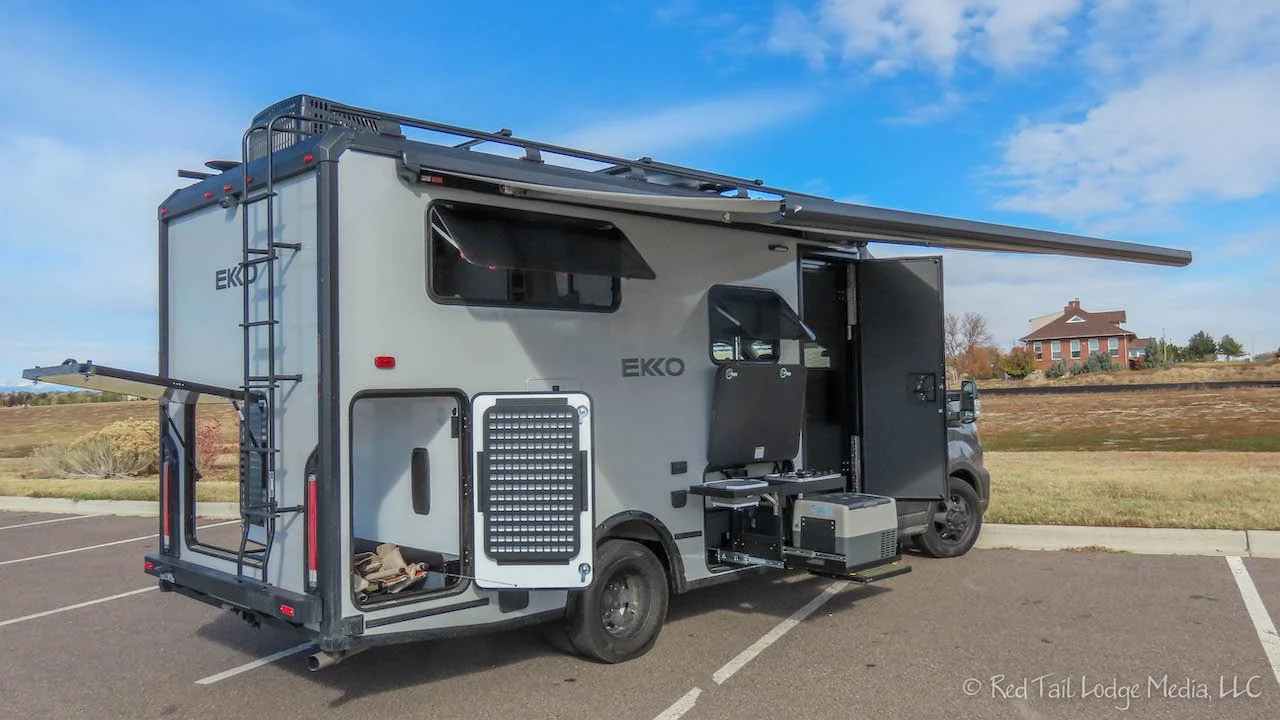
We arrived at La Mesa on Thursday before the dealership closed. They allowed us to come in and take a sneak peak at our EKKO, but we saved our in depth inspection of our vehicle for our scheduled walk through on Friday morning. It looked like they were still completing their inspection of the rig and had turned on many of the systems to test them, like having the fridge of the exterior kitchen turned on to make sure it cooled down properly.

Step Six: Delivery Checklist
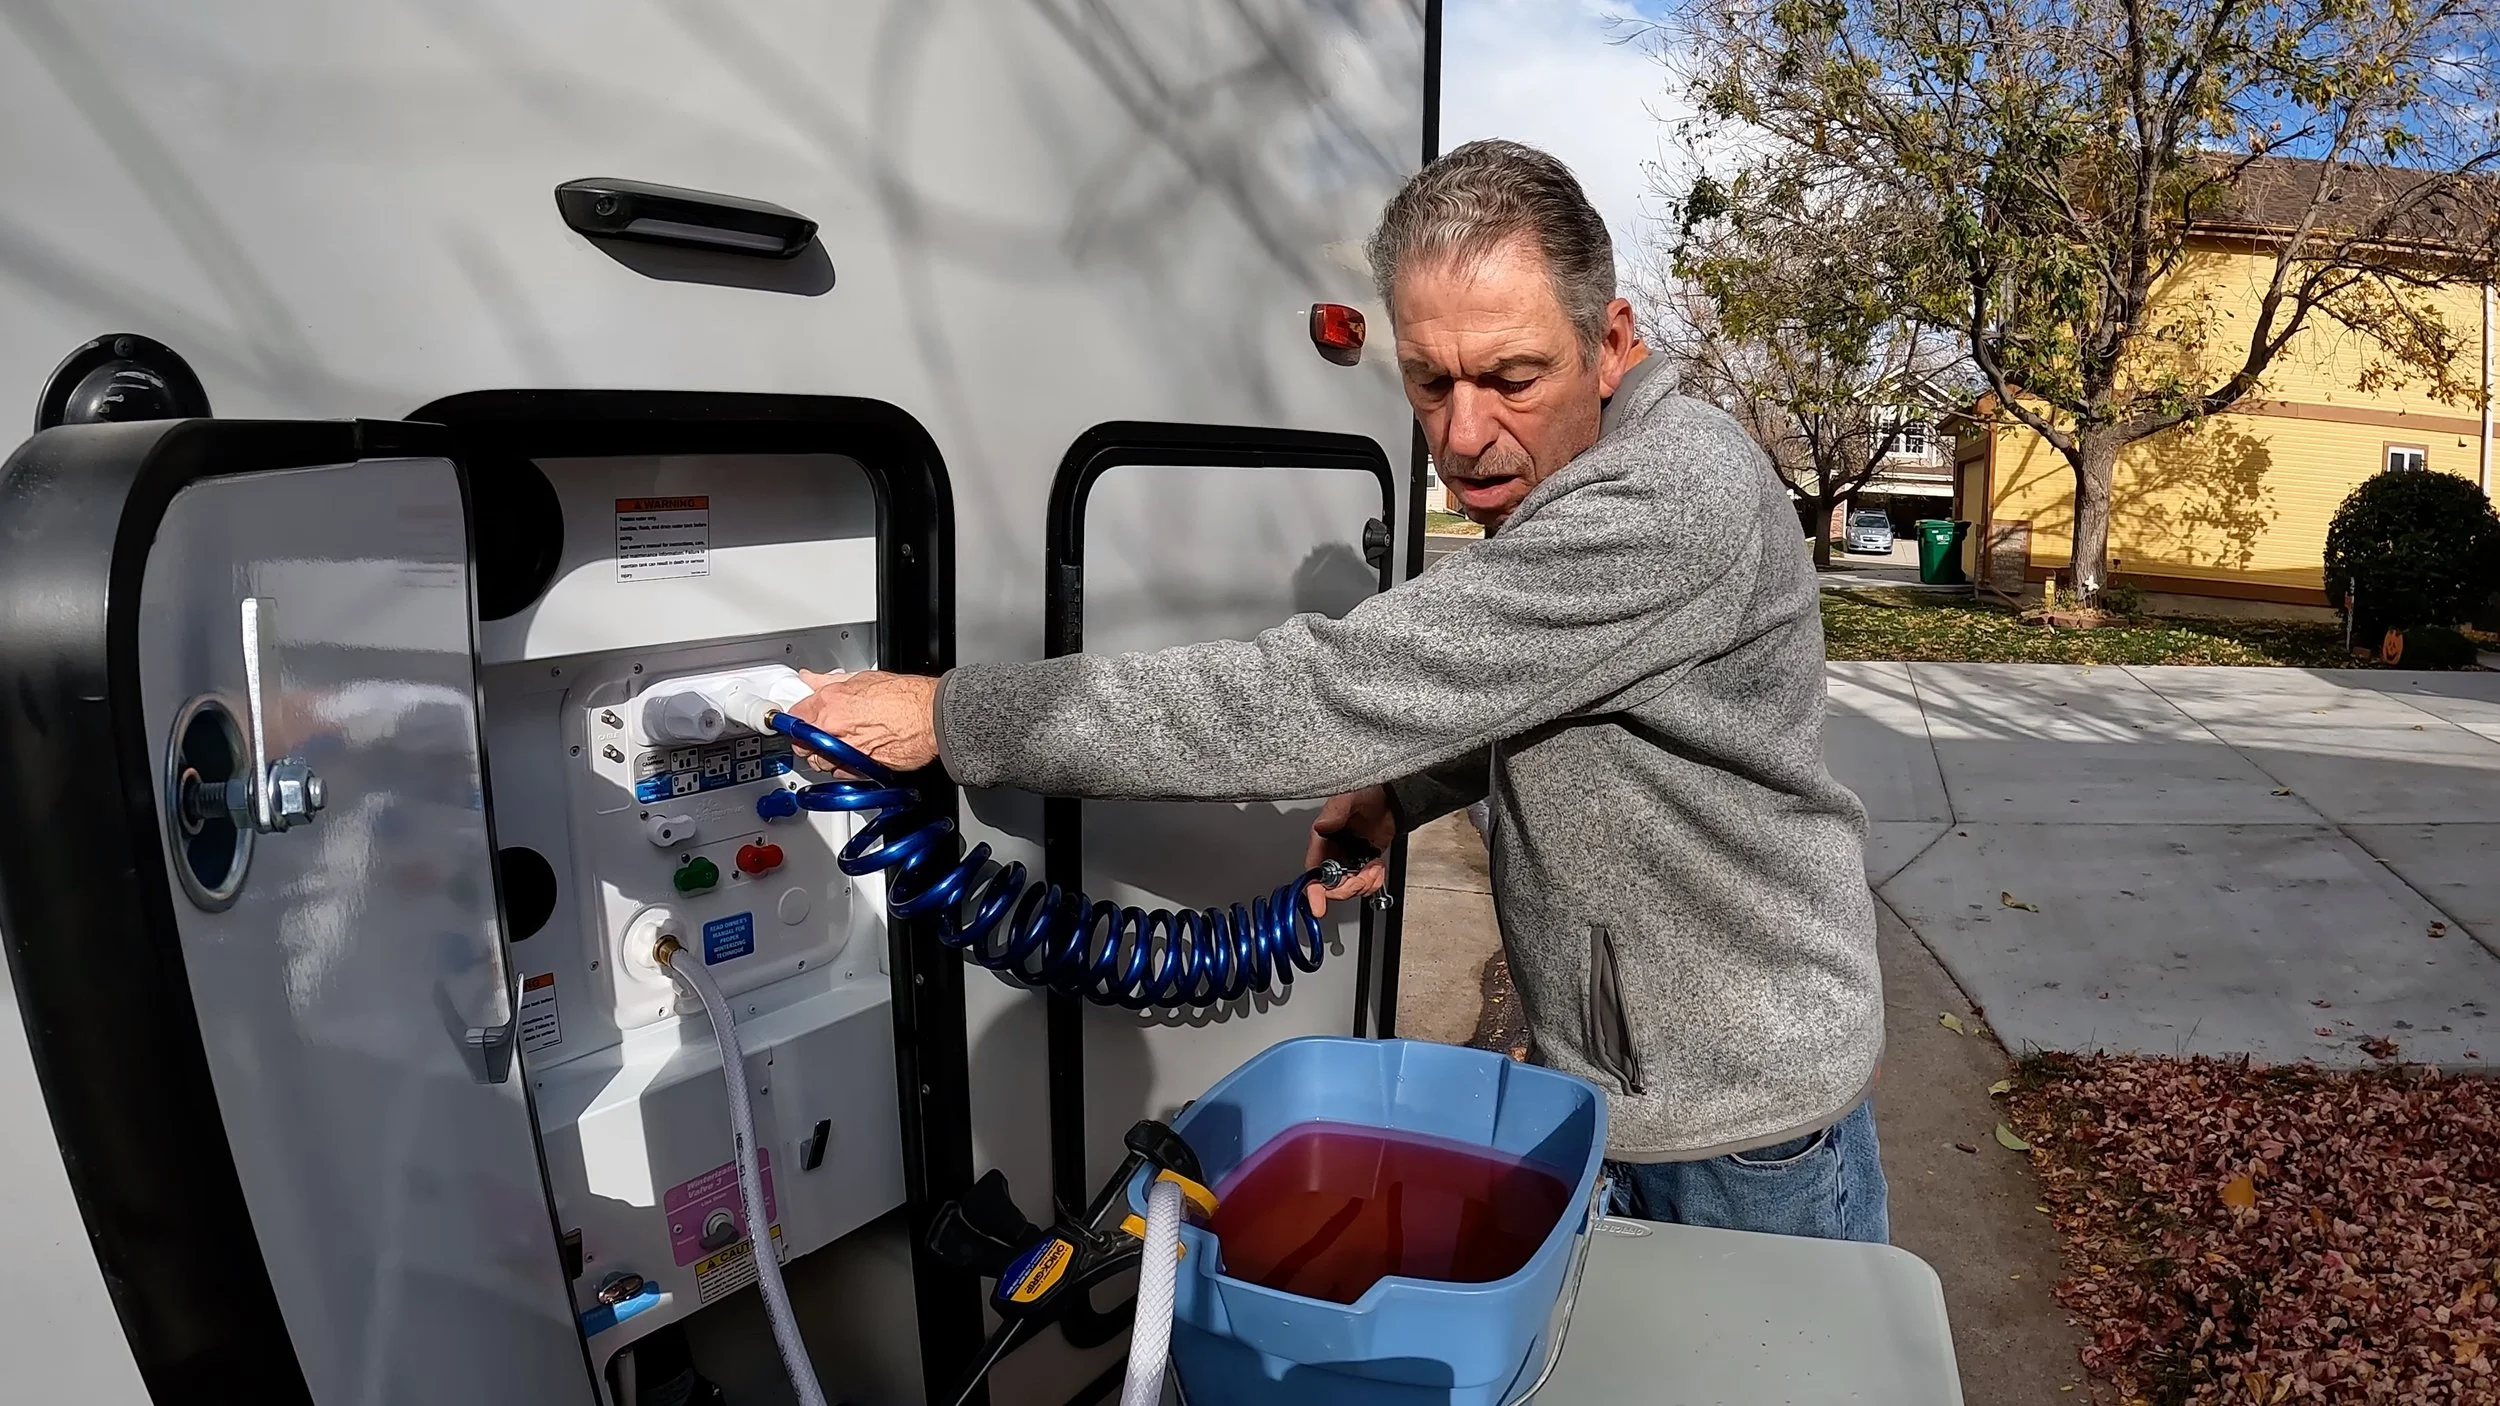
Friday morning, a person took about half an hour to walk through all the systems on our EKKO to make sure we knew how they operated. We had done our homework and knew more details on some items than the person doing the walk through. To be fair, they walk customers through a lot of different rigs and cannot be experts on each one. We had already informed La Mesa that we would be doing our own inspection of the EKKO before completing the purchase and taking possession. After the walk through, they left us alone and did not rush us. They checked back in with us several times to see if there were any issues or if we needed anything. Don’t let a dealer pressure you to cut your inspection short. You have a lot more leverage to get something resolved before you hand over the money than after. We would also recommend scheduling your walk through early in the morning so you have plenty of time for a thorough inspection. Don’t assume the dealer will catch everything during their own inspection.
The Delivery Checklist was invaluable. The initial Winnebago EKKO Delivery Inspection Guide document was created by David Brussin, a member of the Winnebago EKKO Owners and Wannabes Facebook group. Another member of the group, Greg Bond, put the document into a glide app. The glide app allowed us to go through each item in the check list and mark them off as we went. If you use the glide app, please consider making a donation. The popularity of the app has exceeded the free use limitations. Donations can be made from the landing screen when you open it from the email containing the PIN.
It took us about four hours to go through the complete list. La Mesa had filled the gas tank (3/4 full), the propane tanks, and the water tank before we arrived. Both of the lithium batteries were fully charged. Both fridges were turned on and cool. La Mesa also had the EKKO plugged into shore power for us. We previously told La Mesa that we would be camping in the EKKO on the way back home, so we’re not sure if they fill all the tanks for every delivery. If you are planning on using your EKKO on the way home or just want to test all the systems, you’ll want to check with your dealer about how they will prepare your rig for your delivery day.
During our inspection, we found only a few minor issues. The propane quick connect hose was missing for the outdoor kitchen. La Mesa quickly rounded up one. The entry door rubbed the awning when the awning was extended. A technician came over and readjusted the awning. We noticed a cabinet door in the bedroom had some delamination. La Mesa placed an order for a new cabinet door and will ship it to our house. We had trouble working the keys in the exterior compartment locks, but managed to get them to work. They should loosen up over time. In the fridge, some of the shelves had screws securing them in place, but others didn’t. We concluded, along with La Mesa, that these screws were for transport and we should remove them. It didn’t make sense to leave the screws in as they would make it difficult to move the adjustable shelves.
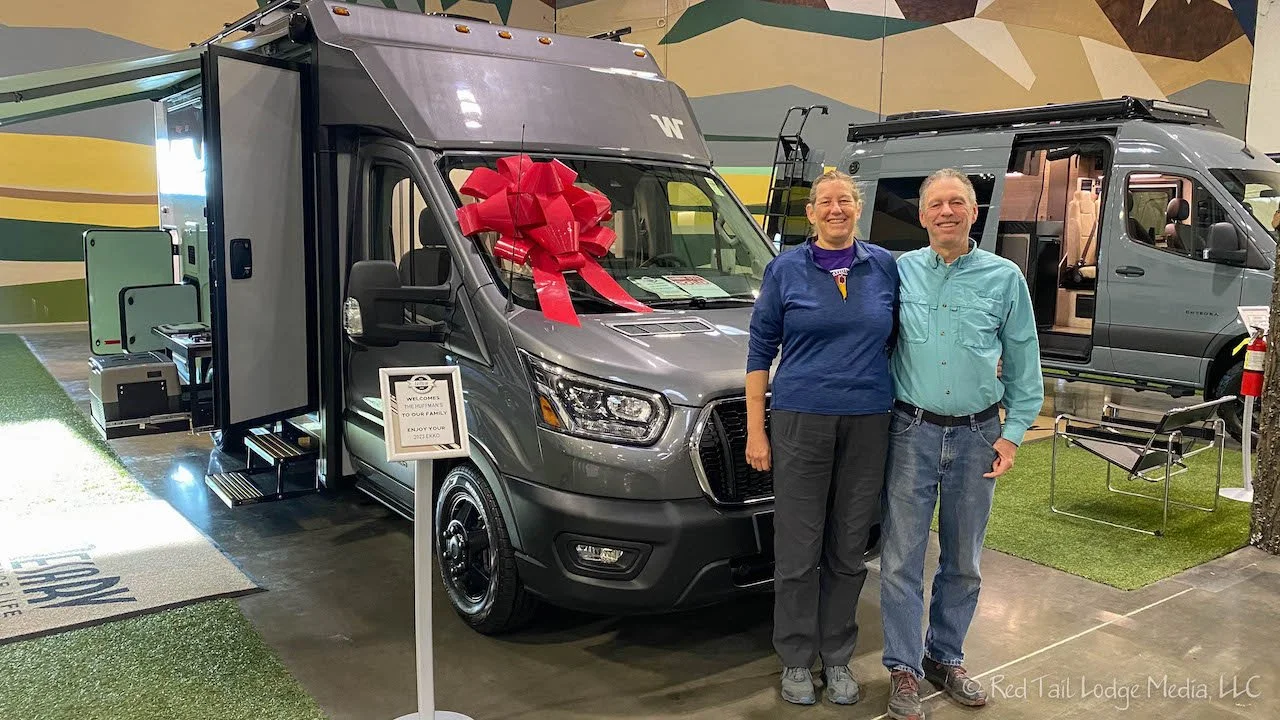
At the end of our inspection and before signing the papers, we had La Mesa pull the EKKO outside so we could test the solar panels and go for a short test drive. Then we were ready to hand the money over and sign all the papers.
Step Seven: Finalizing the Sale
The transaction went pretty smoothly. We were able to send La Mesa a soft copy of the insurance and they printed it for us. Our copies of the documentation that La Mesa gave us included the sales contract, a copy of the Report of Sale, and a Vehicle Transfer and Reassignment Form. In addition, La Mesa gave us a document indicating they will ship us a new bedroom cabinet door. The sales contract included the purchase price along with the amount of sales tax paid to California. The original Report of Sale is affixed to the RV’s windshield which acts like a temporary tag, allowing us to drive it for 90 days which gives us time to drive it back home and apply for registration in Colorado. The Vehicle Transfer and Reassignment Form discloses the mileage of the vehicle when we took possession. RV’s are typically driven, not shipped, from the manufacturer to the dealers, which means a new vehicle can have thousands of miles on it. In our case, it was over 2000 miles. La Mesa considered this a new vehicle and claimed it was not a demo vehicle. Considering the Winnebago factory is 1800 miles away, this made sense to us. La Mesa told us that the title documents would be processed a week later and mailed to us.

Step Eight: Shake Down Trip on Way Back Home
We took our time traveling back home from California, driving for four days and three nights on the road instead of just two days and one night, like on our way to California. This allowed us time to fully test out all the systems and get a good feel for what it is like camping in the rig.
We didn’t go far the first day. We wanted to stay relatively close to La Mesa just in case we found something seriously wrong and could go back Saturday morning to get it resolved. Our stop for the night was in the parking lot of the Thunder Valley Casino in Lincoln, California, just half an hour from La Mesa. This was our first time camping at a casino. We were surprised by how much information the security guard required from us. However, it was a small price to pay for a free and secure camping spot. Being able to park our camper van right next to our EKKO was convenient for transferring the supplies we needed from our van to the RV.
The only down side with the casino was that we did not have any hookups. It was the only time during our trip back that was warm enough for running the air conditioner for an extended period of time, but we didn’t because we couldn’t plug in. However, it did give us the opportunity to open up all the windows in the EKKO and experience how nice the cross ventilation was.
During the four days and three nights, we managed to sleep in the beds, shower, use the toilet (after putting the chemicals in it), cook a meal on the stove cook top, use the bathroom and kitchen sinks, make popcorn in the microwave, run the water heater, inverter, and furnace, and try out quite a few combinations of open and cracked windows with screens and shades. We also put the freezer through the “ice cream test”. Yes, the freezer keeps ice cream frozen solid for at least a couple of days (we consumed all the ice cream by the end of the second day). We dumped the toilet cassette at one of the campgrounds using the Americanizer. The first two nights we ran our electricity from the lithium batteries. On the third night, we plugged into shore power. If you want to see what our shake down trip was like, check out our video: Red Tail Lodge Two.
The only issue we had during the shake down trip was on the second day, the inverter turned off on us. A quick search in the Facebook group revealed how to turn it back on. We needed to access the inverter which, in our rig, is under the dinette bench seat (it is located in the external battery compartment in earlier EKKO models), and push the switch on the actual inverter back on. We could not turn the inverter back on from the control panel near the entry door. The reason the inverter turned off was because the inverter will automatically turn itself off if it detects no power usage for 25 hours. The reason we could not turn it back on via the control panel, was that the power button on the inverter itself was in the “on” or depressed position. In order for the control panel to work properly, the power button on the inverter itself needs to be in the “standby” or up position.
The automatic time out period is a changeable setting. We decided to change the Power Save Time setting from 25 hours to OFF, so that it would not turn off automatically, especially since we believe we had been using power within the last 25 hours, so we’re not sure why the time out tripped. While we were in the settings on the control panel, we noticed that the inverter settings were set to FLD (Flood) instead of LFP (LiFePO4). There is a check for this setting in the Deliver Checklist, but we goofed. We checked the setting on the solar controller, but not the setting on the inverter control panel. Our bad. While we were going through the settings, we also noticed that the LBCO Voltage (setting 02) was 10.5 and the LBCO Recovery Voltage (setting 04) was 13.1, which were different values than what the Facebook posting was claiming Xantrex wanted. However, when we went back in to change them, they were already at the 12.1 and 13.8 values respectively. Our guess is that changing from FLD to LFP automatically changed those values. Perhaps it was the wrong settings that caused the inverter to believe we were not using any power when, in fact, we were. We may try turning the time out back on in the future since the inverter does cause some drain on the batteries if we’re not good about turning it off when we don’t need it.
We also learned that setting 28 should be changed to a value equal to or less than the amperage of the circuit we plug into. It is set to 30 amps, but needs to be lowered if we plug into a 15 or 20 amp circuit, such as when we plug into an outlet at our house. Good to know.
We were driving both vehicles, our camper van and our EKKO, on our trip back. We traded off vehicles, so we could get a good comparison of driving both vehicles. They are both built on Ford Transits, but we both felt that the EKKO handled much better than our camper van. We brought along walkie talkies so we could communicate easily between the two vehicles.
The temperatures were getting colder each day. In the morning of the second day, we ran the water heater in Comfort Mode before turning it off for the drive. We wanted to make sure the water lines and the water heater stayed warm during the drive and did not freeze. Comfort Mode circulates the hot water through the water lines at a higher temperature than when in Eco Mode. The water lines are all in heated compartments, but those compartments are only heated when the furnace is on, not while we are driving down the road. In the morning of the third day, our last driving day, we drained the water heater as an extra precaution to prevent freezing.
Step Nine: Winterization
When we returned home, we unloaded both of our rigs and turned off all the refrigerators. We had a couple of days before temperatures would dip below freezing again, but we didn’t waste a lot of time before winterizing our EKKO (and our camper van). It seems like Winnebago is still working out the details of the EKKO’s winterization procedure. There was an updated procedure on the Winnebago website that was newer than what was in our physical manual that La Mesa had provided us. So we followed the one from the Winnebago website.
Winterization is a procedure done on an RV whenever there is the possibility that the water lines will be exposed to temperatures below freezing. If water in the lines freeze, it will expand and may break the water lines and/or connections. Winterization usually involves filling the water lines with RV antifreeze solution. Winterization may also involve blowing water out of the lines with pressurized air before adding the antifreeze. RV antifreeze is different from automotive antifreeze. RV antifreeze is pink in color and is not poisonous, so it is safe to use for fresh water lines intended to carry drinking water.
In our camper van, we never blew out the lines, but just pumped RV antifreeze through all the water lines. The instructions from Winnebago for the EKKO said that blowing out the lines was optional and adding antifreeze was mandatory, but they recommended doing both. So we did both for our EKKO.
Before we could begin, we needed to purchase a blowout valve. We found one at an Ace Hardware store.
The winterization procedure seemed much more complicated than what we would do for our camper van, but the water system in the EKKO is more complex. For some reason, we had a hard time following the steps, missing a step every now and then. We’re not sure if it was because we were trying to follow a soft copy PDF, where the full page did not fit on our screen and we were constantly scrolling up and down to follow the two columns of information per page. Next time, we may print or write down the steps so we can check them off as we go.
We also had a hard time blowing out the system. Closing the valves did not seem to provide a tight enough seal so that the air compressor could pressurize the system. In the Winnebago EKKO Owners and Wannabes Facebook group, we read others had clamped a drain pipe in order to allow the system to pressurize. We could feel air escaping out of a different drain pipe than the one someone else had an issue with. Instead of trying to clamp it, we taped it close with duct tape. That seemed to do the trick.
Just to give you an idea of all of the steps involved, here is an abbreviated list of steps. WARNING: do not follow this list to winterize your system. Follow the Winnebago EKKO owner’s manual for your rig.
Blowout Procedure:
Level the EKKO.
Set Water Center Panel to “winterization” configuration.
Turn off water pump.
Position the Winterization Valve 3 in the “Water Heater and Line Drain” position and open all waterline drain valves.
Turn off water heater in 2 locations
Empty and clean the water pump strainer filter bowl.
Remove filter canister from the Cold Water Filtration System.
Drain the water heater.
Remove the water inlet filter and clean with clean water.
Set the Water Center Panel to the “blow out” configuration.
Position the Winterization Valve 3 in the “line Drain” position and close all waterline drain valves.
Connect a “blow-out” plug to the city water inlet and connect to an air compressor hose with 30 psi or less.
Blow out exterior shower/wash station at the Water Center Panel.
Blow out lavatory sink.
Blow out lavatory shower.
Blow out toilet.
Blow out galley sink.
Blow out hot and cold lines in the exterior kitchen compartment.
Open all waterline drain valves (except for the cold water supply line for the water heater).
Disconnect the blow out plug.
Turn Winterization Valve 3 to the “Water Heater & Line Drain” position.
Close all waterline and tank drain valves and all faucets.
Close the water heater drain level with the filter installed.
Remove the cold water filter canister, dump the water, and remount the canister.
Antifreeze Fill Procedure:
Set the Water Control Panel to the “winterization” configuration.
Place the Winterization Valve 3 into the “Normal” position.
Attach the antifreeze siphon tube on the Water Center Panel.
Insert the end of the siphon tube into a container with the RV antifreeze solution.
Turn the water pump on.
Open each hot and cold water faucets in the EKKO until antifreeze begins to flow from the faucet (one at a time).
Press the toilet flush button and hold until antifreeze begins to flow.
With the Exterior Kitchen station hose connected, point hose towards the ground and squeeze handle until antifreeze solution begins to flow for hot and cold.
With the exterior shower hose connected, point hose towards the ground and squeeze handle until antifreeze solution begins to flow for hot and cold.
Open each waterline drain valve, one at a time, until antifreeze begins to flow.
Change the Water Center Panel to the “Sanitize” configuration.
Open the freshwater tank drain valve and wait for antifreeze to flow.
Turn Water Pump switch off.
Turn Winterization Valve 3 to the “Water Heater and Line Drain” position.
Disconnect the antifreeze siphon tube.
Make sure the water heater is still off.
Open the latch with your thumb while pulling the Easy Drain Level down as far as it will go.
Remove the water inlet filter and clean with clean water. Leave it out until you are ready to “dewinterize”.
Close the water heater.
Turn Winterization Valve 3 back to the “Normal” position.
Leave the Water Center Panel in the “45 degree” configuration until you are ready to “dewinterize”.
Drain the gray water tank and the toilet cassette at a waste disposal site.
Close the waste tank drain valve and refit the dust cap onto the stage drain outlet.
Empty the cold water filter canister and dump the antifreeze down the galley sink drain and empty the water pump strainer into the galley sink.
Pour 4 cups of antifreeze down the lavatory sink drain.
Pour 4 cups of antifreeze down the shower drain.
Simple, right?
When we started the winterization procedure, we still had quite a bit of fresh water in our tanks, so step 4 of the Blowout Procedure took a while. Since water is precious in Colorado, we didn’t want all that water just running down the gutter of the street, so we put a bucket under the drain. The trees in our yard benefited from the water we emptied from the bucket, which was quite a few times before our fresh tank was empty.
To drain our gray water tank and our toilet cassette (Anti-freeze Fill Procedure step 22), we took our EKKO to the RV Dump Station at our town’s Wastewater Treatment Facility. Our town requires a permit and access card, but the permit is free for residents. Our recommendation is to research where a dump station is located near you before you start to winterize. You can always dump the toilet cassette into a toilet in your house. However, emptying the gray tank may be a little harder to empty at your house.

Step Ten: Title and Registration
Another item that turned out to be more complicated than we expected was obtaining a Colorado title and registration for our EKKO. Since we had purchased a camper van out-of-state before, we thought we knew the ropes.
About ten to eleven days after the purchase of our EKKO, we received the title documents. The title documents included of the certificate of origin from Ford and the certificate of origin from Winnebago. Winnebago is a vehicle manufacturer. The Ford Transit cutaway chassis is not a complete vehicle, as it cannot be sold directly to the public. That is why there are two certificates of origin, one for the cutaway chassis and one for the rest of the RV.
Since we had to have the VIN verified when we purchased our camper van, we drove our EKKO over to our local Ford dealer and had them fill out a VIN verification form for us. Then we made our first appointment with our local Colorado DMV. Heading into the DMV with our completed VIN verification form, our certificates of origin along with our bill of sale, and our check book, we expected to come out with license plates. What we learned was we were missing two items. The first missing item was a dealer verified MSRP for the completed unit. The second was a certified weight of the RV. The Colorado ownership tax (charged every year) is based on the vehicle’s MSRP. This is unfortunate since RV’s are never sold at MSRP. Traditionally, RV dealers will discount RV’s by 20% or more, depending how well the buyer can negotiate. The Colorado license fee is based on the weight of the RV. The DMV provided us with a list of places that are authorized to perform a certified weighing.
We contacted La Mesa asking them to provide a signed statement of facts for the MSRP. Then we drove our EKKO over to the closest place to get it weighed, a local landscape center. La Mesa sent us a sheet containing our VIN and the MSRP, but it wasn’t signed. We decided to gamble that the DMV would accept the unsigned MSRP and headed back into the DMV a week after our first appointment.
The DMV reluctantly accepted the MSRP, but then they had another issue. Our EKKO had more than 1500 miles on it when we purchased it. Accordingly, Colorado considers that a used vehicle, not a new vehicle. Therefore, we needed to send the certificates of origin back to La Mesa and have them get a California title issued in their name and signed over to us. In addition, the DMV issued us a temporary tag for our EKKO, just to make sure we had time to get everything resolved.
Knowing that RV’s are usually driven instead of transported, this didn’t make much sense to us. That would mean that almost all RV’s could not be sold as new in Colorado. When we got back home, Keith looked up the Colorado rule. It stated that a vehicle with more than 1500 miles of demonstration is considered used. Transporting miles from a manufacture to a dealer doesn’t sound like “demonstration” miles to us, so we made a third appointment with the DMV so we could ask more questions. Of course it was Thursday evening, Friday was a holiday, so our appointment was for Monday.
From our conversation at our third appointment, the DMV was willing to accept proof of the transportation miles instead of a title. Next we contacted La Mesa, explaining what Colorado was requesting. La Mesa immediately sent us a signed MSRP and a Fed Ex shipping label for sending them the certificates of origin. We sent the certificates of origin that afternoon and La Mesa confirmed that they received them the following day. La Mesa applied for a California title in our names that same day. They said to expect the CA DMV to take about ten business days to process the title and send it to us. We’re guessing they had to apply for the title in our names instead of the dealer’s name because the dealer no longer owns the RV.
About a week later, we received a California vehicle registration for the EKKO, but it was a PNO type (Planned Non-Operation). We’re not sure exactly what that is, but assumed that was required by California before issuing a title. The California title showed up at our house about 12 days after La Mesa had applied for it. Time to schedule our fourth appointment with the CO DMV.
The fourth time was the charm. They accepted the California title. We noticed that the DMV clerk calculated the Colorado sales tax on our purchase price and determined it was slightly less than what we were charged in California. We not sure if that means if Colorado’s sales tax was higher, we would have been charged the difference. We also wanted to apply for personalized specialty plates. Luckily, we had brought our RMNP Specialty License Plate Certificate with us from donating money to the Rocky Mountain Conservancy. We thought the DMV was going to issue us non-personalized plates and we would have to apply for the personalized plates separately. However, they did not have any Rocky Mountain National Park plates on hand, so they issued us yet another temporary tag and our personalized specialty plate should arrive in the mail in about a month. The plates arrived in mid-January, about two months after our last DMV visit.
What is the lesson learned here? Purchasing an RV in the same state that you live in would probably be much simpler. At least we would hope so.
Step Eleven: Warranty Items
There were a few items that we did not catch during our delivery. Luckily, they are all minor issues.
First, we discovered why we were having troubles with the keys in the exterior compartment locks. We successfully locked and unlocked all the exterior compartment doors during our inspection. We also successfully locked and unlocked an exterior compartment lock with each of the two keys. However, we did not test both keys in all of the locks, nor did we notice that the two keys were different. It turns out that one of the keys works for all the exterior compartment doors except for the driver side gear garage door. The other key works only with the driver side gear garage door. Ugh!
The microwave door sometimes does not open when the “open” button is pressed. It either needs an adjustment or needs to be replaced.
The driver's side bed platform has a significant upwards bow at the foot of the bed. Therefore the platform does not lie flat to be supported by the cabinet frame beneath.
The lithium battery exterior compartment door does not close flush with the side of the coach so the bottom (latch side) of the door protrudes about ½” away from the surrounding surface. We therefore question the water tightness of this door.
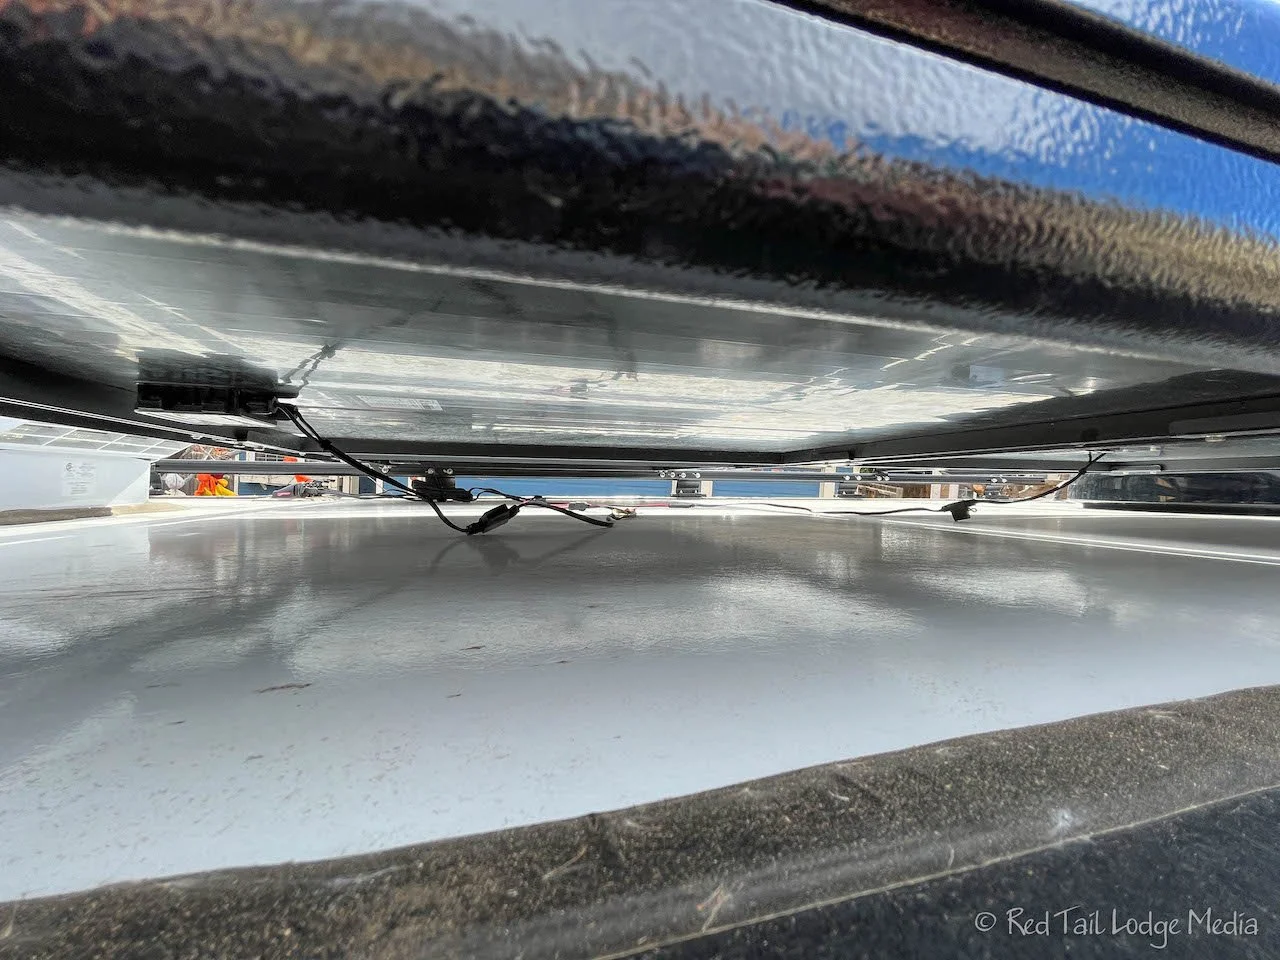
The solar wires on the roof do not seem to be secured very well. We’re not sure if this was by design or some supports are missing.
When we contacted the parts and delivery team at La Mesa to check on the new bedroom cabinet door, we asked whom we should be contacting to resolve these issues. They recommended we contact Winnebago’s Customer Care and they can direct us from there.

Step Twelve: Organization and Mods
While we were waiting to resolve our title and registration issues, we spent a couple of months making some modifications and figuring out how to organize and fit all our gear into the EKKO. We were planning on starting our Season Five travels on March 1, 2023 and we wanted to have the EKKO in good shape and ready for travel as much as possible before putting it into storage for the winter. If you are new to RVing, we would recommend you travel for a while in your RV, learning how you like to camp and what is like, before making any major modifications. Experience in your rig will help you figure out what gear you want to have with you. You may be surprised by what you find annoying, what you can live without, and what ends up on your list of must haves. We’ve been traveling extensively over the past four years, although it was in a camper van, not the EKKO. However, we’re pretty sure what we like and don’t like, and how we like to travel. Plus, our plans for 2023 have us on the road for over seven months, so we want to have things pretty dialed in before we start instead of trying to make major adjustments on the road. We have a spreadsheet listing all the gear we travel with. We test fitted our gear into the EKKO to figure out where everything would go and what types of organization gear we needed. We’ll post details of all of our modifications, new gear, and organization in separate posts. Of course, we are realistic and realize that we will probably make some adjustments along the way. From our experiences, it is a never ending process.

Step Thirteen: Storage
Unfortunately, the EKKO is just a little too long to fit in our driveway. So we need to put it into storage when we are not traveling. We found an RV storage lot not too far from us which had an available spot. It is an outdoor parking spot, but they seem to have pretty good security and good reviews. The facility also offers covered storage, premium covered storage (with electricity and lighting), and indoor storage. The other options are more expensive and there were waiting lists for them. In addition, the prices also vary by the length needed. We don’t know if we’ll switch to another option when they become available, but it is nice to know we wouldn’t have to switch facilities. To give you an idea, the monthly rates for a 25 foot storage spot vary from $57.50 for an outdoor back-in spot to $300 for an indoor storage back-in spot. In order to make sure we did not lose the outdoor storage spot, we started renting it before we left for California. Since we didn’t have the EKKO yet, we had to register the storage spot with our camper van and switched it over to the EKKO after we had it registered in Colorado.

Ready for Season Five
So that was the whole process. We hope you found at least one thing that was helpful for you. The process took a lot longer than we originally expected. We are so thankful that we were able to take possession of an EKKO in the fall. There is no way we would have been able to make that all happen after we started traveling in the spring of 2023 without canceling so many of our plans. Now we feel we are ready for Season Five: Southern States. Bring it on!
Check out our related video: Our EKKO Purchase Process
(Ann)