
Our Camera Accessories

In a previous post (Our Cameras), we described the different cameras that we use. In this post, we'll discuss the assorted accessories that we use with our cameras and why we use them.

Let's start with the accessories for our iPhones. To protect our iPhones from damage in the event of an occasional drop, we keep them in protective cases. Right Buddy (RB) uses an Otterbox Symmetry Series case (paid link). Left Buddy (LB) uses a Casetify Impact Case (paid link). We don't know about you, but RB drops her phone a lot. So far, her iPhone has never been damaged while in the Otterbox case. We just need to keep her away from cliff edges! In addition, RB also uses a PopSocket (paid link). The PopSocket allows her to take pictures and video one-handed without fear of dropping her phone. The PopSocket gives her a longer reach, such as holding the phone high over a fence or stretched out over a cliff edge to get the shot. OK, we don't really keep RB away from cliff edges. For added security, she's attached the PopSocket to her case using 3M VHB tape (paid link).

For shooting video inside and under our van or shooting action video of our customization projects, we use the Zhiyun Smooth 4 Gimbal (paid link) with our iPhones. The gimbal results in smoother video panning along with providing a wider range of camera angles without having to contort our bodies or try to squeeze into tight places. There is a learning curve with this gimbal and RB feels she still has a lot to learn, especially with some of the more advanced features like focus pull.

We have quite a few accessories for our GoPros, most of them came with the MCOCEAN GoPro Accessories Kit (paid link). Some of the accessories we use more than others.

We have a GoPro base mount attached to our van dash that we use with our GoPro HERO 5 Session (paid link). The base mounts come with 3M VHB tape already attached. Our van dash heats up in the sun and the GoPro overheats in a matter of several minutes and shuts itself off. For Season Three, we will probably try to find a different place to mount the GoPro, such as under the rear view mirror.

When we use the GoPro HERO 5 Session as a body cam, there are three options: the chest strap, the head strap, and the wrist strap. We have tried all three while kayaking. The chest strap works the best for us. Even though you are forced to turn your whole body to change the view, it results in smoother video than the head or wrist straps. The advantage of the head strap is that the camera is pointed in the direction that you are looking, but we had a tendency to turn our heads faster than what is comfortable viewing on video later. The wrist strap is even worse, since it is a little harder to tell what the camera is seeing and we move our hands even faster than our heads. However, they can provide an interestingly different viewpoint every once in a while.

We have tried mounting a GoPro on the handlebars of our bikes which works OK when riding on a paved surface. When riding on a rough surface, like dirt or gravel, the video is too jittery to watch comfortably. Note, we have hybrid bikes which do not have shocks. You may have different results with a mountain bike that has shock absorbers. When riding our bikes, we prefer the chest strap over directly attaching the GoPro to the bike. With the GoPro mounted to our chest, our legs and arms become the shock absorbers.

The flexible tripod that came with the MCOCEAN Accessories Kit is not that great in our opinion. We ended up buying a Joby flexible tripod (paid link). The Joby tripod is small enough to take along on hikes. The flexible legs allow the tripod to be wrapped around something like a tree branch or railing.

For times when we want to capture good sound with the video, such as our Sixty Seconds of Serenity videos or our "Chat With Ranger Kensie on the South Rim in the Grand Canyon" video, we use the GoPro HERO 5 Black with the tripod along with an external microphone (Sennheiser MKE400 with Windscreen - paid link). The external mic is directional and has a dead cat to reduce wind noise. LB rigged up an angle bracket to allow us to attach the microphone and GoPro to the tripod at the same time, making sure the microphone stays behind the lens of the GoPro and thus out of the video. For Season Three, we may start using the angle bracket and external mic with our Canon PowerShot (paid link). The PowerShot has a jack for an external mic, but provides no way to mount the mic to the camera.

When RB was carrying her Canon EOS Rebel camera and lenses with her on a hike or bike ride, she used a camera case that strapped around her waist. She likes the Case Logic case (paid link) with the "hammock" inside that helps keep the weight of the camera off the camera lens at the bottom of the bag. The case has extra pockets to store things such as spare batteries and lens cleaner. The two Promaster lens cases (Promaster Deluxe Lens Case LC-1 and LC-2 - paid links) attached to the strap of the Case Logic bag. RB was able to wear the bag around her waist with both lens cases and still be able to wear her backpack with its waist belt riding beneath the camera bag. During a hike, leaving the top zipper of the top-loading camera bag open made access to the camera easy and fast. RB also became pretty adept at switching lenses on the trail. She just needed to pay attention to keep the long neck camera strap from hanging down. Her foot managed to get caught up in the strap during a step descent for a brief moment. That could have been disastrous.

When riding her bike, RB would rotate the camera bag 180 degrees, so the camera and lenses were on the small of her back, keeping the camera out of the way of her pedaling legs. It was quick and easy to pull the camera around to the front when she stopped her bike to take a picture. The camera bag is a little cumbersome to take on and off her waist, so she generally left it on most of the day. This is the camera bag she used on our five day, rim to rim backpacking trip of the Grand Canyon. The camera, three lenses, camera bag, and two lens cases weighed about five pounds. That is a significant amount of weight to carry on a backpacking trip.

For Season Two, RB switched to a Canon Powershot camera. No extra lenses are needed. She also switched how she carries the camera on hikes and bike rides. RB uses a Peak Design Camera Clip (paid link). She attaches it to the left shoulder strap of her backpack. There is a base plate attached to the camera that allows the camera to quickly snap into and unsnap out of the clip on the backpack strap. The quick release button can be rotated into a locked position to prevent unintentionally releasing the camera. RB only locks the release button when in risky situations, like a scramble section on a hike. The clip and camera weigh one pound and 10 ounces, a vast improvement over the five pounds of the previous camera set up.

Initially she only bought one clip and moved it between her hiking backpack and her small day pack. This proved to be a pain because each pack requires a different set of mounting screws. RB's day pack straps are thin and need the short, thumb screws to mount the clip. Her backpack strap is thick and needs the longer mounting screws which require the use of an Allen wrench. So she bought an additional clip. She leaves the clips attached to her packs at all times.

In addition to the camera clip, RB also purchased a clutch camera strap from Peak Design (paid link). The strap comes with a base plate, which is why she bought the camera clips without the base plate. The base plate is compatible with our Promaster tripod, so she leaves the plate attached to the camera. The small strap does not get tangled and doesn't get in the way like the long neck strap did. It also allows for secure, one-handed operation of the camera, like reaching out over a cliff edge to get that perfect shot. What is RB's attraction to cliff edges?

The disadvantage of leaving the base plate on the camera is that it blocks the compartment housing the camera battery and SD card. The attachment screw that comes with clutch strap requires an Allen wrench or coin to remove. Since RB removes the SD card on a daily basis, she replaced the attachment screw with a D-ring mounting screw (paid link). The D-ring screw is slightly longer than the Peak Design mounting screw, so she added a washer to get the base plate to fit tight. She can now quickly remove and replace the base plate with just her fingers.

To protect the lenses of her Canon EOS Rebel, RB added UV Protection Filters (Tiffin 52mm UV Filter & Rocketfish RF-UVF58 - paid links). The filter reduces the UV light entering the lens, but, more importantly, it provides a layer of protection. It is much cheaper to replace the filter when it gets scratched than replacing the whole lens. RB dropped her camera on hard pavement once. The filter shattered, but the lens survived OK.

What SD card you use in a digital camera makes a difference. When shooting in burst mode, the rate at which you can take successive pictures is limited by how fast the images can be written to the SD card. When trying to captures a wild animal on the move, being able to take pictures at a fast rate can make all the difference. RB uses the SanDisk Extreme PRO (paid link) with her Canon PowerShot camera. It has a transfer speed of up to 170 MB/s.

When shooting video or time-lapses while we are not on the trail, we typically use our Promaster XC-M 522 tripod (paid link) Even though it collapses down pretty small, we do not carry it on hikes. It is what we use when shooting our video intro's. The tripod has quite a range of heights and angles. It is easy to use, even on uneven ground.

To capture good sound of someone talking, we use a PoP voice cavalier lapel microphone (paid link). The mic attaches to a shirt collar. We run the cord under our shirt and attached it to one of our iPhones. On the iPhone, we just use the Voice Memos app. The audio is recorded separate from the video (which is recorded on one of our other cameras). The hardest part is trying to synch the audio with the video in Final Cut Pro, but RB has gotten pretty good at it. The PoP voice mic results in better audio than the built-in audio of the PowerShot or iPhone. This is especially true when the speaker is moving around and may not be facing the camera, such as during a van tour. However, the PoP voice does not do well if there is a lot of background noise. We were not happy with it when trying to record inside the van while driving down the road. We may try using the Sennheiser mic in that situation next time.
After taking pictures and video, there are accessories we use that are not specific to cameras, but we consider them essential.

We do not keep the videos and pictures on our iPhones or SD cards, but transfer the files to two separate external hard drives on a daily basis. Having two copies of all of the original files prevents losing them due to a hard drive failure. Once we have transferred the files to the two drives, we remove the files from our iPhones or SD cards. Lately we have been buying WD Elements hard drives (paid link). We find that two 4 TB drives is plenty of room to store a whole season's original files along with Lightroom backups and Final Cut Pro libraries.

For editing still pictures, RB uses Adobe Lightroom. For the type of photo editing she does, Lightroom is all she needs. She loves the user interface and the efficient workflow. In RB's opinion, Adobe Photoshop is much harder to use. There are more sophisticated features in Photoshop, but it has a much steeper learning curve. If you are more into artistic photo editing, then Photoshop may be more to your liking. Many people use both Lightroom and Photoshop. However, RB is more of a photo journalist than an artist, so she only uses Lightroom. Another advantage of Lightroom is that all of the photo editing is kept separate from the original photos. To apply all the edits to the photo, the edited photo is exported. The original photo remains untouched, allowing you to go back to the original if you don't like your edits. This also makes backups smaller since only the edit commands are saved, not the edited photo.

Adobe products can be expensive, but RB finds the monthly Creative Cloud Photography Plan (paid link) of $9.99 per month to be a pretty good deal. The plan gives you access to both Photoshop and Lightroom, including the desktop Lightroom Classic, which is what RB uses most of the time. The only drawback is that you can only be disconnected from the internet for a set number of days before the software will not allow you back in since it cannot verify your license. The adobe website says it only tries to validate the license every 30 days, but RB's experience leads her to believe that is not 30 days from the last internet connection, but 30 days from the last time the license was validated. It's a little bit of a nuisance when traveling to remote areas where we may not have an internet connection for several days and the license validation is due, but it doesn't happen very often.
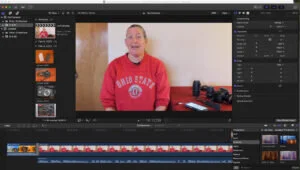
For video editing, we use Final Cut Pro 10.5. We have been using Final Cut Pro for years, so we can't really compare it to something else. It has a learning curve, but it is what we are familiar with, so switching at this point doesn't make much sense for us. Final Cut Pro is very popular, so finding help online is easy when we come across an issue. The software does everything we want it to do and we know we don't come close to using all of its features. However, if you do not use a Mac computer, you are out of luck. Final Cut Pro is an Apple product and does not run on Windows. The comparable video editing software for Windows is probably Adobe Premiere Pro.

Hopefully you found at least one of the items helpful to you. Do you have additional or alternative accessories that you like? Please share! Whatever cameras and accessories you use, have fun capturing your memories!
Check out our related video: Our Camera Accessories
(RB)