
Campervan Tips & Tricks From Season One 2019
Now that most of our traveling for 2019 is behind us, we wanted to share with you what we’ve learned. Some of them are unique to our particular VanDOit campervan setup, but hopefully these will help someone or give you ideas for solving problems you may have. So here are our 22 tips.

Tip One: use non-slip shelf liner (paid link) to keep things from sliding. Roads may be bumpy and there is a lot of starting and stopping. Having our belongings shifting around or falling into hard to reach places is not fun. Plus, keeping rattles to a minimum is good for the nerves.

Tip Two: put a lip on the back of any open shelf to prevent items from falling off the back. One of the first things we did after we picked up our van was to put the remote control on a shelf inside our electrical cabinet with shelves that are open on the back. Then one of the next things we did was spend quite a bit of time trying to get the remote control back out of the electrical cabinet after it slid off the back. Left Buddy (LB) used a strip of 3/4” aluminum angle and attached it to the back of the shelf with 3M Extreme Mounting Tape (paid link). This was an additional place where we implemented Tip Number One (non-slip rug pads). We are also careful with the types of things we put inside the electrical cabinet and avoid metal objects that might cause electrical shorts if they fall into the wrong place.

Tip Three: Use small USB fans (paid link) to increase and/or direct air flow within the van. We have two small fans that are usually placed at the foot of our bed, one on each side. They are usually blowing on us during the night. If we are sitting in the van on a hot day, we swivel the fans to blow on us or help circulate the cold air from the air conditioner to the bench seat which is somewhat under the bed. The small fans also help us stay cool at night, especially when we do not have electrical hookups and are running the MaxxFan but not the air conditioner. The electrical draw for these fans is quite minimal.

Tip Four: Use rectangular containers to maximize the space in a small refrigerator. We have the Dometic CFX28 (paid link) which only holds 26 liters so making efficient use of that space is essential. Lucky for us, we have some thirty year old Tupperware containers that fit perfectly in the fridge. Unlucky for you, we don’t think they sell those containers any more, so you may have to search awhile, or park your van outside of the Container Store to conveniently try out different options. Using our Tupperware containers, Right Buddy (RB) is able to fit everything we need for cooking and leftovers for a week at a time. She keeps the size of the fridge in mind when planning meals and grocery shopping. However, sometimes that does mean we have to eat leftovers the very next meal before cooking something new and creating more leftovers that need refrigeration. Now, if only beer came in square containers.

Tip Five: Use bungee cords (paid link) in a loop to hold a tablecloth to massively thick picnic tables. We have some metal clips (paid link) that we use to secure a plastic table cloth to a picnic table, but those only work if the table is 2" thick or less. We've come across many tables with much thicker tops, approaching 4-5 inches, and needed another solution. We discovered that connecting a couple of bungee cords together and slipping them over the ends of the picnic table does the trick. This trick would also work on some metal top tables with a thin top and a lip around the edge.

Tip Six: Use cardboard and duct tape to make a knife sheath or scabbard. As we were scrambling to load the van at the beginning of the summer, RB wanted to take her chef’s knife with her in the van, but didn’t have a sheath or cover for it. It was too late to order one so she used some scrap cardboard and duct tape to quickly make one. It held up all summer so now she is contemplating whether she wants to spend the money to buy a nice looking one or live with the handmade one.

Tip Seven: Dangle the sink drain hose in the waste basket while emptying the gray tank to avoid a mess. For us, the sink drain hose fits down inside our gray tank and our waste basket sits right next to it in the sink cabinet. So when we pull the gray tank out to empty it, it’s an easy process to move the waste basket under the hose so that any drips will go there rather than the floor.

Tip Eight: Use the leftover hot water in the electric tea kettle (paid link) to wash dishes instead of pouring it down the drain. This not only saves fresh water and gray water capacity, it also saves the electricity for heating up the water. When you have limited fresh and gray water and battery power, you start to pay more attention on ways to conserve.

Tip Nine: Notice where your faucet will drip while driving. For us, that means it would be turning the faucet away from our sink bowl as sometimes our sink faucet (paid link) drips, especially when we are making changes in elevation. We also put a dish cloth underneath to absorb any drips during travel. Since our space is limited and we look for multiple uses for the same area so our sink can also be a storage and prep area. Therefore, we have a wooden cutting board that covers our sink while we are traveling down the road. If water dripped on the board and sat the wood could swell and we would rather keep it dry. Simply turning the faucet and placing something under it that we don’t mind getting dripped on solved this concern. (FYI: the pink on the cloth in the photo is from RV Antifreeze as we're winterized for the season).

Tip Ten: Hang fruits and vegetables where they have room to swing and not get bruised by bumping. We initially stored all of our fresh fruits and vegetables in a tote, or later, in a plastic drawer in the back. This worked fine for hearty vegetables like onions and potatoes, but did not work well for softer fruits and vegetables like tomatoes and cucumbers. At first we tried placing tomatoes in small plastic containers by themselves, but they still split open while bouncing around as we drove down the road. We came to the conclusion that we needed to hang them, but then struggled with where. Hanging them underneath the bed blocked the view out the back windows. They bumped against the side of the van when hanging them from the T-track along the side. Hanging them above the foot of the bed is in the way when getting in and out of bed. We bumped our heads when we hung them in the center of the living area. This is still a work in progress, but we believe we have come up with a solution even though we have not fully tested it out yet. We bought a cotton string bag (paid link) designed to hang vegetables up to forty pounds since RB was concerned about the strength of the net bags that she already had and was trying to use. Attaching the two handles of the bag along the T-track just behind the driver’s seat allows the bag to swing and not hit anything while also not being in the way. It looks to be high enough even while weighted to not hit the driver's head. It is also in a convenient location for accessing while cooking. However, this required us to remove the TV which was something we were going to do anyway since we rarely used it and it took up some headroom. We’ll let you know how this works out during Season Two.

Tip Eleven: Add a rug to cover at least part of the hard floor in the van. It is so nice to have something soft and warm under your bare feet when you climb in and out of bed, are changing clothes, or just chillin’ inside the van.

Tip Twelve: Have another door or window open when closing the sliding door so it will easily close all the way. This is something we had to Google and research to figure out. We have a running board that retracts when the sliding door is closed, so it is easy for us to tell when the sliding door doesn’t close all the way. If the step is out, the door's not fully closed. For a while, we struggled with getting it to close completely. It seems this is a general issue with the Ford Transit and possibly with how air tight our van is. The air pressure inside the van can prevent the door from completely closing. So just opening another door, or window, or having the roof fan on before trying to close the sliding door solves the issue every time.

Tip Thirteen: Have your camera accessible while driving down the road to get that once-in-a-lifetime shot of the bear next to the road. This is RB’s tip, can you tell? She always likes to have her camera ready and usually regrets those times when she doesn’t.

Tip Fourteen: Put a large road atlas between your laptop and legs when the laptop gets too hot, like when the battery is charging. Besides helping with directions and trip planning, it can double as a lap desk. OK, other things would probably work also, but the road atlas is usually in a handy spot and we don’t have to travel with an additional lap pad. Multipurpose is king in vanlife. However, the spiral binding on the atlas will leave interesting marks on your bare legs. That just gives onlookers at the rest area something to stare at and talk about.

Tip Fifteen: Pull down any suitcases and whatever else is being stored on top of the bed before attempting to pull the window shades out from under the mattress. Don’t ask us how many times we’ve attempted to pull out the window shades without doing that before we said, “Duh, this would be easier without all the weight on top!”. Important: Don't forget to use a cargo net in front of the bed to prevent projectiles in a sudden stop.

Tip Sixteen: Put the windshield shade in before turning the passenger seat around. This is another one of those things we forget until we are trying to do it the hard way. You make the mistake enough times, you will learn - at least we eventually hope we will.

Tip Seventeen: Tying the front wheels of the bike to the bike frame with giant twisty ties (paid link) to keep the front wheel from flopping around. We travel with our bikes on a hitch on the back of the van. It probably doesn’t hurt much of anything to let them swing around, but it just seems like the potential is there. If nothing else, it probably saves wear and tear.

Tip Eighteen: Tie a rag to the bike where the two bikes tend to rub together to prevent abrasion. When we mount both of our bikes to our hitch, the two like to touch and rub in one spot. Putting a cloth rag in that spot reduces the friction and hopefully any damage that the rubbing could cause.

Tip Nineteen: Lock the front wheels to the bike frames to discourage theft. Our front wheels on our bikes are quick release. Because our bikes are sitting outside of our van, leaving the front wheels unsecured while parked in a lot or campground seems like it is tempting someone to take them. We just use our normal bike locks to lock the wheels to the frames.

Tip Twenty: Use water pipe insulation around the bike rack to prevent it from scratching the rear door when opened. When our bike rack is swung to the side (using the RakAttach swing arm), the rear door just barely touches the vertical section of our bike rack. Using the soft pipe insulation alleviates our fear of damaging the finish on the rear door.

Tip Twenty One: Use a bungee cord (paid link) attached to the bike and back door handle to keep it propped open. Again, this is probably unique to our particular bike rack (an old Yakima) in combination with the RakAttach swing arm. When the bike rack is swung to the side, the rear door of the van does not quite open all the way to the locking position. So, to keep the door from accidentally swinging shut while accessing the cargo area, we use a bungee cord to secure it to the bike. To be fair, we attach both the RakAttach swing arm and the Yakima bike rack using the holes that minimizes how far the bikes extend behind our van. We want to make sure we can fit in most normal parking spaces. If we used the other holes on both, the rear door would probably open to the locking position, although we have never tried it.

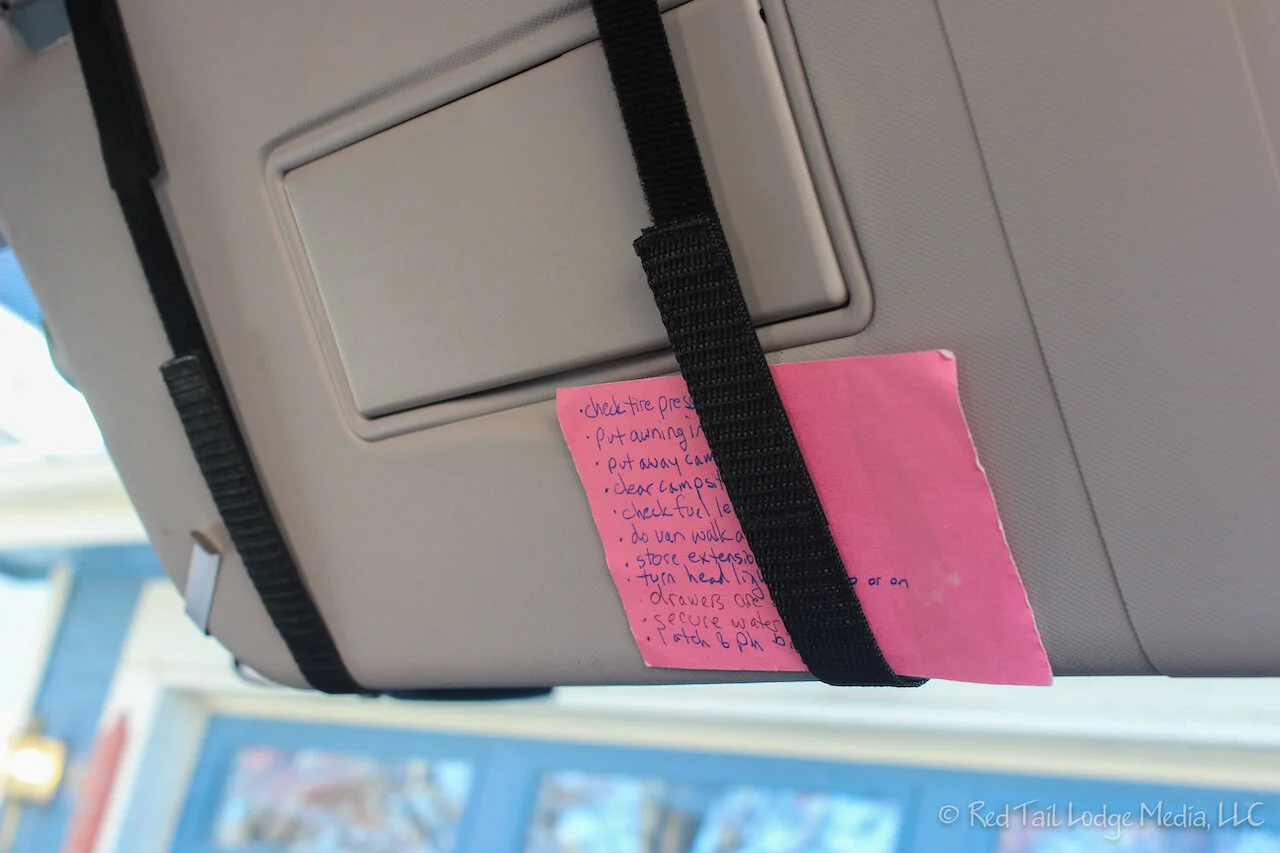
Tip Twenty Two: Create and use a checklist when breaking camp. This is something that we’ve seen quite a few RVer's use. We initially thought this wasn’t necessary with a camper van, because packing up is so simple and easy. However, after forgetting to turn off the roof fan or filling our water bottles before starting down the road a few times and having to stop, it started sounding like a good idea. Not everything on the list needs to be done every time we pack up, but the list is a good reminder to make sure we don’t forget anything. The list started out with just a few items and grew longer as we went along. Here is what we ending up with on our list:
Air conditioner off
Electric hookup unplugged
Window shades stored
Water jugs filled
Gray water emptied
Trash emptied
Personal water bottles filled
Water pump off
Fan off
Leveling blocks removed and stored
Check tire pressure (visual and with TPMS - Tire Pressure Monitoring System)
Put awning in
Put away camp chairs
Clear campsite
Check fuel level
Do van walk around (visual inspection)
Store extension cord
Turn headlights to auto or on
Drawers are bungeed
Extra jerry cans are secure (fresh and gray water)
Latch and pin bike hitch swing arm
Passenger laptop within reach
Well, that’s what we’ve learned after traveling for one summer. We’re starting to plan next summer already. Time will tell if we learn anything new next year. We’re pretty sure we will.
If you want more visuals, check out our YouTube video: Campervan Tips & Tricks From Season One
(RB)