
Campervan Project #5: Shades and Curtains
You may remember the window shade prototype we made for our VanDOit campervan. For our summer travels we needed a full set of window shades. That is eleven window shades in total. The windshield, the front passenger and driver's windows, the two in the kitchen/living room area, four in the garage area, and two for the rear doors. We wanted the window shades not only for privacy, but also for temperature and sound insulation. For more flexibility, we added a curtain behind the front seats and for water protection we added a shower curtain in the back. If you wish to familiarize yourself with our previous post about our shades, you can see our post: Campervan Project #1: Window Shade Prototype.

For the window shades, we did not wrap the fabric around to the other side like we did on the prototype, but glued it along the edge with a small fabric overlap. The goal was to get a cleaner looking edge and to help fill in any gaps along the edge to prevent light and heat from seeping in or out. The finished look was good enough for us, so we did not add the second layer of fabric on the other side. On the prototype, we noticed that the fabric we used for the pull tab would stretch, so we bought a small amount of the PVC/Poly fabric from Hobby Lobby and used that for the pull tabs. However, during the couple months of use, some of the pull tabs became detached and frankly, we found that we didn't need the pull tabs for most of the shades; we could just as easily pull on the extra fabric around the edge to get them out.

One of the side window shades in the garage area had to be split in order to get it behind the bed lift posts and into the window. We carefully cut just the corrugated plastic across the middle horizontally with a box cutter and then taped it back together with duct tape. This gave it enough flex to work it into the window. We found that getting the shades into and out of all four of the rear side windows in the garage area was a pain and we leave them in all the time. There is enough light coming in the remaining seven windows and we don’t look through the four rear side windows when driving.

The window shades for the two front doors don’t fit tight like the others because those windows do not have deep trim around them to hold them in. However, when the door is shut, the shades are partially between the door and the door frame around the edges. So we just hold the shades up in the window with the door open, then quickly shut the door. They hold in place just fine.

The shade for the windshield turned out to be rather tricky since it is such a large window and needs to go around the rear view mirror. The first version we made followed the same design as the other windows except that it was in two pieces, with the split vertical in the middle around the rear view mirror. Since we trimmed the corrugated plastic to fit the windshield before adding the thickness of the Reflectix and fabric, the final shades did not fit well because the interior trim closes in on the windshield near the edges and the final thickness of the shade would not fit in the space near the edges. The rear view mirror had to be twisted, first one direction, then in another direction, in order to get the shades in place. Our tight schedule left us with no time to fix the windshield shades or make new ones before we left in June, so we managed to live with it.

The hot glue on the windshield shade turned out to be a problem. When we were in Sequoia National Park, the windshield was in the full sun during the day. The sun melted the hot glue, but then the hot glue solidified during the cool night, gluing the shade to the windshield. We had a heck of a time trying to pry the shades out of the windshield the next morning. However, during the first three weeks of our traveling, this only happened once. While we were home for three days in July, we made another shade for the windshield. This time we just cut out one large piece of Reflectix with a slit for the rear view mirror and put duct tape all around the edge. Version two of the windshield shade has been used ever since. It still isn’t perfect, but we now don’t worry about the shade being glued to the windshield or the rear view mirror coming loose from twisting it all the time.

The only other issue that we’ve had with the window shades is that the one for the sliding door likes to fall out, especially when opening and closing the door while the shade is in. Initially we thought the shade was just not quite the right size, so Right Buddy (RB) made another one when we were home for three days in July. However, the new one kept falling out as well. Our fix? Jam a rewards card under the molding at the top to hold the shade in. Works like a charm, even when opening and shutting the sliding door multiple times.

All the shades store nicely under the mattress and out of the way when not in use. The two back window shades slide under the mattress from the back. The shades for the front doors, the sliding door and the window opposite the sliding door slide under the mattress from the front. In order to identify the shades without relying on the labels (that seem to want to fall off), we store the shades on the side of the van that they belong to (passenger side versus driver side). The windshield Reflectix shade is stored on top of the bed since it is too flexible to slide under the mattress easily. As we said before, the remaining four rear side window shades are kept in the windows all the time while traveling.

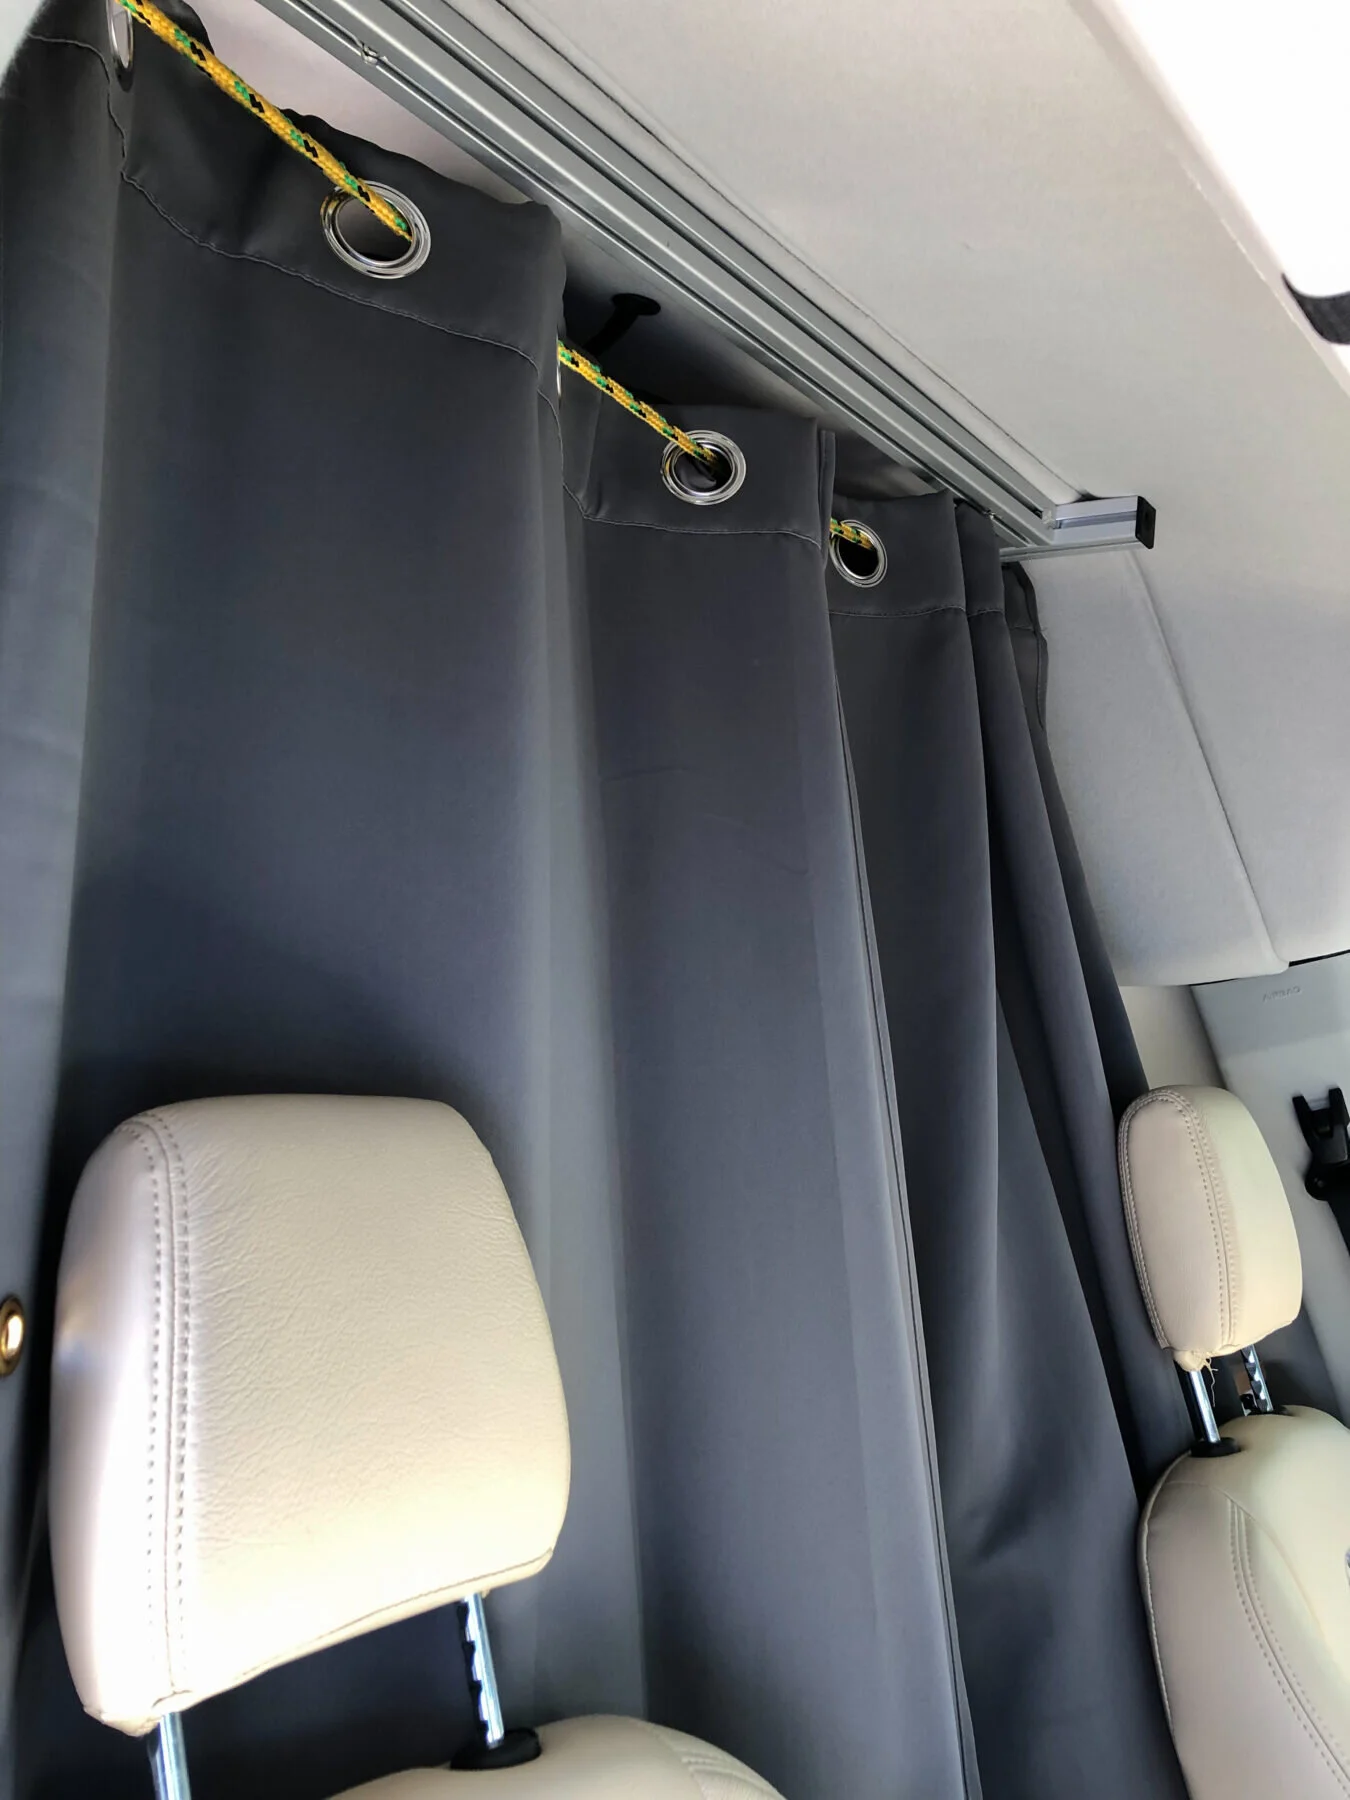
For added privacy, we added a curtain just behind the front seats. The curtain comes in handy when we are concerned that people might be able to peer in through the gaps around the windshield shade or we don’t want to take the time to put the windshield and front door shades in. It also adds some separation if one of us wants to use the camping toilet while both of us are in the van. To be honest, this is a very rare emergency scenario. The person not using the toilet can sit in the passenger seat on the other side of the curtain affording some tiny bit of privacy for the user and allowing the other person to avoid certain images from being burned into their brain. (In a van that size, there is no escaping sounds and scents.) The curtain we use is a room darkening thermal insulated window curtain with grommets along the top to hang it from (Deconovo Room Darkening Thermal Insulated Blackout Grommet Window Curtain for Bedroom - paid link). Two curtain panels are simply hung by running a rope through the curtain grommets and tying the ends of the rope to eyelets attached to the T-track that is standard in VanDOit vans.

The curtain panels were longer than what we need, so RB cut them shorter and hemmed them using a sewing machine. Since she only uses the machine about once every decade, it took a while to remember how to thread the machine and remember to adjust the thread tension settings properly. Her mom, who was an excellent seamstress, would have been so disappointed. With the extra material, RB made tie backs to hold the curtains open when not in use. The tie backs are strips, about two and a half inches wide by twenty inches long, that she rolled the edges over and sewed by hand at first before getting the sewing machine out again. No pressure. We were just leaving for the summer the next morning and hadn't started packing yet. Then, using a grommet kit (General Tools 81264 Multi Grommet Tool Kit, 3/8" and 1/2" Rustproof - paid link), RB punched a grommet near each end. The tie back loops around the curtain panel, through the grab handle near the sliding door opening and is held closed with a carabiner through the two grommets. On the driver side of the van, the tie back loops around the post to the driver’s headrest since there is not a grab handle on that side of the van.

Since the sides of the van angle in near the roof and the T-track does not go all the way to the sides of the van, the curtains hang in a little from the sides of the van. For a little more privacy, we added grommets along the edge of the curtain panel, originally thinking we could add Command Hooks to the sides of the van to slip the grommets over. However, RB could not get the Command Hooks to adhere to the textured plastic of the van interior. Instead, we clip the carabiner through the grommet on the curtain panel and through one of the grommets on the tie back. Then we tie the other end of the tie back to the grab handle. On the driver’s side, the headrest post is not close enough to the side of the van, so we knot the tie back to the driver’s seat belt, the portion that is vertical along the side of the van. There still is a little bit of a gap between the curtain and the sides of the van, but it is sufficient enough to change clothes or use the camping toilet in the center of the van without putting in the front three window shades. As long as there are no lights on in the van, the graphics on the van provide enough privacy during the daylight hours so that no one can see into the van through the other windows with no window shades in.

In the back of the van, we installed a shower curtain (Home Queen Shower Curtain, Heavy Duty Liner, Waterproof Bathroom Curtain Liner - paid link) across the back. This protects our bedding when we need to open the back doors and it happens to be raining or snowing outside. It also helps prevent water coming into the van while using the water nozzle as an outdoor shower or to hose off shoes or equipment like muddy bikes. The shower curtain is installed using the same technique of stringing a rope through the grommets along the top and tying the rope ends through eyelets that are attached to the VanDOit's T-track. Normally we have the bottom of the shower curtain tucked under the bottom of the bed mattress so that we still have visibility out the back door windows while we are driving. The shower curtain is only untucked and pulled down all the way when we need to keep water from the spray hose out of the garage area.
Overall we’ve been happy with our shades and curtains. They have served us well for their intended function and have lasted through about ten weeks of constant use. Hopefully they will last even longer. Time will tell. We’ll keep you posted. Stay tuned for more posts about our van!
The video on our YouTube Channel includes a demo of how to use a grommet kit: Van Shades and Curtains.
(RB)