
Alaska Tips

A road trip to Alaska has more challenges than driving through the lower 48 states. Most of the challenges involve international border crossings and the remoteness of Alaska and parts of Canada. We’re sharing what we learned through our process of planning and experiencing our road trip to Alaska in Red Tail Lodge One (our VanDOit camper van). The following are our tips, in no particular order.

Tip One: Use the Milepost
The Milepost is a thick book with just about everything you need to know about traveling to Alaska from the lower 48 states. An updated version is released every spring. Buy it. Read it. Carry it with you on your trip. It will be your main guide. We bought one a couple of years before our trip and then bought an updated one at the beginning of our trip. All of the information in it can be a little overwhelming at first. We started out by reading the general information in detail (such as border crossings and the ferry systems). Then we skimmed through all of the detailed route information (yes there are multiple routes to get through Canada), highlighting the items that sounded interesting, such as things to see or do and places to camp. We used the highlighted items to help us determine which routes to take. There was also good information on the timing of some things, like what time of year the bears would be active in Hyder, Alaska. After we laid out our route, we marked up the book to indicate which direction we would be going along which routes. Then we used the book as we traveled, looking ahead to see where we wanted to stop, for bathrooms, for places to eat, for gas, for a picnic, and for interesting sights to see. When you buy the book, you do have access to an electronic version of the book, but we mainly used the hardcopy.

Tip Two: Join a Facebook Group
We joined the RVing to Alaska 2022 (Original) Facebook group. They create a new group each year. We found this group very useful as a place for information, ideas, questions, and timely information. However, this can also be a double-edged sword. This group is very large and many people are reporting all of the problems they are encountering as they are on their trips. Our advice is to listen, but don’t panic. While we were on the road, we heard about wildfires, lots of smoke from the fires, road closures due to fires, accidents, washed out bridges, ferries that stopped running, and floods. Even though many of those items were on our routes, we only had to temporarily change our plans in one location, at Jasper, Alberta, near the end of our trip. All of the other issues either happened after we went through those areas or were resolved before we reached them. Stay the course. Only change your plans when you are forced to. You can start to think of back up options for some things, but don’t let it consume you. Relax. Things will work out in the end.

Tip Three: Use My Maps in Google
Ann is a visual person. Seeing all the desired places we wanted to go visually on a map helped us plan out our route. Learn how to use My Maps. You can enter all the desired locations in a spreadsheet, then import them into a My Map. The locations will then be shown on a Google Map. It helped us visualize where everything is and the relative distances and roads between everything. Then it starts to become a puzzle to solve.

Tip Four: Lay out the itinerary in a spread sheet
We use spreadsheets for just about everything, and our itinerary is no exception. We start with columns for the date and location, adding more information as the plans become more finalized. The date is the day we want to arrive at the location. As we work the puzzle, we can easily drag groups of locations around. Initially we thought we would do the Skagway and Haines loop on the way back from Alaska, but then realized the timing would be better on the way up, so we easily moved those rows around until we were happy with the routes and timings.
Tip Five: Use formulas in spreadsheets to calculate information for you
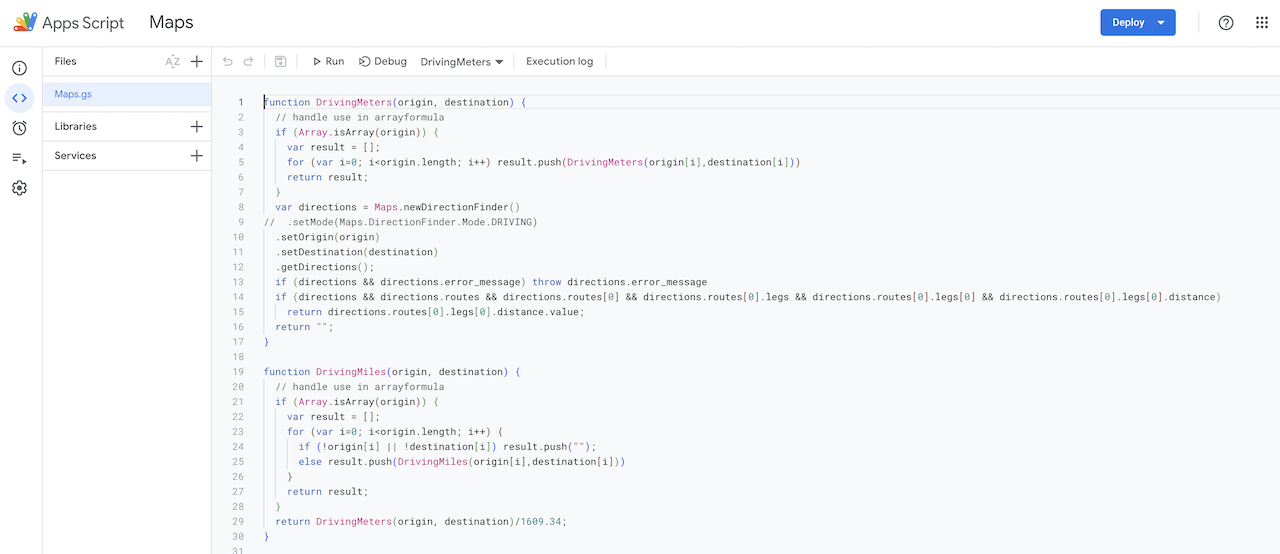
We add a column with a formula to calculate the number of days we are at that location from the date of the next location in the next row. We add two more columns, one for distance and one for driving hours between the location and the previous location, using an Apps Script we found online for Google Spreadsheets which uses Google apis. We’ll have a future post explaining more details on how we plan long trips and what tools we use. We like to travel slowly and we had the luxury of taking more than six months to complete the trip. Our general rule was to keep our travel days to four hours or less of driving and to stay for two or more nights at each location, avoiding two travel days in a row. The calculations helped us tweak the plan.

Tip Six: Use paper calendar to visualize plan
This may seem like an unnecessary step, but we like seeing the plan laid out on paper, in addition to the spreadsheet. Again, Ann is a visual person and seeing how long we are at each location laid out on a calendar is helpful. We carried our paper calendar with us in addition to a print out of our spreadsheet and we referenced both of them.

Tip Seven: Know when different campgrounds open for reservations
Popular campgrounds fill up quickly. Some even fill up in a matter of minutes. Knowing which ones those are will allow you to get into the places you want. Set calendar reminders so you don’t miss a deadline. Some campgrounds require accounts with different types of reservation systems. Set those up ahead of time. Some people don’t like to make any reservations, but that limits where they can camp. We are planners. We like knowing where we will be spending the night and not spending our time during our trip trying to figure out where we will be camping. That doesn’t mean we always have reservations, but we have a plan. Knowing ahead of time that we want to stay at a first come/first serve location means that we can plan to arrive early at that location, so we have a better chance of getting a site.

Tip Eight: Know the local holidays when planning
Many campgrounds require a minimum length of stay on holiday weekends. Canada has different holidays than the United States. Learn what they are and where they fall during your itinerary. Canadian holidays caught us off guard and we had to adjust our plan to stay at a location a night longer than anticipated, borrowing a night from the previous or following location.
Tip Nine: Reserve ferries and excursions
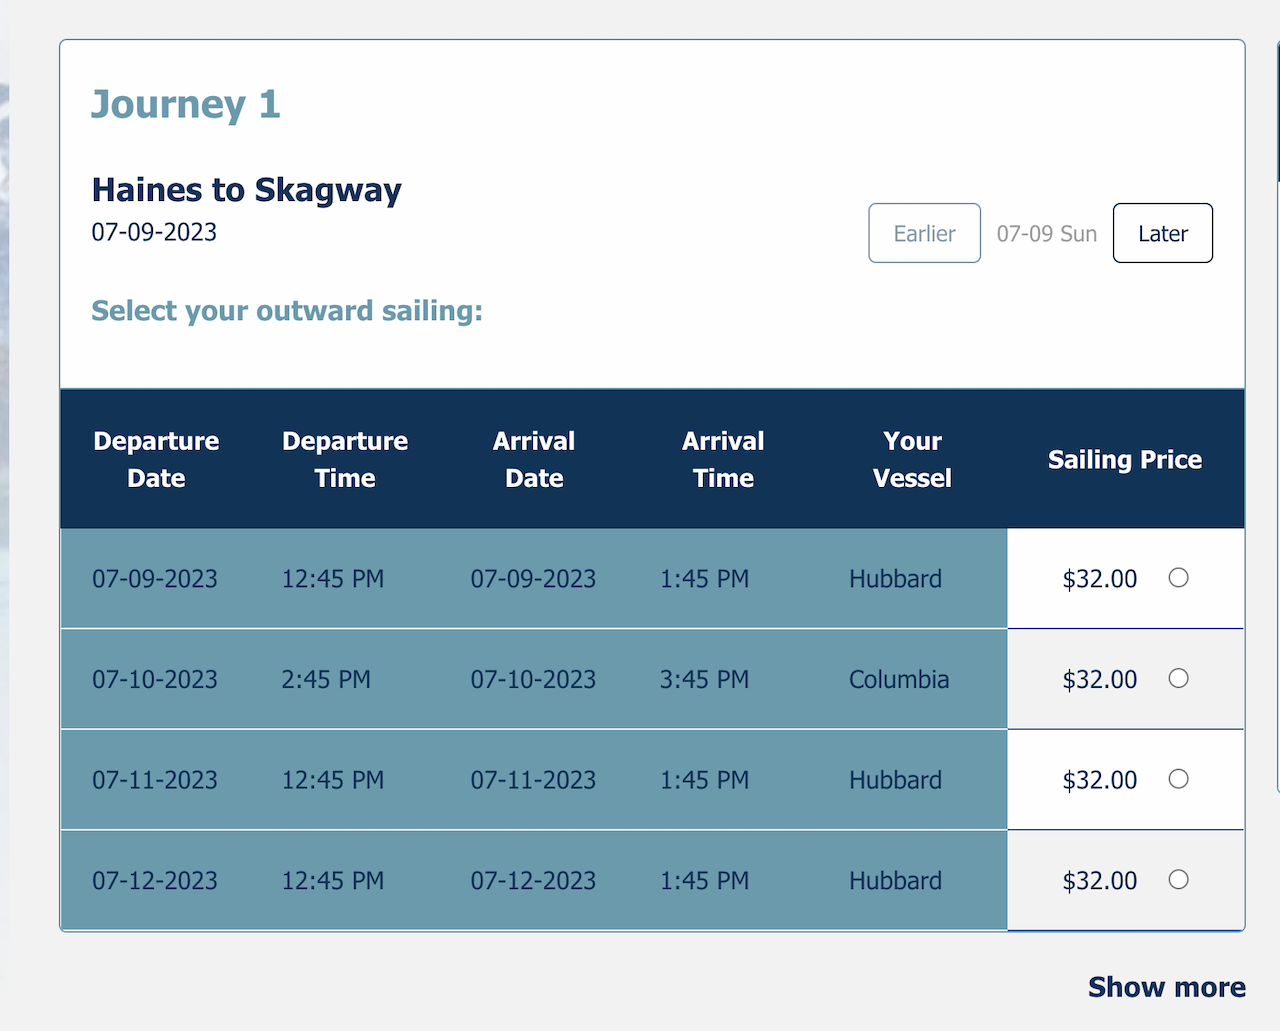
Ferries are especially something you want to research when planning your route. Some ferries run often and are not a problem, like the ferries over to Vancouver Island (BC Ferries). However, some only run once per day and maybe only once or twice a week depending on the time of year, such as the ferries between Skagway and Haines, Alaska (Alaska Marine Highway System). If your itinerary depends on a particular ferry crossing on a particular day, check the schedules and make a reservation. Having to wait around a week to catch the next ferry can have a huge impact on your trip. Also, if you’ve planned out your itinerary and know what dates you will be where, you can also think about reserving some of the popular excursions, such as a flight over to Brooks Falls in Katmai National Park to see the grizzly bears (Katmai National Park, Alaska - July 11th, 2022). If you do that, you might want to build in a day or two buffer at those locations, as weather may cause those excursions to be cancelled, delayed, or rescheduled.

Tip Ten: Check credit card international fees
Most credit cards will allow you to pay for goods and services in a foreign country and automatically convert the charge to US dollars. However, many of them charge an international transaction fee. Check with your credit card company to see if they charge fees for using your credit card in Canada. We had three credit cards. Two of them charged fees and one did not. Surprisingly, the one that did not was with the same credit card company as one of our other cards that did charge a fee. So you need to check each one of your cards. Of course, we tried to always use the one that didn’t charge fees when we were in Canada and when we were making online reservations for things in Canada.

Tip Eleven: Check if ATM card will work in Canada
We verified our card would work with ATM’s on one of the networks that was listed on our card while in Canada. That was how we planned to obtain Canadian currency, so we wanted to make sure it would work. Cash is needed for some campgrounds and stores in Canada. Not every place accepts credit cards, especially in remote areas. Some stores in remote areas may not have internet access, or it may be down, or their credit card equipment may be out of order. Always having cash on hand will come in handy.
Tip Twelve: Use ATM’s in Canada to get Canadian currency
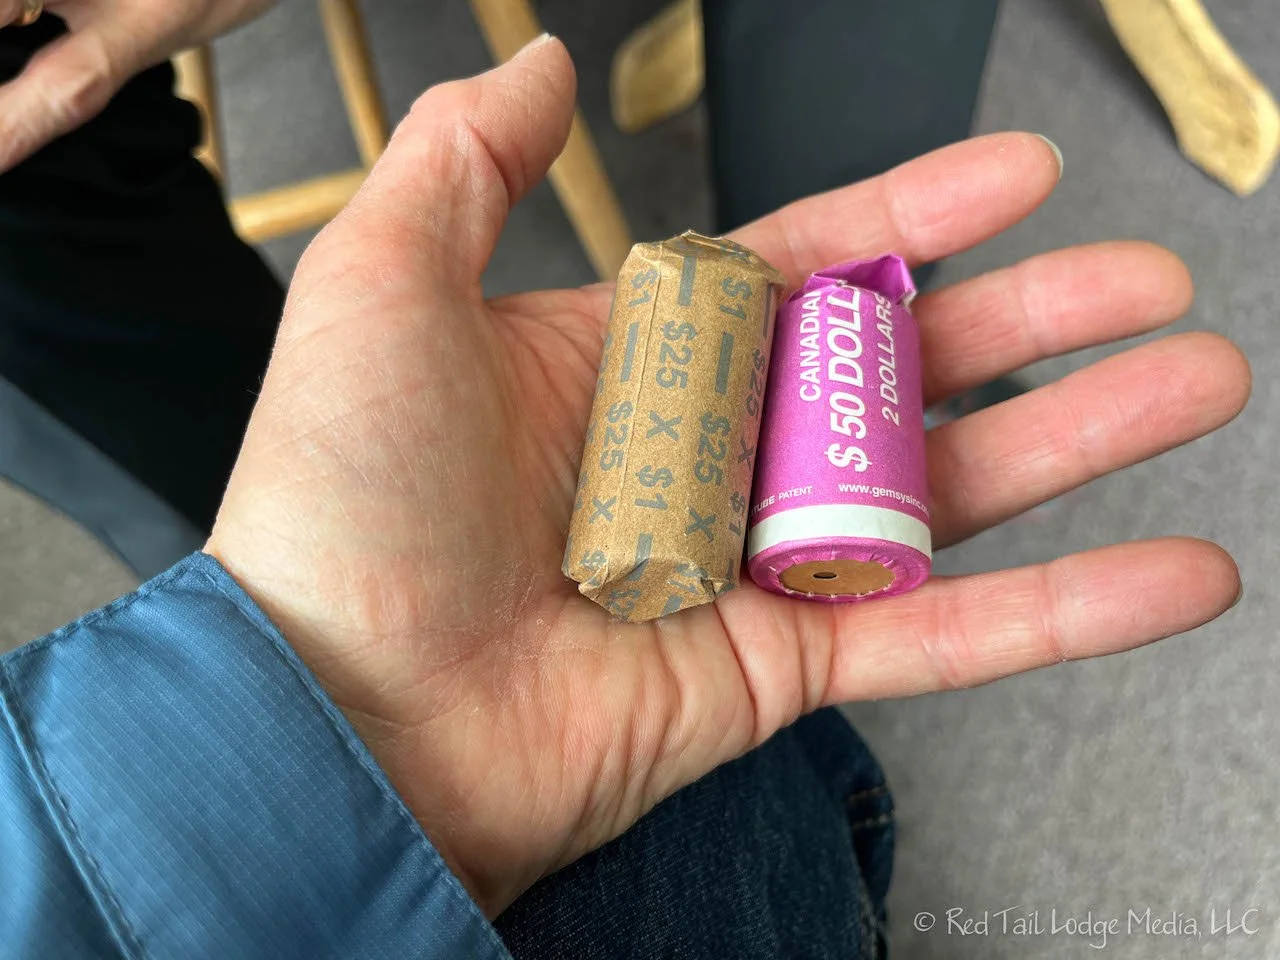
We’ve heard that the exchange rate and fees are better when getting cash from a Canadian ATM instead of exchanging currency at your bank before you leave the lower 48 states. We did not verify that. We tried to search out ATM’s that incurred no fees. Our credit union phone app would search the local area for us. Of course, when you are in remote areas, you may not have a choice. We withdrew a chunk of Canadian cash from an ATM right after crossing the border. Then we stopped at a bank a few days later to get “loonies” and “toonies” for Canadian laundromats. Many laundromats had coin changers, but some did not.

Tip Thirteen: Check if cell phone plans work in Canada
We use AT&T for our phones, plus we have a Verizon Jetpack hotspot. Our particular AT&T plan worked while we were in Canada and did not charge us roaming fees. However, since we were not on AT&T networks while in Canada, it seemed like our phones did not have priority. We could have a strong cell signal, but our throughput was very slow due to other cell phone traffic taking up the bandwidth. But, we could make phone calls and send text messages. It was really only an issue for streaming and uploading videos. And that was better than our Verizon plan. Our Jetpack would not work at all while we were in Canada. Check your cell plans. If they don’t work in Canada, look into alternatives. It is possible to buy a Canadian SIM card for your phone, if your plan allows it (you may need to “unlock” your phone). If you only need to get text messages in and out, then a satellite communicator, such as a Garmin InReach, may be all you need. However, you wouldn’t be able to look up information on the internet or make reservations online. Another option is StarLink which would give you satellite internet, but that is a very expensive option. While we were in Canada, StarLink was still gradually extending their coverage further and further north and there were still areas not covered. However, we believe that has changed by now, but check to make sure before you purchase it.

Tip Fourteen: Obtain a Canada Non-Resident Inter-province Motor Vehicle Liability Insurance Card
If your vehicle insurance covers you while you are in Canada, then your insurance agent should be able to provide you with a Canada Non-resident Inter-province Motor Vehicle Liability Insurance Card. We believe this is a Canadian requirement. Our agent provided us with one, but we never needed to show it to anyone. Perhaps someone would have asked for it if we were involved in an accident.
Tip Fifteen: Check on current border crossing regulations
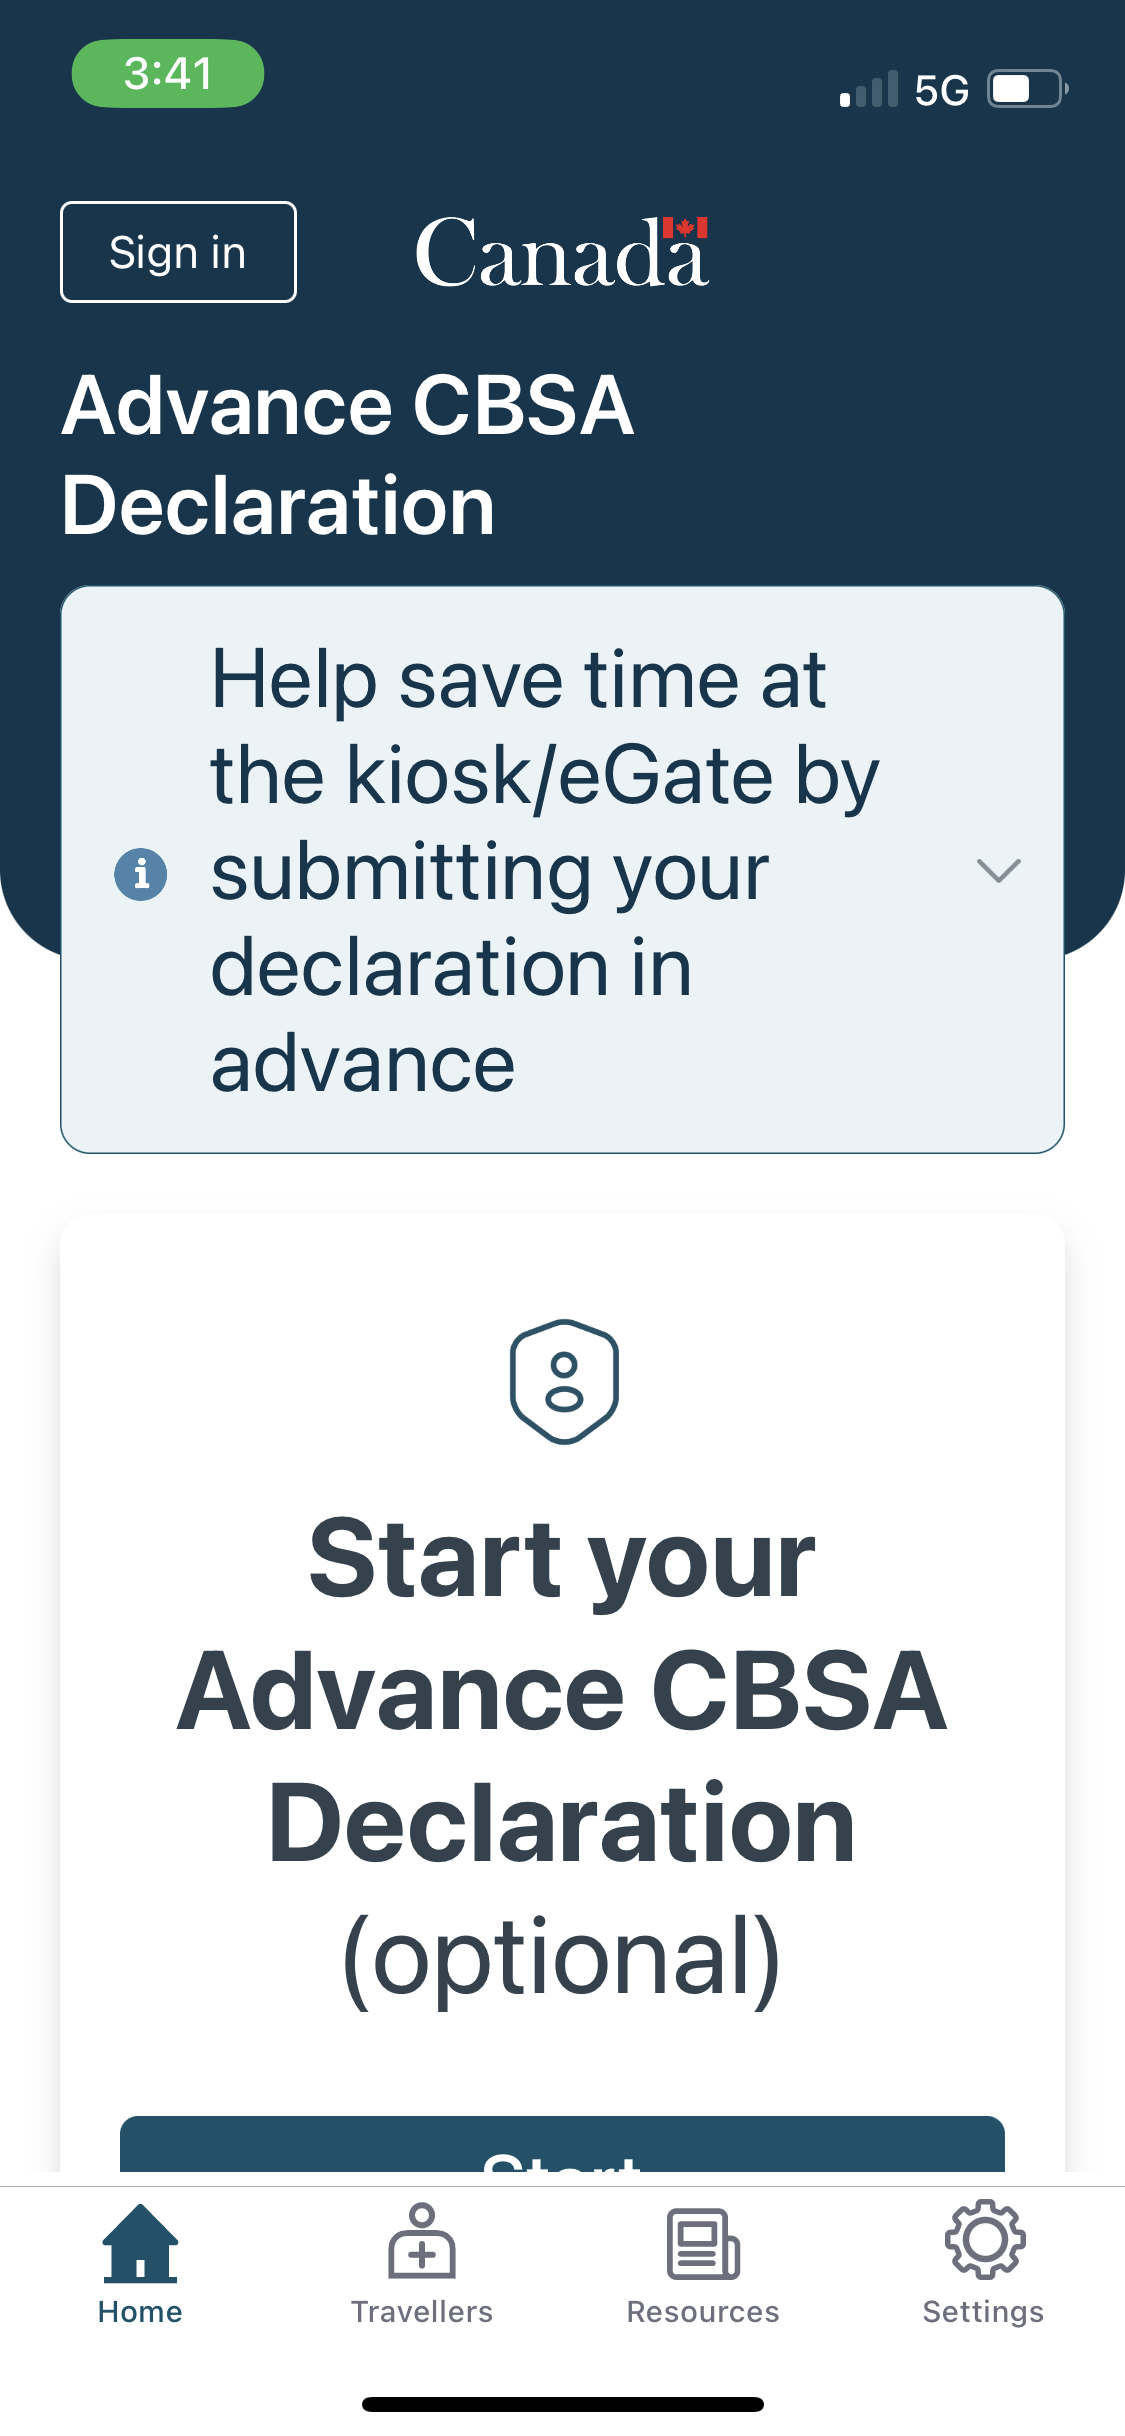
What you can bring into the country, for either Canada or the United States, varies all the time. Check the appropriate government websites to know what the current rules are (Canada Border Services Agency, US Customs and Border Protection). We had the additional complication of COVID regulations when we travelled, but thankfully these have been lifted. What also made it challenging for us, was that the regulations were constantly changing. Generally speaking, fresh fruits and vegetables are not allowed across the border in either direction. If you want to transport firearms or pets across the border, make sure you know all the rules and have followed all the required procedures and have all the required documentation. The ArriveCAN app, which we were required to be filled out before crossing into Canada, is not longer required. However, it is still being used and we’ve heard that it may make the border crossing go faster since you can load all the required documents ahead of time.
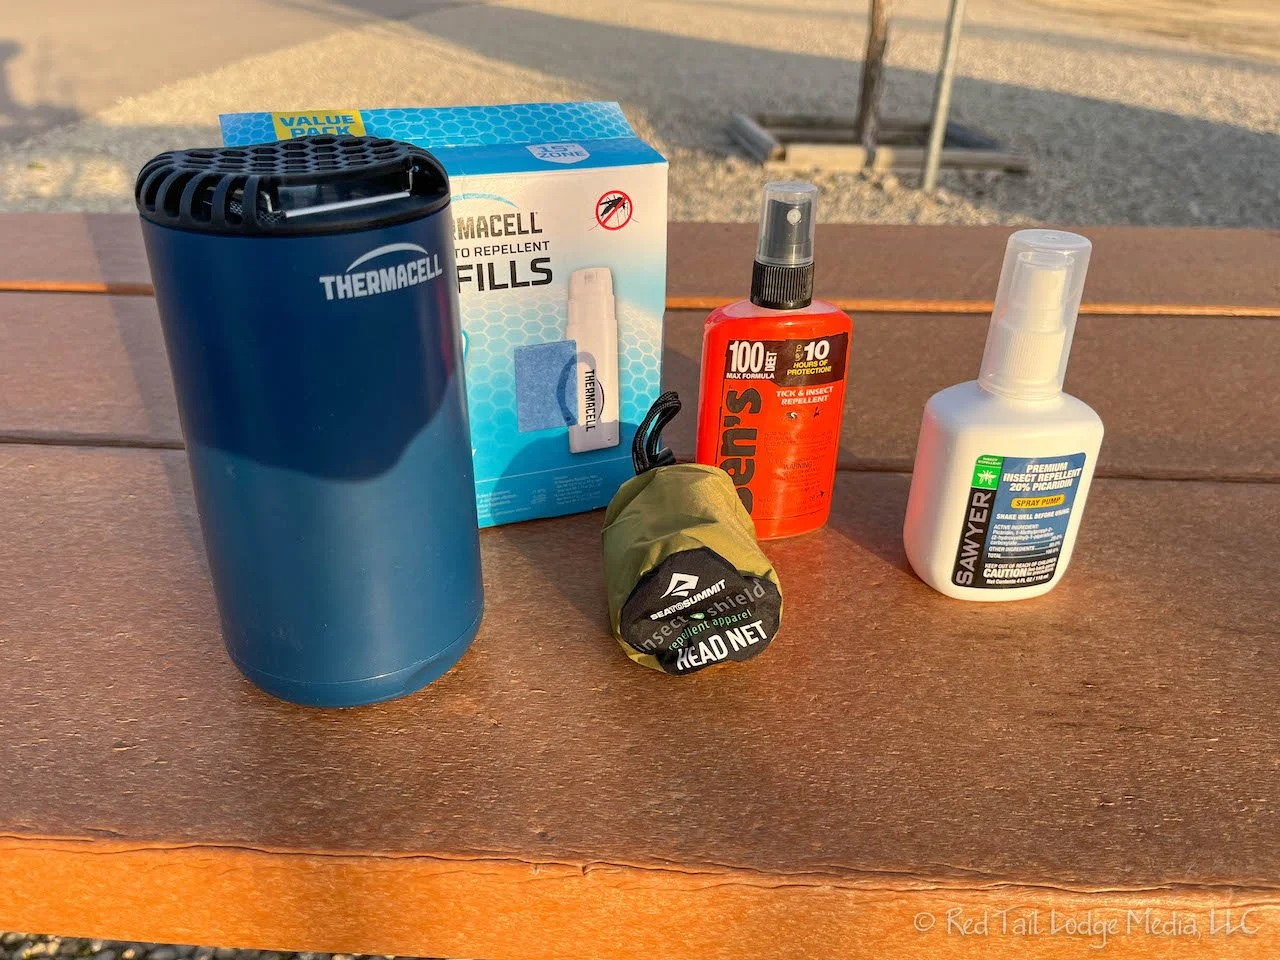
Tip Sixteen: Be prepared for bugs and rain
Yes, there are bugs including mosquitos and biting flies. And it rains a lot in Canada and Alaska. However, what we experienced was not as bad as what others have reported. Just be prepared. Bring bug spray and repellent. Bring head nets. Bring screen enclosures. Bring rain jackets, rain pants, and waterproof boots. You may not need all of these things or any of these things. But, if you do need them, you’ll be so much more comfortable if you have them.

Tip Seventeen: Bring bear spray
If you plan on hiking, bring bear spray. There are places you can buy it in Canada and Alaska. There are grizzly bears in Canada and Alaska. Don’t hike without it. Know how to use it, but don’t practice with a real can of bear spray. There are practice cans that you can purchase. You will probably never need to use it, but your life may depend on it if you come face to face with a grizzly. Even with bear spray, never approach a bear and keep your distance. A Denali Park Ranger taught us that you should be far enough away from a grizzly so that the finger nail on your pinky finger can cover up the bear when your arm is fully extended. Interestingly, bear spray is not allowed at Brook Falls in Katmai National Park. That probably has more to do with the fact that you need to fly over in a plane and a can of bear spray accidentally releasing inside the plane would incapacitate the pilot. Similarly, when you ride the buses inside Denali National Park, you are required to put you bear spray inside a ziplock bag and store it inside your backpack before boarding the bus. Your fellow passengers will thank you (Denali National Park: Teklanika River, Alaska - August 4th to 8th, 2022).

Tip Eighteen: Plan for vehicle maintenance
If your trip to Alaska is long, you will probably need to schedule some regular maintenance while you are on the road, such as oil changes. Also budget for some unexpected repairs. The roads through Canada and in Alaska can be hard on vehicles, from broken windshields to blown out tires. Check your vehicle often. On our trip, we repaired a chip on our windshield. While we were having maintenance done in Anchorage, they noticed our tires were too worn for the trip back. We were only able to replace two of them in Anchorage, because we couldn’t find two other new ones for are vehicle. We replaced the two worse tires and thankfully made it back home to replace the other two.

Tip Nineteen: Verify medical insurance for Canada
Check that your medical insurance will cover you for health emergencies while you are traveling in Canada. If not, consider getting travel insurance. Our health insurance covered us, but we were required to pay for the services up front and submit claims ourselves to our insurance to get reimbursed. You might want to make sure you have the means to pay if something comes up. Luckily, we did not have any medical needs while we were in Canada, so we didn’t have to experience the process.
Tip Twenty: Verify your roadside assistance works in Canada
You want to make sure you are not stranded if your vehicle breaks down in Canada. However, just because you have a company that will pay to assist you, that doesn’t mean help will get to you in a timely manner when in remote areas. Make sure you are also carrying supplies to help yourself. Carry basic tools and a tire repair kit. Make sure you always have enough food and water with you that you can survive for a day or two on your own.

Tip Twenty One: Plan for resources
While on your trip, look ahead and plan for replenishing your resources, such as gas for your vehicle, dump stations to empty your gray and black water tanks, and grocery stores for food. Some areas you will be driving through are remote and resources are limited. Don’t rely on a particular gas station being open or having gas. Gas stations may not be open 24 hours a day. They may have run out of gas. Their pumps may be broken. We tried to never let our gas tank go below half. Not only was our gas needed to drive our vehicle, but our Espar heater also ran off the gas in our tank. So if we ran out of gas, we would also lose our heat. Fortunately, the only time that gas became a possible issue was when we were leaving Haines, Alaska, when we struggled to find a gas station that was open and had gas. (Alcan: Whitehorse, Yukon Territory - June 16th to 17th, 2022)

Tip Twenty Two: Carry a satellite communicator
We carry the Garmin InReach (paid link) with us. It allows us to send text and receive text messages via satellite as well as send an SOS signal to authorities. We shared our itinerary with our two adult children. We would text them whenever we left a location, when we arrived at a new location, when we started a hike, and when we ended a hike. If we didn’t have a cell signal, we used the InReach to text them. The InReach not only sends our message, but also sends our GPS location as well. Our hope is that our kids would notice when they stopped receiving messages from us and notify the authorities with our last known GPS location. We would also let our kids know if any of our plans changed. On our way up to Alaska, we had a stretch of over four days with absolutely no cell service, but we were still able to communicate with our kids using the InReach (Alcan: Watson Lake, Yukon Territory - June 8th to 9th, 2022). We heard about an Alberta couple who was coming back from Alaska. Their relatives didn’t hear from them for over a week, so they notified the authorities who started searching for them. The couple turned out to be fine. They had changed their return plans and didn’t have cell service for over a week on their new route. If they would have had satellite communications, they could have notified their relatives and prevented an unnecessary search.
Tip Twenty Three: Relax and have fun
There are so many things to think about. You will be pushed outside of your comfort zone. There are so many things that could go wrong. We can guarantee that not everything will go smoothly and not everything will go according to your plan. We had to cancel a few excursions when we came down with COVID during our stay in Seward, Alaska, but we still had a rewarding experience (Seward, Alaska - July 13th to 18th, 2022). Embrace the challenges you face with a positive attitude. Have faith that you prepared yourself enough that you will survive. Then relax. Enjoy the experience and the journey. You will be making memories that will last a lifetime.
Hopefully we gave you enough ideas to get started and some things to think about and research. Good luck with your plans and your trip. It will be an epic trip, at least it was for us! If you need more inspiration, check out our Season Four: Alaska Bound playlist on YouTube.
Check out our related video: Alaska Tips
(Ann)